Apr 19, 2013

Netgear RP614 Router JTAG Serial

RP614 is a very cheap 4-Port DSL/Cable router from NetGear.

I bought this router from FutureShop and it was 29$ after rebate.

What is inside the box?

Since it's pretty cheap, I just wonder what is inside this little beast. So I unscrewed the router cover and revealed the secret.


As you can see from the picture, RP614 is mainly powered by the Samsung S3C4510B processor.


The memory devices are 1MB Flash(MX,16bit port) and 8MB of SDRAM(EtronTech, 16bit port).


There is a Broadcom 6 Port switch chip (the one with the heatsink) to do the 4 port ethernet switching job and connects to the S3C4510B's ethernet MII interface.

For the WAN interface which is supposed to be connected to the DSL/Cable modem, a ISA ethernet controller RTL8019AS from RealTek has been used on this router.


JTAG and Serial port

Fortunately, the NetGear designers left the Jtag and the serial port on the PCB. They are basically on the side near the Broadcom switch. They came with no connector soldered. So I have to solder the connecters by myself.


The JTAG is a standard 14PIN ARM JTAG debug port. It's compatible with the standard WIGGLER JTAG interface cable which could be easily found in the store or just make your own.

The serial port is a 10-pin connection but really you only need 3 pins out of it. Pin 3,4,10 are TXD, RXD and GND. But for sure you need a level shifter to be connected to your PC's RS-232 port. - source

Facts of Geothermal Energy

Asides from the Sun, the Earth's interior provides heat energy that can be effectively used for generating electricity. Yes, geothermal energy has been in existence since hundreds of years, however, extensive research has led to the possibility of tapping this renewable source of energy. The word geothermal is derived from two words, 'geo' and 'thermal'. Geo stands for 'Earth' and thermal is related to heat energy. So, geothermal energy is the energy that is generated inside the layers of the Earth's surface.

Generation

One of the most interesting geothermal energy facts is that it is generated deep within the Earth's surface. The Earth has three layers, the crust, the mantle and the inner core. Crust is the outermost part of the Earth's surface and it is this part that forms the continents and ocean floors. The thickness of this layer is usually between 3 to 5 miles under the oceans and between 15 to 35 miles on the continents. The mantle or the middle part surrounds the core and is nearly 1800 miles in thickness. Magma and rocks are the major constituents of this layer. The innermost layer or the inner core is divided into two cores, one is called the solid iron core and the other hot melted rock or magma. The Earth's crust is broken into a large number of pieces called plates. The hot melted rock or magma comes close to the edges of these plates and forms the volcanoes. The lava that comes out from a volcano is nothing but the magma. The deepest part of inner core contains magma at temperatures higher than the Sun's surface. The rocks and water found in the deep underground parts of the Earth's surface absorb heat from the magma. The temperature increases with an increase in the depth of the Earth's surface.

Where it is Found

Geothermal energy is hidden in the depths of the Earth's surface, however, it often finds its way out to the surface, in the form of volcanoes, geysers and hot water springs. Generally, the major sources of geothermal energy are the areas close to the major plate boundaries of volcanoes and earthquakes. The area, called a 'ring of fire', encircling the gigantic Pacific ocean is a very popular region for a lot of geothermal geysers and water springs. In the United States, geothermal reservoirs are found in the western states of Hawaii, Utah and Nevada etc. California holds the distinction for producing most electricity from geothermal energy. The US government has strict laws regarding the misuse of the lands in yellow stone national park where geysers and similar features are found.

More Information about Geothermal Energy
Some more interesting facts about geothermal energy are as follows.

  • Geologists test the presence of a geothermal reservoir, by drilling a well and recording the temperature deep beneath that place.
  • The entire resource of geothermal energy has been found to be more than that of coal, gas and uranium combined!
  • Iceland and Philippines produce 27% of the nation's electricity consumption by geothermal energy! They are the world leaders in geothermal energy production!
  • Sites where geothermal energy is tapped are called geothermal springs and in these places, water seeps into the Earth's surface and resurfaces as hot water!( the Earth's interior heats it!)
  • No fuel is consumed in producing geothermal electricity and the geothermal heating and cooling systems, so it is absolutely emission free.
  • The US government provides 'geothermal tax credit' that is a form of incentives to people saving electricity by installing geothermal heating and cooling systems
  • Geothermal plants emit 97% less acid content than fossil fuel plants!

Geothermal energy is considered to be a viable option for generation electricity, cooling and heating homes and is used in almost 20 countries of the world. Except for the high initial cost and space for installation, geothermal energy is an excellent alternative energy source.

Apr 15, 2013

Iloilo city sex scandal video: Teacher-student sex goes viral

A sex video of an alleged public high school teacher with a university student from Iloilo City went viral on social networking site Facebook but was removed after it sparked a wave of scorn among Internet users.


The video, assumed filmed in a boarding house, shows the two engaging in sexual activities, according to a Bombo Radyo report.

The woman, still wearing a university uniform was caught on camera having sex with the teacher while lying on a mattress spread on the floor.

The FB user who posted the video described the woman as a second year Accountancy student of a university while the man was in his 20s and teaches at a public high school in Iloilo City.

The 7-minute video appeared to have been posted on Facebook a few days ago. However, after it was broadcasted over different radio stations in the city, it spread like wildfire and had been shared more than 1,300 times and gained more than 2,000 likes.

However, the Iloilo sex video scandal was taken down by the Facebook user after the news hit the local media.

Meanwhile, the victims of the latest sex video scandal said that the source of their sex video could have been the cellphone which was allegedly lost few years ago.

The person who posted the video could be liable for violation of Republic Act No. 9995 or the "Anti-Photo and Video Voyeurism Act of 2009".

Under the said law, a person who posted the video could be penalized of imprisonment of not less than three years but not more than seven years and a fine of not less than P100,000 but not more than P500,000 or both. -Source: Bombo Radyo

Apr 14, 2013

Huawei BM622i MAC Change Package Date 2010

This is another How-To change the MAC address of Huawei Echolife BM622i 4G WiMAX CPE broadband modem wireless router firmware date package 2010. This tricks is a different approach as the previous post to Huawei BM622i MAC Change Package Date 2011. Although this is being done also thru CLI via telnet or putty client with specific command.


The above is a snapshot of Huawei Echolife BM622i 4G WiMAX CPE broadband modem wireless router date package 2010 firmware from Globe Telecom Philippines one of 4G ISP Telcos in the country.

To begin with click the Start button of your Windows machine make sure you enable your telnet client from your Conrol Panel>Promgram and Features because on 32/64bit Windows7 this is disable by default, Windows XP don't have the issue about it. Putty is an alternative if you want to be handy.

On Search Programs and Files type telnet 192.168.254.1 then press Enter

Or simply use putty


Telnet Command
Login: wimax
Password:wimax820
ATP>diag set macaddr 40:4D:8E:26:A1:7C

set Lan mac address success
Lan mac address updated 40:4D:8E:26:A1:7D
set Lan Mac address Sucess
Wan mac address updated 40:4D:8E:26:A1:7C

ATP>diag reboot
This must be the output of your telnet command line interface (cli) or putty screen.

The Huawei Echolife BM622i 4G WiMAX CPE broadband modem wireless router will then now reboot just wait for few seconds.

Open your fave browser on the address bar type http://192.168.254.1 login as admin account used any password generator with your MAC address you used in telnet cli as in my case I have used  40:4D:8E:26:A1:7C MAC address and yours might be differ.


Your WAN and LAN MAC addresses would  appear similar to the screenshot above, once you have login as admin you must be seeing this. To verify that everything will works, while logged in as admin account navigate the BM622i 4G WiMAX CPE interface on the left corner there is WiMAX Menu click Security Sub-menu we will confirm if the Profile Security Setting is in place such NAI, User ID and the User Password fail to do this even a valid MAC address will not let you connect to the ISP network.


If happen to you such as the screenshot above then you will be in trouble (this will keep on connecting only), as in my case I have used 40:4D:8E:26:A1:7C as my valid MAC address so will then input manually the NAI, User ID and the User Password just like the snapshot below.


Here the sample of NAI, User ID and User Password

NAI 404D8E26A17C@globelines.com.ph
User ID 2008t2EIHdNtQEMD

In my case once I set from telnet command line interface ATP>diag set macaddr 40:4D:8E:26:A1:7C it will automatically changed the NAI, User ID and the User Password.

Apr 13, 2013

Understanding JTAG

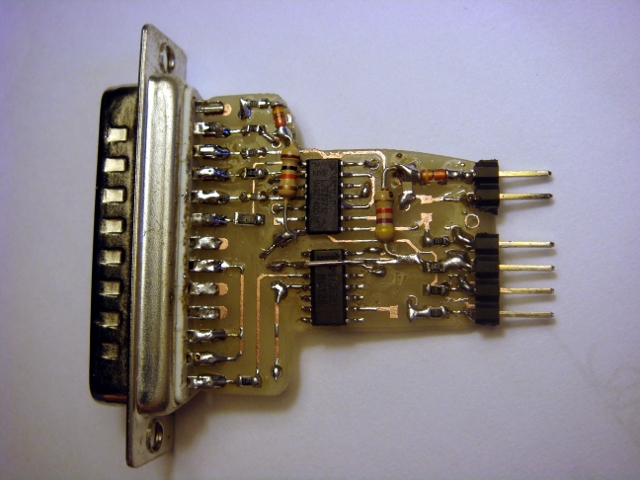
JTAG is a program for fixing your router if it is in an otherwise unrecoverable state. Jtag is done with a cable hooked from a computer 25 pin printer port (USB might also be available) to an electrical connection on your router called a jtag port. There are sometimes two similar ports on a router; one is the jtag port and the other is a serial port. These ports do not usually have the pins there to connect to, but are just holes in your router motherboard. You often need to solder a pin connector to your motherboard. This pin connector is called a header.


In order to understand jtag, you need to understand the three parts of the program that runs inside your router (known as the router's firmware). The firmware is composed of a bootloader, (that starts up the router's operating system), the NVRAM, (where information particular to your router are stored, like it's IP address and your ssid name) and the kernel which is the program that your router uses.

These three parts together are known as the WHOLEFLASH.

The bootloader on a DD-wrt is a linux bootloader, known as a CFE. Linksys also used a VXworks bootloader on some routers that has to be replaced with a CFE linux bootloader using a VXKiller program. So, when people talk about the CFE of the router, they are talking about the bootloader. Every router has it's own particular CFE. It has the MAC addresses embedded in it for your router, so each one is a little different. That is why it is so important not to ever delete this without backing it up. If you delete it, you at least have to find another one that is for your make and model of router. This can be tricky in some cases, so don't delete the bootloader!

The nvram is the place where variable information is stored. This is often where things get mucked up and is often the reason why people need to jtag their router. You can erase the nvram by doing a HARD reset of the router but sometimes the router will not respond. Then it is jtag time. If you delete the nvram, and have a proper CFE and kernel on the router, the nvram will rebuild itself. You don't need to jtag the nvram.

The kernel is the firmware. This is what you flash when you flash dd-wrt. DD-wrt IS the kernel. Again, if you have a CFE on the router, you don't need to flash the kernel with Jtag. If the CFE is working, you can flash using TFTP.exe or an equivalent program. Although you CAN flash the kernel using JTAG, it takes a LONG time and flashing using a jtag cable is not completely reliable, so you can end up with problems. You should not need to do this.

So if you have followed the bouncing ball, you should now understand that you should use JTAG primarily for two things:

1. Replacing a CFE

2. Erasing the NVRAM or kernel.

With that understanding, we can now turn to the brjtag program
Setting up the JTAG Program

To JTAG a router you can download a copy of hugebird's program from the SF.net files:

http://sourceforge.net/projects/brjtag/files/

You will note that there is a version 1.9, and a folder for a v.2.0. The 2.0 supports more router chipsets, but you have to rename it .exe from .bin.

You have to, on a Windows system, load giveio.sys. First you have to put it in the c:\windows\system32\drivers\ folder and then you have to load it using the loaddrv.exe program. Make sure you put the full path of the driver in the loaddrv.exe program as well as the file name. (c:\windows\system32\drivers\giveio.sys). Also note the giveio.sys driver needs to be installed only once. Subsequent needs for the driver during additional jtag sessions, or if your computer needs a re-boot, it only needs to be "started" by clicking on the "start" button of the loaddrv.exe driver loader utility.

Here are the steps:

1. Start your computer and unarchive the contents of 2.0.5 to your C:

2. Put giveio.sys in the proper directory: c:\windows\system32\drivers\

3. Start the loaddrv program and hit install. Make sure you add "giveio.sys" to the end of what appears in the window so it looks like this:

c:\windows\system32\drivers\giveio.sys [1]

4. Then hit start.

5. Then hit OK.

6. Remove the power supply from your router.

7. Hook up your jtag cable. Make sure you have pin one on pin one and the cable is not upside down on your router, and that you have the cable is hooked to your 25 pin parallel port

8. Plug your power supply into your router.

9. You might have to set the parallel port communications settings, but I have always found default settings work. If they don't please note that your rig needs to have a real printer port, not a usb to printer port adapter. The printer port should be set for ecp mode and standard io of 0x378.

Using JTAG

DO NOT POWER CYCLE WITH THE JTAG UTILITY RUNNING! If the jtag utility is running, do a control-C to stop it. IF YOU TURN THE POWER OFF WHEN THE JTAG IS RUNNING YOU MIGHT DAMAGE THE FLASH CHIP!

You should check to make sure your cable is working with a probeonly command:

brjtag -probeonly

If you don't get a response that recognizes your chipset, check your soldering carefully with a multimeter.

If you get a response that recognizes your chipset, the next command should always be to backup your CFE first, even if you think it is FUBAR. Better safe then sorry.

This is done with the command:

brjtag -backup:cfe

Do this twice and make sure the files match.

With most bricked routers, ALL you have to do is erase the nvram and the kernel. You do that with these commands:

brjtag -erase:nvram

brjtag -erase:kernel

DO NOT erase:nvram on a Belkin F5D7230-4 router. Doing so will erase important values and require you to have to jtag the kernel back on.

Doing that should put you back to a position where you can tftp the firmware back on. Stop and try that. You must disconnect your jtag cable to flash the firmware. Follow the guidelines for flashing by tftp found at note 11 of the peacock thread announcement, at the top of the broadcom forum.

http://www.dd-wrt.com/phpBB2/viewtopic.php?t=51486

DO NOT REPLACE THE CFE unless it is corrupt. A bad flash should NOT normally corrupt the CFE. However, if you have to replace the CFE, you must rename the CFE file CFE.bin, and then use this command

brjtag -flash:cfe

It is important to know, that if you do need to replace the CFE, an erase of wholeflash should be done prior to flashing the CFE.

brjtag -erase:wholeflash

The reason for this is if the kernel and nvram are left intact and only the CFE (bootloader) is replaced, when the bootloader boots the device, it will load the kernel. If a corrupt kernel or a bad nvram variable caused the bootloader damage in the first place, the offending pieces of the program are still present and may cause bootloader damage again as soon as the router is power cycled after the CFE flash.

If you need a CFE for a Broadcom router, you can find most through this link: http://www.dd-wrt.com/phpBB2/viewtopic.php?t=25971

However, these CFEs will contain generic Mac addresses, so you will likely have to hexedit your Mac address to the generic CFE prior to flashing.

JTAG on a Laptop Computer

Laptops don't normally have parallel ports anymore, and if your laptop doesn't you would be hooped. USB Jtag is expensive, and doesn't appear to work consistently well. The best option is to get a ExpressCard Parallel port adapter. Further information is in this thread:

http://www.dd-wrt.com/phpBB2/viewtopic.php?t=61256

Another simple programming FPGAs

In the last article I wrote , and that is the JTAG TAP controller. This knowledge will help us make a simple programmer for FPGA company Altera.

I want to make a very simple programmer that will work through the serial port. The serial port is good in that it is very common, easy to program and, in addition, there are low-cost devices USB-to-COM. The hope is that my programmer will work through this adapter. On the computer I'm going to run my special program that controls the programmer. We will write to her (in the sense I have already written and tell you how it works).

So, in the JTAG connector has 4 significant signal to us: TDI, TMS, TCK and TDO.
The first three signals are inputs to the programmable FPGA, so we have a computer to manage them. Each control signal to be random, any of them, we can at any time set or reset. We have several serial signals suitable for this purpose:
  • RTS - it will match the JTAG signal TDI
  • DTR - it will match the signal TMS
  • TX - would correspond to a signal TCK
In addition, the output signal has a JTAG TDO, the state of which we need to be able to read from the computer. We shall use for this purpose the CTS serial port.

With signals understood, but there is one problem. We need to do a level converter serial signals. Of course you can use a specialized chip level converters, of which there are a great many. For example, there is such a chip icon HIN202 (625.08 KB)

We are (as always) go our own way. We make the programmer's on the following scheme:


A few resistors, zener diodes, LEDs for debugging and .. that's it - simple as that.

Here are photos of our programming, top view:


View from below:


I will write a program in C language environment in Microsoft Visual Studio v10.

My program will consist of at least two logical parts. The first part - is the serial port control signals, which means it control signals JTAG. The second part of the program - it's reading *. SVF file, its interpretation and consistent performance. In the last article I wrote that the SVF file describes the sequence of commands for the TAP controller's programmable chip. Wednesday Altera Quartus II can generate SVF files to compile the project.

To control the serial port I use API functions OS Windows:
  1. CreateFile (..) - is used to open the serial port
  2. EscapeCommFunction (..) - the parameters SETRTS or CLRRTS to set or reset signal TDI
  3. EscapeCommFunction (..) - the parameters SETDTR or CLRDTR to set or reset signal TMS
  4. EscapeCommFunction (..) - the parameters SETBREAK or CLRBREAK to set or reset signal TCK
  5. GetCommModemStatus (..) - to read the state of the CTS line and thus learn the value of TDO signal from the JTAG interface
The program identifies two very important functions:
int sir (int nclk, int val);
int sdr (int nclk, int val);

The first function sir (..) writes to the command register TAP controller programmable chip val is a long nclk bit. The second function sdr (..) writes to the data register TAP controller programmable chip val is a long nclk bit.

Functions look about the same and do about the same thing. Using the TCK and TMS signals they carry TAP controller state record in the relevant register IR or DR according to the state diagram (TAP state-machine) described in the previous article. TDI signal is used for serial transmission of data on the register TAP, and the TDO signal is used to read response data from the controller.

Now for the interpreter SVF file.
So, you've done a project for the FPGA, compiled it using Quartus and got SVF file to program the chip.

SVF - a text file. Our program will read it line by line and interpret the command in this line and execute it. I do not know all the details of the standard SVF files, but what I see in the file generated kvartusom - this is a very simple file. One line - one team. There are no conditional or unconditional jumps or subroutines. Thus, reading and execution of SVF file line by line - it is a convenient solution for us.

Actually you need to implement only a few basic commands: RUNTEST, SIR, SDR. As you guessed team SIR - write down the number in the instruction register and the TAP SDR - write down the number in the data register. RUNTEST - a pause when the controller is in the state IDLE. I will say honestly that I pause in the program does not withstand strict. We've already gotten a very slow rate due to the recording software implementation protocol. So pauses according to SVF hope is not necessary.

Well, here's the program is written and compiled using Visual Studio.
You can download its source code and binary file on our website: Programming via the serial port (51.89 KB)

The program console, takes 2 parameters on the command line: the name of the serial port and the file name SVF. For example, like this:

c: \ MarsBlaster.exe COM4 my_proj.svf

Connect fee rover to our programmer, connect it to the computer has power.


It looks like it works!

To watch the video of this project from here

PS: fly in the ointment.
Via an adapter USB-to-COM works, but very slowly. Programming the Mars Exploration Rover (including verification after burning) takes about 5 minutes. The reason is that the control signal goes via USB and read the response signal TDO takes a very long time (2-3 milliseconds). Get rid of this so simply will not work. Need to do more complex programming, with more complex logic of that exchange would lead not one bit, but at least bytes, then you can do so much more quickly.

Well, a look at the programming scheme is "feedback" from the 6th to the 3rd leg connector COM port. This is the same need - just to work through the adapter USB-to-COM. This feedback allows you to accurately tell whether the data came on the status of TDO or not. I set the TCK and read through the feedback it well - he came or not. If you come, then came to him and TDO. A bit surprising happened, but it works. - source

MAX232 Serial level converter

When communicating with various micro processors one needs to convert the RS232 levels down to lower levels, typically 3.3 or 5.0 Volts.

Here is a cheap and simple way to do that.

Serial RS-232 (V.24) communication works with voltages -15V to +15V for high and low. On the other hand, TTL logic operates between 0V and +5V . Modern low power consumption logic operates in the range of 0V and +3.3V or even lower.

Thus the RS-232 signal levels are far too high TTL electronics, and the negative RS-232 voltage for high can’t be handled at all by computer logic. To receive serial data from an RS-232 interface the voltage has to be reduced. Also the low and high voltage level has to be inverted.

This level converter uses a Max232 and five capacitors. The max232 is quite cheap (less than 5 dollars) or if youre lucky you can get a free sample from Maxim.

The MAX232 from Maxim was the first IC which in one package contains the necessary drivers and receivers to adapt the RS-232 signal voltage levels to TTL logic. It became popular, because it just needs one voltage (+5V or +3.3V) and generates the necessary RS-232 voltage levels.

The requred parts:
  • 1 x max 232
  • 4 x 1uF capacitor
  • 1 x 10uF capacitor
  • Soldering iron, wires, breadboard etc.
Schematic


The MAX232 is an integrated circuit, first created by Maxim Integrated Products, that converts signals from an RS-232 serial port to signals suitable for use in TTL compatible digital logic circuits. The MAX232 is a dual driver/receiver and typically converts the RX, TX, CTS and RTS signals.


The drivers provide RS-232 voltage level outputs (approx. ± 7.5 V) from a single + 5 V supply via on-chip charge pumps and external capacitors. This makes it useful for implementing RS-232 in devices that otherwise do not need any voltages outside the 0 V to + 5 V range, as power supply design does not need to be made more complicated just for driving the RS-232 in this case.

The receivers reduce RS-232 inputs (which may be as high as ± 25 V), to standard 5 V TTL levels. These receivers have a typical threshold of 1.3 V, and a typical hysteresis of 0.5 V.

The later MAX232A is backwards compatible with the original MAX232 but may operate at higher baud rates and can use smaller external capacitors – 0.1 μF in place of the 1.0 μF capacitors used with the original device.

The newer MAX3232 is also backwards compatible, but operates at a broader voltage range, from 3 to 5.5 V.

Pin to pin compatible: ICL232, ST232, ADM232, HIN232 (much cheaper alternatives).

Homemade Xilinx Parallel Cable III

I needed a Xilinx JTAG cable for my CPLD project. I looked up the schematics for Xilinx Parallel Cable III, and found out I already had the two ICs that were needed. I was going to build another PCB for the project anyhow, so I decided to make this one as well.

I designed it using my trusted gEDA suite (xgsch2pcb = gschem + pcb). I made a one-sided PCB, since it’s much easier to manfacture at home.

Electronic sidenote: actually I had HC125 and HC126, not two HC125. But since the only difference between 125 and 126 is the OE inputs negation, and only 1/4 of the other HC125 is used, I only slighlty modified the schematic and finally it worked just fine.

I fired up IMPACT of the Xilinx WebPack, and it sort of worked, because it detected my xc9536xl CPLD, but refused to program it:

ERROR:iMPACT:583 - '1': The idcode read from the device does not match
the idcode in the bsdl File.
INFO:iMPACT:1578 - '1': Device IDCODE :
00000100101100000001000001001001

INFO:iMPACT:1579 - '1': Expected IDCODE:
00001001011000000010000010010011

The idcodes looked alike, only as if shifted one bit. I took a closer look at the programmer, and found out I actually skipped one pull-up resistor at the TDO line, doh!


Here is how it looks, together with the fix. I know it’s not a work of art, but it gets the job done, and fits inside a standard DB-25 enclosure. - source

HL-340 usb to serial driver for windows 7 64 bit (CH341SER.EXE)


Instructions for Installing the USB driver onto your computer:
  1. Turn on computer and make sure USB port is available.
  2. Plug in USB connector to USB port.
  3. The "Add New Hardware WIzard" should appear (if not, then you can open the wizard from the Control Panel)
  4. Click "Next"
  5. Select "Search for the best driver for your device"
  6. Click "Next"
  7. Windows will ask you to specify the location of the driver. Please select "Specify a location"
  8. Use "Browse" to find the driver in the CD-ROM drive (or wherever the file is located on your hard drive)
  9. Click "Next"
  10. You're done
I used Windows 7 32bit and this driver works for me, you can download from this link.


Having problems using your USB adapter?

Problem: I can't transfer any data, or my map software doesn't see the USB adapter.

The most common issue when installing the USB adapter and driver is selecting the correct port for your map software to recognize.

You must make sure your particular software is looking on the correct port for it to transfer any data.

To see which port your USB adapter is connected to, connect your USB adapter and follow the following instructions:
  1. Go to the Start Menu
  2. Right click on "My Computer"
  3. Select "Properties"
  4. Click on the "Hardware" tab
  5. Click on "Device Manager"
  6. Click the + sign next to "Ports (COM & LPT)"
  7. One of the listed ports should indicate which port your USB adapter is connected to (e.g. COM1, COM2, COM3, etc.)
  8. Go back to your map software program that you use to transfer data and make sure it is looking at the correct port.
  9. You should be able to transfer data once the correct port is selected
Files have been zipped to save space and shorten download time. If you do not have an application to unzip the files, you can download one at www.winzip.com

Additional USB to Serial Adapter - Driver Downloads and Documentation
  • Gilsson USB to Serial Adapter Windows Drivers
Windows 7 32-bit/64-bit driver
Windows vista 32-bit driver
Windows vista 64-bit driver
Windows XP drivers and documentation
Windows 2000 drivers and documentation
Windows 98 or ME drivers and docs

Open source Initiative provides free JTAG/Boundary Scan Software and a number of hardware Kits

GOEPEL electronics Ltd. recently announced the accession to the open source initiative goJTAG™.

open source initiative goJTAG™

GOEPEL electronics Ltd. recently announced the accession to the open source initiative goJTAG™ (www.gojtag.com). The networking founded and joined by various universities and several Companies pursues the goal to provide JTAG/Boundary Scan tools and knowledge based on an independent and non-commercial platform, sustainably accelerating the wide adoption of standardized IEEE 1194.x test methods. GOEPEL electronics engages in providing 20 hardware kits free of charge and according reference designs for interested parties in the UK.

goJTAG is the first university-driven open-source project aiming at providing a full package for a JTAG/Boundary Scan newcomer including training materials, slides and exercises. The software includes a simulation component that fully reveals every single bit movement along the scan chains with a single TCK precision. The user can directly step-wise control TAP states and observe system's reaction in a real time as an on-screen simulation. Using PicoTAP controller, all actions can be synchronized on the hardware attached. Such a fine-grain illustration of JTAG/Boundary Scan test principles has never been possible so far.

“The number of new designs with most modern packaging technologies, high-speed signals, FPGA and high performance processors disproportionately increases and requires adequate test strategies. IEEE standardised test methods may offer important help, but a wide adoption requires respective know-how transfer as well as freely available training tools. That’s why we were immediately ready to engage within the frame of the goJTAG initiative“, says Frank Amm, chairman of the goJTAG project with GOEPEL electronic in Jena/Germany. “We see goJTAG as opportunity to popularise the research institutes‘ existing knowledge and service offers, and hence foster cooperations. Additionally, the open-source philosophy may be of great help to smooth the way for numerous new users and applications without future pressure to vendor specific migrations.”

The platform’s first open-source project goJTAG provides an IEEE 1149.1 training software that can be run in simulation mode as well as online mode. The tool enables the graphical display of Boundary Scan ICs in the respective mode, the visualisation of register states, pin toggling and the execution of SVF files without any qualitative limitations. The definition of networks is also possible. The source code written in JAVA™ is freely accessible and can be changed under the generally valid terms and conditions for open-source software.

In the online mode, the software can be utilised for individual projects. For this, GOEPEL electronics has developed a specific controller, which is also available as reference design to be ordered directly via www.gojtag.com.

Free JTAG/Boundary-Scan Tools

Press release date: January 28, 2013

Eindhoven, The Netherlands - The makers of JTAG Live(TM) Buzz and BuzzPlus are proud to announce a new release of the popular JTAG Live platform and the free Buzz module that is now 'downloadable' without registration.


New JTAG Live V1.6 features include an automatic chain detect that can interrogate multiple boundary-scan chains to determine the number of components in each plus their manufacturer and type.

According to Peter van den Eijnden, MD of JTAG Technologies: "This is the first time this feature has been included in a generic boundary-scan test platform that can be downloaded and used for no-cost. At the launch of JTAG Live Buzz 3 years ago we announced that it would be 'Free for Life' and we're sticking to that promise."

Another requested feature added to JTAG Live V1.6 is multi-language support. Now users from Japan, Germany, Russia, France, China, Holland and Portugal can get up and running in their native language - a prospect that is bound to improve productivity.

The JTAG Live product family includes free Buzz, plus the optional modules Script (for Python-powered cluster logic testing), AutoBuzz (for automated interconnect comparisons), Clip (interactive test vector generator) and CoreCommander. For all modules only BSDL models of the JTAG/IEEE std 1149.1 compliant parts (available from most manufacturers web-sites) are needed to start using the tool-set.

Supported interfaces currently include Altera's USB Blaster, Xilinx's parallel III/IV and USB interfaces, JTAG Technologies' JT 3705 / USB controller, JTAG Live dedicated USB controller and some FTDI based modules.

About JTAG Technologies

JTAG Technologies is a market leader and technology innovator of boundary-scan software and hardware products and services. The company was the first to bring to the market such important advances as automated test generation, automated fault coverage analysis, automated flash and PLD programming via boundary-scan, and visualized boundary-scan analysis. Its customers include world leaders in electronics design and manufacturing such as Ericsson, Flextronics, Honeywell, Medtronic, Motorola, Nokia, Philips, Raytheon, Rockwell-Collins, Samsung, and Sony. Its innovative boundary-scan products provide test preparation, test execution, test result analysis and in-system programming applications. With an installed base of over 6500 systems worldwide, JTAG Technologies serves the communications, medical electronics, avionics, defence, automotive, and consumer industries with offices throughout North America, Europe and Asia. JTAG Technologies headquarters are located in Eindhoven, The Netherlands.

Press contact for JTAG Technologies:
Renate Fritz
RF Communications
Utting am Ammersee, Germany
email: renate.fritz@onlinehome.de

Benefits Of Castor Oil For Hair

Castor oil is rich in vitamin E and unsaturated fatty acids. Plus, this carrier oil works as a great humectant for your skin and hair. Thus, it moisturizes your hair and prevents dry scalp.


In addition, castor oil helps avoid hair damage and split ends. As the oil is packed with omega-9 fatty acids, it nourishes your hair, promotes hair growth, and reduces hair loss.

Furthermore, it prevents hair frizz, cures scalp infections, and stops premature graying of hair. Regular application of castor oil can also help thicken thin hair. It makes your hair appear soft and shiny as well.

Castor oil has anti-fungal, anti-bacterial, anti-inflammatory, and antioxidant properties. It is derived from the tropical castor bean plant (Ricinus communis).

Pure, unrefined castor oil is available in the form of a thick liquid which is clear or pale yellow. You can buy it from a grocery store or health food store.

How to use Castor Oil to Encourage Hair Growth

Castor oil can be used individually or in combination with other oils like coconut oil, olive oil, sweet almond oil, avocado oil, amla oil, etc. to maintain healthy hair and boost hair growth.

For instance, you can take equal parts of castor oil (preferably, Jamaican Black Castor Oil) and organic coconut oil, heat the mixture, and massage it on your scalp and hair.

Wrap a warm towel around your head or wear a shower cap. Finally, wash your hair after at least 30 minutes or leave the oil in your hair overnight and shampoo the next day.

As castor oil is heavy and difficult to remove, you may use a clarifying shampoo. You can follow this deep conditioning treatment once or twice in a week.

In case you have dandruff, you may add a few drops of tea tree oil in the castor oil mix. Those of you who have normal to oily hair may use a combination of castor oil and grape seed oil or jojoba oil.

Watch these videos showing how to make black castor oil at home to help your hair grow longer.


Individuals usually dilute castor oil by adding some other light-weight oil or use only a small quantity of the oil because it tends to be thick and sticky.

Furthermore, you can add essential oils like that of lavender, thyme, rosemary, cedar wood, etc. to promote hair growth.

In addition, you can prepare some castor oil home remedies for hair treatment by adding herbal infusions prepared from fresh or dried herbs. To stimulate hair growth, consider adding crushed biotin and folic acid pills in the oil and then apply.

Castor oil can also be used to treat skin infections, heal boils, dissolve cysts, and so on. It helps fade wrinkles and age spots, too. Moreover, application of castor oil relieves osteoarthritis pain and inflammation.

Besides, you can take this oil internally to benefit your health. For example, having a teaspoon of castor oil in the morning cures constipation.

The Hidden Secret Benefits of Castor Oil

One of the most effective health recommendations made by naturopaths is the daily use of castor oil packs. It’s also one of the most mysterious and least well known.


As with many beneficial remedies in naturopathic medicine, there’s not a ton of scientific research surrounding this practice. Its effectiveness is mostly anecdotal and passed down due to repeated clinical success. I would venture to say that the reason for this is that not much money would be made on using castor oil…and that using it takes a little half hour out of your day, which most people insist they don’t have. But all joking aside, castor oil has been used for thousands of years for a variety of different conditions. It can be taken internally (as a laxative) but here, I will be discussing a much less disagreeable and much more gentle use of the oil.

First, a little tidbit on castor oil…(it’s important to know what you put on and in your body!)

Castor oil comes from the castor seed, Ricinus communis, (a plant native to India) and is composed mostly of the fatty acid, ricinoleic acid. Archaeological findings show that this oil was regularly used medically in India, Egypt, China, Persia, Africa and Greece for over 4000 years.

Ricinoleic acid is what is thought to be responsible for castor oil’s unique healing properties. It diffuses through the skin and into the organs and vessels where it acts as a mild irritant. Mild irritation can be good for the body—it can stimulate movement of fluids, recruit immune cells, and encourage peristalsis (the intestinal contractions that aid in removing waste), among other physiological processes.

A study published in the Journal of Naturopathic Medicine in 1997 found that daily use of castor oil packs can increase the production of T-lymphocytes, an important player in your immune system.

As with anything so miraculously amazing, there is another side to the seed, which is in the form of a potent toxin called ricin. If inhaled or ingested, ricin can immediately kill—in fact, it was used as a compound in chemical warfare. However, according to the International Journal of Toxicology, you won’t have to worry about finding any trace of ricin in the castor oil that is sold to the general public and the Joint Food and Agriculture Organization(FAO)/World Health Organization (WHO) Expert Committee on Food Additives deem it safe.

Naturopathically, castor oil is used to decrease inflammation and to help the liver to function optimally. It increases circulation of blood and lymph, enhances the immune system, improves elimination of toxic substances, and promotes the healing of tissues. Due to these effects, it can be used to decrease pain, improve digestion, and help in the treatment of many conditions including uterine fibroids, non-malignant ovarian cysts, headaches, migraines, constipation, intestinal disorders, and gallbladder and liver conditions.

If you’re ready to start feeling some of its benefits, pick up some castor oil packs in any drug or grocery store and follow these simple steps:
  1. Take a clean flannel cloth folded into 2-3 layers and large enough to cover your entire abdomen.
  2. Drizzle 2-3 TBSP of castor oil onto one face of the cloth.
  3. Place the oily side down on your stomach, add a little heat (via a heating pad, a hot water bottle, your own arms, a warm blanket) and lie still for 30-45 minutes. You can incorporate this into your evening routine. If you regularly check email every night, do your castor oil pack while you sit at your computer. Or do it while you read or talk to your spouse or watch a movie.
  4. After the allotted time, place your pack into a plastic bag and set it aside until tomorrow.
The following days:
  1. Add a TBSP or so of additional castor oil to the same side of the same cloth you used the previous day. Do this for the next 4-5 days. Until the cloth is “saturated” enough that it leaves a SLIGHT film of oil on your belly when you remove it.
  2. Once this level of saturation is reached, you only need to add oil once every 5-7 days.
And visit my site to read up on the most common Castor Oil pack mistakes as well as more suggestions for using them!

The 6 Main Uses for Castor Oil

Castor oil is one of the best kept secrets in the world of natural health. Taken from the bean of the castor plant, this oil is rich in ricinoleic acid, which exerts powerful therapeutic effects.


Historically, castor oil was taken as an oral laxative. Today, however, taking castor oil this way it is not recommended because its powerful laxative effect can disrupt normal digestion and healthy intestinal flora. When it comes to treating chronic conditions, sometimes it is more effective to treat our bodies gently. Castor oil best exerts its powerful effects when applied topically, directly to the skin. It proves to be a simple, cheap and effective remedy for a variety of common health complaints.

1. Skin health. Castor oil has a low molecular weight, which means it is absorbed readily into skin and hair, providing nourishment and moisturizing effects. When applied to the ends of dry hair, it moisturizes and prevents split ends. It has been used for years as a face cream to reduce the risk of dark under-eye circles and to aid in the prevention and treatment of wrinkles. Castor oil is commonly added to natural lip balms and glosses to add shine and moisture to dry lips and it’s also frequently added to natural mascaras to encourage lash growth.

2. Antimicrobial. Ricinoleic acid contains antimicrobial properties, which, when applied to open wounds, can act as a disinfectant. It is effective for treating fungal skin infections, such as ringworm, as well as minor cuts and scratches. An added bonus to using castor oil as a first aid treatment are its anti-itch and pain-relieving properties, which help ease symptoms as minor skin infections heal.

3. Decreasing stagnation. Because of its low molecular weight, when applied to the skin, castor oil has the ability to not only penetrate the skin, but to reach the deeper organs of the body. According to Ayurveda, the ancient Indian healing art, castor oil has the ability to warm the body, which can decrease the stagnation of excess bodily fluids and lymph. This stagnation can cause blockages in the body's tissues, leading to water retention and weight gain. In Ayurvedic medicine, it is common to apply a mixture of castor oil and powdered turmeric to masses and lumps found under the skin in order to dissolve them. It is an excellent oil to use in full-body self-massage for people of Kapha constitution, whose bodies typically accumulate fluids and need stimulating warmth and invigoration. Its warming and moisturizing benefits are suitable for individuals who have drier skin, such as those of Vata constitution, as well.

4. Pain relief and joint health. Ricinoleic acid, in addition to being an antimicrobial, has powerful pain-relieving properties. Not only does it aid in relieving the pain of cuts and scrapes, it also makes castor oil ideal for lubricating the painful, cracking joints of arthritis or other musculoskeletal conditions. When applied to joints that feel sore, or even just stiff and creaky from repetitive use, castor oil penetrates to help lubricate the joint, reduce pain and increase circulation. To further increase circulation, cayenne or turmeric powder can be added to castor oil to create a warming, stimulating ointment. This can be massaged into stiff or painful areas and left overnight.

5. Alleviating constipation and encouraging detoxification. In naturopathic medicine, castor oil is a popular remedy for common constipation and a necessary accompaniment to any detoxification program. Patients are instructed to massage the oil into the skin of their entire abdominal region (from rib cage to below the belly-button), making sure to cover the area over the liver. For best results, patients are then instructed to cover the oiled area with a towel and a hot water bottle. The heat from the hot water bottle aids the penetration of the abdominal organs, allowing the oil to promote the elimination of waste and to decrease stagnation of the entire digestive system, including the liver. Its ability to stimulate the liver aids the body’s natural detoxification processes.

6. Promoting self-care. Rather than popping a pill to treat pain or constipation, performing a self-massage with castor oil helps establish a self-care routine. Self-care is important, not just for promoting health, but for developing a relationship with the body and getting in touch with the body's natural healing abilities. Setting aside time to perform a healing ritual like applying castor oil packs to inflamed joints or sites of stagnation, establishes the mind-body connection and decreases stress, helping to improve physical, mental and emotional health.

This article is not meant to serve as medical advice. For a more individualized assessment, please see a licensed naturopathic doctor.

The Health Benefits of Castor Oil

What is Castor Oil?

Castor Oil is a very pale yellow liquid that is extracted from castor seeds (Ricinus Communis). It is an anti-inflammatory and anti-oxidant oil which has been used for centuries for its therapeutic and medicinal benefits. It is believed that most of castor oil's benefits are derived from its high concentration of unsaturated fatty acids. Although it has a strong and rather unpleasant taste, castor oil is used in cosmetics, soaps, textiles, medicines, massage oils and many other everyday products.


What are the Benefits of Castor Oil?

Castor Oil has been used both internally and externally for thousands of years due to its many wonderful health benefits. Since it can strengthen the immune system, castor oil is considered a great remedy to treat the following major illnesses and ailments:
  • Multiple Sclerosis
  • Parkinson's Disease
  • Cerebral Palsy
  • Hair loss
  • Pain from Arthritis and Rheumatism
It has also been found to help with many everyday problems such as:
  • Yeast Infections
  • Constipation
  • Gastrointestinal Problems
  • Menstrual Disorders
  • Migraines
  • Acne
  • Sunburn
  • Athlete's Foot
  • Ringworm
  • Skin Abrasions
  • Inflammation
Castor Oil is also commonly used to induce labour, so pregnant women should always consult a doctor before using it.

Uses of Castor Oil

Arthritis Natural Remedy

The anti-inflammatory properties of Castor Oil make it an excellent massage oil for relieving arthritic joints, nerve inflammations, and sore muscles.
  • Make a small pad by folding a small piece of unbleached cotton flannelette into 3 or 4 layers.
  • Dip the cotton pad into Castor Oil and place it on to the affected joint or muscle.
  • Cover the pad with a plastic wrap.
  • Place a hot water bottle or heating pad over the plastic wrapped cotton pad. The plastic wrap will prevent the water bottle or heating pad from getting oily.
  • Leave the cotton pad on for 45 minutes to an hour, once per day.
This Castor Oil pack can be reused. Simply place it into a plastic ziplock bag and refrigerate it until it is ready to be used again. It can be refrigerated in a ziplock bag.

Constipation Remedy

Studies have shown that Castor Oil is a very strong laxative, which makes it very effective against constipation. Therefore, simply take a teaspoon of castor oil in the morning. You can mix the oil with orange juice, cranberry juice, prune juice, or ginger juice to take away from the bitter taste without affecting the laxative effects. However, do not take it continuously for more than 3 days. If symptoms persist for longer than 3 days, consult your physician immediately.

Ringworm Treatment

Ringworm is known to be a stubborn condition to treat, but one of the active compounds of Castor Oil (Undecylenic Acid) has been found to be very effective at treating this fungal infection.
  • Spray Castor leaves with some hot water and coarsely crush the leaves.
  • Soak the leaves in pure coconut oil.
  • Warm the leaves to a temperature that will not burn the skin, and apply the leaves over the affected area as a poultice.
  • Leave on the skin for at least one hour, or optionally overnight.
  • You may wrap the leaves with unbleached cotton fabric to prevent the oil from staining your bed sheets.
Repeat the procedure every night before going to bed until cured. However, if you notice any redness or discomfort around the area, discontinue this remedy.

Skin Problems

Successful studies have approved the use of Castor Oil for skin infections and other skin problems such as sunburn, abrasions, acne, dry skin, boils, warts, stretch marks, liver/age spots, athletes foot and chronic itching and inflamed skin.
  • Dip a cotton ball into Castor oil and apply it onto the affected skin in the morning and at night.
  • Alternatively, for larger skin areas, soak an appropriately large piece of unbleached cotton cloth in Castor Oil and wrap the affected area overnight.
  •  If the area is very small, soak a Band-Aid in Castor Oil and cover the infected skin overnight.
For stubborn fungal infections that affect the skin or nails, it is recommended to soak the affected skin in Epsom Salt for 10-15 minutes to soften and disinfect the skin before applying Castor Oil. This can help speed up the healing process.

Stye Treatment

The anti-bacterial components of castor oil have been found to be effective against styes (oil gland infections on the eyelid). Simply apply a very small drop of the oil directly onto the stye 2 or 3 times per day.

Wrinkle Treatment

Castor oil is a natural emollient that penetrates the skin and helps stimulate the production of collagen and elastin which can soften and hydrate the skin. Therefore, it is a wonderful natural treatment for wrinkles since it restores and rejuvenates skin's natural youthful appearance by making skin smoother, softer and pliant. Dip a small cotton ball into the oil and apply it on wrinkled skin before going to bed. Use only a small amount of oil when applying it to the skin near the eyes.

What are the Side Effects of Castor Oil?

Castor oil is normally safe if used in moderation. However, pregnant and lactating women and people with intestinal blockage, acute inflammatory intestinal disease, appendicitis, or abdominal pain should not take Castor Oil without their doctor's approval.

Note that precautions must be taken when taking the oil internally, so you should always follow the directions on the package and consult your doctor or naturopathic professional before consuming it. A typical recommended dosage for the oil is no more than one-half to one full teaspoon per day. Overdosage of Castor Oil may result in diarrhea, nausea, vomiting, abdominal pain or cramping.

XBOX360 solution the BAN hard, the whole process

My machine does not have a parallel port. Find a friend borrowed an old Pentium 3 667. Memory 384 line have all connected. Read the first completed seven errors. Find four FindSecData v0.5,
I read parallel port 512 as if the coming 30 hours.


After the second read errors a lot more than 20. Do not know why, read about 180MB. I stopped reading. Does not seem to completely read out. I've stopped. Personal feeling, what dismantle the machine, welding is not a problem. The key is the correct identification of the read correctness and software, some problems. Not dare Brush.

Solution BAN success. Japanese version of the machine, machine appearance date of July 8, 2009. Japanese version. A version of 512MB. Finally put together the the RP successful solution BAN.

Thanks to book many friends in the group. Also, thanked littleman21 for my Savage, as well as group boss, friends and so on. And finally succeeded. I use the printer port, you read it again NAND with 30 hours, seven errors. I guess I was the first to use the printer port solution 512MB successful. Oh.

The loss of the "savages" friend, he said the solution with the most primitive way BAN success is 512, I also succeeded in his way. I read it again, seven errors. And the beginning I fool, the kick command did not press enter, so wait 25 hours. Just does not feel right, depressed ah, later to read for 30 hours, the first time out, 7 error, the above figure, we can see, such as the second read after 15 hours of it is found that there have been 20 more errors.

To stop reading this time has been the size of the read 185MB. So this time I spent a total of 70 hours to solutions BAN completed. Depressed, but indeed spent a dollar. Other home, buy a dime a resistor 10, gave a switching diode, but useless, huh, huh. This character of the fight to take a chance, but a success. I hope to friends to help. Here are a lot of pictures, we hope to help, I actually bought the BAN. So the time to buy the hard disk. So there is no hard testing, but I'm sure I solution BAN. As for why, we look at the picture.

Finally just say, I was in Harbin, if I can help you, but I fight RP, I read once NAND and out of seven errors, but still brush to write successful. I feel I exported NAND should not be perfect, but not in an important place because it contains errors do not affect. If you are like me, want to spend very little money, a lot of patience, you double 65 solution BAN. We can study each other under.

The above solution BAN hard the whole process, I speak from specific solution BAN method.

Because I use the parallel port solution BAN. So I will talk about my parallel port solution BAN a process parallel and USB ports need to disassemble the motherboard wiring, wiring methods are the same, only parallel port connected to the 5 100 ohm resistor, The disassemble method you can go online to find. But I recommend the parallel port. Although a long time, but do not have to spend money. Haha. A dime a resistance. Oh. We all count. The other things I have.

This picture is the link of the parallel port. The 1,2,12,16,17 resistor.


These are the ones I then finished picture


The finished wiring can be connected to the CD-ROM drive installed on your computer parallel port driver port95nt.exe After installing restart the computer. Parallel port you can plug in to start reading NAND, to read nandpro this software in DOS prompt, enter nandpro where directory input nandpro lpt:-R512 nand1.bin. If it is 16MB. Or 256MB should be changed to the corresponding value-R512. Into the following figure should appear


Read parallel port 512MB takes about 20-30 hours.

We also need to read the correct time to prove NAND. If the the 2 reads contrast is not the same, be sure to read the same, exactly the same NAND can. Although I did not do it but I did is very dangerous I hope you will not take the risk, they might machine three red. The second read as command nandpro LPT:-R512 nand2.bin, the formation of a corresponding BIN file read every time nandpro folder.

Two files compared confirmation before they can proceed to the next step.

If correct, we can start the analysis we have read the NAND. We need FindSecDatav0.61 of (my solution BAN version of the software was going out in 0.5 so I use the 0.5 version of the software, but recommended a new version). Let go on as long as we have just read out left NAND1.bin button, tap and hold onto the FindSecDatav0.61 icon on it. If the following picture will appear correctly.


We see the red mark on the map the right. We can call him "timestamp" ,2009-11-09 is the date of BAN, this timestamp 0x0EBA the physical address in the NAND. We have to do is to clear the information of the timestamp, 360 will automatically timestamp of October 28, October 28, the timestamp is not BAN. So that we can solve for the BAN (if multiple BAN timestamp, it is necessary to clear out). To timestamp, we would also like to nandpro software to get rid of the time stamp, command nandpro lpt as follows:-E512 0x0eab 1 remember not to miss behind, after you're done. Look at our success. Turn off the power, disconnect the connection between the parallel port and the computer, it can not welded down the line from the motherboard. , You can test the new power cord connected to the video line.

In fact, there is a simple Windows interface software. It is of lucker prepared in A9 Forum. Oh. Chinese language interface easier to use. And simple to use and we can see the figure, I believe that one look to know how to use.


This image is read out of my NAND. The contrast on the map and I like November 9 the physical address 0x0eab I have not used this software reflash my machine, but believe as well read. Thank you the lucker write such a good software. - source

The Lean, Green Avocado Hand Moisturizing Machine Recipe

There are three things you’ll always find on the verge of going bad in my kitchen:
  1. Sauerkraut, which I’ve made religiously by hand every six months for the last two years, and I’ve never eaten. I buy a cabbage, ferment it, and then forget that it exists. By “forget,” I mean ignore. The idea of sauerkraut is good in theory, but when it comes to actually eating it, well … my sock looks more appetizing. By “looks,” I mean “smells.
  2. A quarter cup of homemade hamburger helper. We have “hamburger helper” every two weeks or so here, and no matter what, no matter how hungry everyone is or how full everyone is or how many dogs I threaten to adopt to eat our leftovers, we always have exactly one quarter cup of it still in the pan when dinner is over. It’s enough to where you feel a guilty pit in your stomach for even considering throwing it out. But it’s not enough for another meal for one person the next day. So into a glass jar it goes, and in the refrigerator it stays, for three weeks, until my conscience is clear enough to say, “Well, if anyone tried to eat it now, they’d just get sick. Even that imaginary dog. Might as well throw it out.” It’s a system; who am I to change it?
  3. One mushy, brown avocado. If you want to ripen avocados quickly, you store them in your cupboard for two or so days. And then you take them out and cook with them, or put them in your fridge to slow the ripening process. Unless you’re me. Then, you buy three avocados, even if you only need two, and forget that there’s one in the cupboard for a week. Then, one day you’re filling your water glass, and a little voice from the cupboard goes, “Hey. Hey. If you don’t pay attention to me, I’m going to grow legs and hair, move to Portland, and start an indie band called mono:unsaturated.”

Yes. You can steal that band name.

Anyway, if you’re anything like me – although you’re probably not, because you actually eat your sauerkraut – you’ll have an avocado ready to go for this easy-peasy, food-on-your-hands, super mono:unsaturated hand treatment.


I actually put together this recipe, not because my hands are terribly dry – because it’s 67 degrees in December in Colorado with a relative humidity of 15%, which is like a sauna around here – but because Crunchy Betty is going to be in Vegetarian Times Magazine!

We should see one recipe (using rice) show up in the next issue or two (I think), but that danged incredibly beautiful, tempting and tantalizing magazine invited me back to submit more recipes for the April/May (or April or May, I’m not sure) edition. The moral of the story is, just look for ‘em in Vegetarian Times magazine every month between today and, say, July 2015. Just to be safe.

Anyway, this isn’t the exact recipe I submitted along with the recipes to Vegetarian Times. It’s a riff on that recipe, if you will. A drum solo in the middle of the mono:unsaturated’s 15-song set. This particular recipe is meant to be used over the course of three days, for dry winter hands that need extra tender lovin’.

Yes, it is for dry, winter hands – and to ease my guilty conscience about all the over-ripe, mushy avocados in your cabinets, just waiting to be used for practical purpose. Let’s be honest. No avocado really wants to be in a band.

The Lean, Green Avocado Hand Moisturizing Machine Recipe

This recipe, you’ll store in your refrigerator and use twice a day for three days.

It’s quick to mix up, and it’s quick to use, but the results are easy to see – and your hands will soon be back to their mid-summer, dewy and moist (but not in a creepy way) condition. In the middle of winter.

Do, though, be careful with this recipe if you have broken skin anywhere. It might sting a bit. Wait until your skin has healed to apply fresh foods to it, mkay?

Ready to soften your hands, the avocado way? Here’s what you need:


Half of an avocado, olive oil, sugar, and patchouli essential oil.

Easy.

Mushy.

Exfoliaty.

Soft.


Slice your avocado in half, and save the pit to throw at an unsuspecting cat. You can skip the last part. But I don’t.

Anyway, you want to mush it as well as you absolutely, possibly can. My avocado was actually a little unripe (gasp), because the overripe one I had in my cabinet had grown hair and legs and was packing its bags for Portland already.

So, my recipe may look a little more lumpy than your does. That just means you’re better than me.


Add in your olive oil and stir, stir, stir until it’s all mixed together.

But be prepared. You’re going to stir a little more. And then a little more. But not any more after that.


Now you add in 4-5 drops of patchouli essential oil, which, despite what everyone says, isn’t just for hippies anymore. It’s actually a warm, cozy scent that makes you want to snuggle with your cat, but he won’t come near you because you threw an avocado pit at him earlier.

Patchouli, by the way, is an excellent essential oil for healing and nourishing dry and/or flaky skin. It also happens to smell divine with the rich, thick, green scent of avocados.


Now you stir in 1/8 c. of sugar. And that’s all you have to do.

Except, of course, you still have to apply it, and that’s SO much easier than making it.

Scrub your hands with the mixture, and let the alpha-hydroxy acids in the sugar soften old, dead skin cells, while the avocado, olive oil, and patchouli essential oil moisturize and nourish your hands underneath. Scrub for a few minutes, and then rinse off well.


Here’s the whole recipe/instructions: The Lean, Green Hand Moisturizing Machine Recipe
  • 1/2 of an over-ripe avocado
  • 1 Tbsp olive oil
  • 1/8 c. sugar
  • 4-5 drops patchouli essential oil
Mash the avocado well, until you have a thick paste. Blend the olive oil in completely, and continue stirring as you add the patchouli essential oil. Quickly stir in the sugar.

To use: Over the sink, place a healthy-sized glob of avocado hand treatment in your hands. Rub your hands together, scrubbing every inch, but concentrating on super dry areas. Leave this on for 30 seconds to a minute, and then scrub your hands together while rinsing off under lukewarm water. Finish with shea butter or a moisturizer of your choice. Repeat this treatment once or twice a day for three days.

Put the remainder of your avocado hand treatment in a glass container with a lid, and store in your fridge for up to three days. If the sugar in your avocado hand treatment dissolves too much, just add a bit more sugar before using.

That’s it. You’re done.

Source