May 23, 2020

AR9341 Router TTL Line Brush Machine

Recently, I have a batch of OEM PoE routers that do not have a USB interface. It is just used to study the TTL flash machine.

Then connect the USB to TTL. Note here that some boards will be incompatible with garbled characters. You can try to change the baud rate. If not, just change a USB to TTL board.

The computer uses SecureCRT, serial port connection, there is no character on the connection, then power on the router, the screen starts to display UBOOT, press any key to interrupt, some press TPL interrupt or ctrl + c interrupt, I first flash breed

These software will be provided below to download, understand the command of FLASH before brushing

2MB FLASH


Flash programmer firmware: tftp 0x80000000 full.bin
erase 0x9f000000 + 0x200000
cp.b 0x80000000 0x9f000000 0x200000 flash
uboot:
tftp 0x80000000 uboot.bin
erase 0x9f000000 + 0x20000
cp.b 0x80000000 0x9f000000 0x20000 flash
fw:
tftp
0x80x9fwfc.
cp.b 0x80000000 0x9f020000 0x1c0000
brush art:
tftp 0x80000000 art.bin
erase 0x9f1f0000 + 0x10000
cp.b 0x80000000 0x9f1f0000 0x10000


4MB FLASH

Flash programmer firmware: tftp 0x80000000 full.bin

erase 0x9f000000 + 0x400000

cp.b 0x80000000 0x9f000000 0x400000 flash

uboot:

tftp 0x80000000 uboot.bin

erase 0x9f000000 + 0x20000

cp.b 0x80000000 0x9f000000 0x20000 flash

fw: tftp 0x80x9 fw0f0f3

cp.b 0x80000000 0x9f020000 0x3c0000

brush art:

tftp 0x80000000 art.bin

erase 0x9f3f0000 + 0x10000

cp.b 0x80000000 0x9f3f0000 0x10000


8MB FLASH

Flash programmer firmware: tftp 0x80000000 full.bin
erase 0x9f000000 + 0x800000
cp.b 0x80000000 0x9f000000 0x800000 flash
uboot:
tftp 0x80000000 uboot.bin
erase 0x9f000000 + 0x20000
cp.b 0x80000000 0x9f000000 0x20000 flash
fw:
tftp
0x80x9 fw.f02
cp.b 0x80000000 0x9f020000 0x7c0000
brush art:
tftp 0x80000000 art.bin
erase 0x9f7f0000 + 0x10000
cp.b 0x80000000 0x9f7f0000 0x10000


16M FLASH: flash address from 0x000000 ~ 0x0FFFFFF
ttl access flash address from 0x9F000000 ~ 0x9F0FFFFFF


The network cable is connected to the router lan port, the computer configuration is set to 192.168.0.2, the mask is 255.255.255.0, and the gateway is 192.168.0.1

Open tftp in my software package, select the network card connected to the router's network cable, it will normally display the IP 192.168.0.2, click "Show Dir" contains a firmware of breed-ar9341.bin, first flash him, execute the following command

setenv ipaddr 192.168.0.1

setenv serverip 192.168.0.2

tftp 0x80000000 breed-ar9341.bin

When done appears, it means that the brushing is successful, and then execute

erase 0x9f000000 + 0x20000

cp.b 0x80000000 0x9f000000 0x20000

When done appears, flashing in is successful. Unplug the router and plug it in again. SecureCRT displays the Breed boot and press any key terminal. At the same time, you can see that the default lan port address is 192.168.1.1

Connect the computer browser to 192.168.1.1, then you can directly use the Breed Web


Enter 192.168.0.1 in the address bar of the browser and select the firmware upgrade. Here you should save the original firmware under backup. You can configure openwrt after the flashing is completed.

Software download address:

https://pan.baidu.com/s/1Z7PkN8ROxpDITdRZHgw3nQ

Extraction code: be5m

May 22, 2020

Tenda G103 ONU works on HUAWEI OLT


Today a friend from India an FTTH subscriber of RailWire ISP share the thoughts of his Tenda G103  ONU (Optical Network Unit) as a replacement to Huawei ONT (Optical Network Terminal).


Looking for serial port pin header very easy to guess just like the other wireless router that has Ground TX RX and VCC.


The good news firmware is base on opensource OpenWrt image_name=openwrt-lantiq-falcon-EASY98020

The Tenda ONU G103 is equip with 400MHz Falcon-D Lantiq Chips, with 64MB DDRAM and 8MB Flash.


Another interesting command line interface

Press SPACE to delay and Ctrl-C to abort autoboot in 5 seconds
FALCON => bdinfo
boot_params = 0x83F2FF98
memstart = 0x80000000
memsize = 0x04000000
flashstart = 0xB0000000
flashsize = 0xFFFF0000
flashoffset = 0x00000000
ethaddr = C8:3A:35:B3:E8:50
ip_addr = 192.168.5.1
baudrate = 115200 bps
FALCON => ?
? - alias for 'help'
asc0_fixup- fix asc0 pins (for silent boot)
askenv - get environment variables from stdin
base - print or set address offset
bdinfo - print Board Info structure
boot - boot default, i.e., run 'bootcmd'
bootd - boot default, i.e., run 'bootcmd'
bootm - boot application image from memory
bootp - boot image via network using BOOTP/TFTP protocol
chipinfo- print chip info
cmp - memory compare
cp - memory copy
crc32 - checksum calculation
ddrlp - config DDR LowPower
ddrstatus- show DDR Controller status
dhcp - boot image via network using DHCP/TFTP protocol
echo - echo args to console
editenv - edit environment variable
eeprom - EEPROM sub-system
env - environment handling commands
exit - exit script
extphy - external PHY enable (clock and reset)
false - do nothing, unsuccessfully
go - start application at address 'addr'
gpio - input/set/clear/toggle gpio pins
help - print command description/usage
httpd - start webserver
i2c - I2C sub-system
iminfo - print header information for application image
itest - return true/false on integer compare
loadb - load binary file over serial line (kermit mode)
loads - load S-Record file over serial line
loady - load binary file over serial line (ymodem mode)
loop - infinite loop on address range
md - memory display
mii - MII utility commands
mm - memory modify (auto-incrementing address)
mmd - MMD utility commands
mtest - simple RAM read/write test
mw - memory write (fill)
nm - memory modify (constant address)
ping - send ICMP ECHO_REQUEST to network host
printenv- print environment variables
reset - Perform RESET of the CPU
run - run commands in an environment variable
saveenv - save environment variables to persistent storage
setenv - set environment variables
sf - SPI flash sub-system
sfboot - boot from serial flash device
showvar - print local hushshell variables
sleep - delay execution for some time
sntp - synchronize RTC via network
source - run script from memory
test - minimal test like /bin/sh
tftpboot- boot image via network using TFTP protocol
tlb - setup TLB (virtual memory) mapping
true - do nothing, successfully
version - print monitor, compiler and linker version
wdoff - switch watchdog off
wdtest - watchdog test (endless loop!)
wdtime - set watchdog timeout

On the printenv

FALCON => printenv
act_img_addr=0xBF20003C
addip=setenv bootargs ${bootargs} ip=${ipaddr}:${serverip}:${gatewayip}:${netmask}:${hostname}:${netdev}:off
addmisc=setenv bootargs ${bootargs} ethaddr=${ethaddr} machtype=${machtype} ignore_loglevel vpe1_load_addr=0x83f00000 vpe1_mem=1M mem=63M ${mtdparts}
addmtdparts0=setenv mtdparts mtdparts=sflash:256k(uboot),128k(uboot_env),3712k(linux),3712k(image1),384k(rootfs_data),8192k@0(all)
addmtdparts1=setenv mtdparts mtdparts=sflash:256k(uboot),128k(uboot_env),3712k(image0),3712k(linux),384k(rootfs_data),8192k@0(all)
baudrate=115200
boot_image=run boot_image${c_img};
boot_image0=run kernel0_from_sf flashargs addip addmtdparts0 addmisc && bootm ${ram_addr}
boot_image1=run kernel1_from_sf flashargs addip addmtdparts1 addmisc && bootm ${ram_addr}
boot_image_err=setenv kernel_offs ${kernel0_offs};httpd && setenv image0_is_valid 1
bootcmd=run flash_flash
bootdelay=5
committed_image=1
data_addr=0xB07a0000
data_offs=0x7a0000
data_size=0x60000
env_offs=0x40000
env_offs_redund=0x50000
ethact=GPHY0
ethaddr=C8:3A:35:edited
ethrotate=no
extphy=1
fileaddr=80F00000
filesize=380004
flash_flash=run select_image boot_image
flashargs=setenv bootargs rootfstype=squashfs,jffs2
goi_config=begin-base64 644 goi_config@H4sIAGrcIVMCA+1XS0/bQBDOtfkVW3HICbOzT7tWD6hAhQoSIhE9RMja2Jtg@1c5atmnpv+84KTgPp1woFWq+i62dz/PamZ21reOj2M2n6exo5tJo+dp7WVCE@lnLxRGw+maS8B4wD5VKB0D0KXDHdI7T3CrivalMS0iudq//Ee07+RtFf7jjB@zSeDWeYmJhv037miTt2cfDJZOilN8z5Kc4uZygsyYBTkIVWHACNQH5gY9NeU@lGY+s9XGYm3zwqKm+9JGtZlkDeHRyqi0UzLglHuBTxVlwm9lN8dXJ9EkiRYU@yTwutJKKyQ1GFZtsyaEeUH/DeBIncWSKZNMn9LTK07q25Q5JVLgfW8LczdPa@la0Hl+jASqaiz4ssYkQt5QR9o9HVBSUDCAKPrktgKWFaiVUR6n2ol6JD6mkp@FOZHK6VbynnuElTw+3vpgZaKYw4Dta0GUA142pdoRigO0KUGScA9wQPFGJdS@boeADCZUVwiNJFC8KwS2sE3B577GCLptI0l7PhqVPAAssm3brLEAXbYbiWRs@TYQ10aYdv/M7pLBD6qbTyj4mH/gOvRix2qm2Q/iktdkLpnZoxVh8Lndo7RA+@aW2yzBe+rhesNRX2XW7n9UrTrbaMZFIGjCktYaVor4fD8whEQBNTfnuk4nnt@A/cpoz5HdLBXFTMRYL1iNQGwDmphSjNxWRov+eD5WJeSYuU1fqwF4fL7jZWJ@q8xKPHg6RWeZmaGadvXCueLSJRZ3eOPraVylLe/zzRDdfYCJll1nR+xK27We@JM3h8KbPf4vzv0lCvBj/Zmb/go1n5j8CmvkvtBBCaobzn2lN9/P/NUB7e/zP@WO//xdUsykxly+ZI9uLq+wv1P945dvY/KNne/ynyQAFT+/5/DRzg/YHMXU3i@u+beTuo7S0Y/C0vSBO8L6TS15fswDPvN2seL4+HpdXR9etasHODMxd+B8Zfb@8Ly+I+P8+DYcnpLx/dej5hVHCRlXt32814faE74OgUpPST+k/X3b7bHHHnv8@c/wCI53hZAAUAAA=@====@
gphy0_phyaddr=0
gphy1_phyaddr=1
image0_addr=0xB0060000
image0_is_valid=1
image0_version=G10xla_v1.0.0.2_cn
image1_addr=0xB0400000
image1_is_valid=1
image1_version=G10xla_v1.0.0.2_cn
image_name=openwrt-lantiq-falcon-EASY98020
ipaddr=192.168.5.1
kernel0_from_sf=sf probe 0;sf read ${ram_addr} ${kernel0_offs} ${max_kernel_size}
kernel0_offs=0x60000
kernel1_from_sf=sf probe 0;sf read ${ram_addr} ${kernel1_offs} ${max_kernel_size}
kernel1_offs=0x400000
lang=en
load_kernel=tftpboot ${ram_addr} ${tftppath}${image_name}-uImage
load_uboot=tftpboot ${ram_addr} ${tftppath}u-boot.img
machtype=EASY98020
magic_addr=0xBF200038
magic_val=0xDEADBEEF
max_kernel_size=0x180000
net_nfs=run load_kernel nfsargs addip addmtdparts0 addmisc;bootm ${ram_addr}
nfsargs=setenv bootargs root=/dev/nfs rw nfsroot=${serverip}:${rootpath},${nfsoptions}
nfsoptions=rsize=1024,wsize=1024
omci_loid=GPONONU15
ponmac=00:A1:B2:edited
preboot=echo;echo Type "run flash_nfs" to mount root filesystem over NFS;echo
ram_addr=0x80F00000
reset_uboot_env=sf probe 0;sf erase 0x40000 0x20000
restore_sta=0
rgmii0_phyaddr=4
rgmii1_phyaddr=5
save_uboot=sf probe 0;sf erase 0 0x40000;sf write ${ram_addr} 0 ${filesize}
select_image=setenv activate_image -1;if itest *${magic_addr} == ${magic_val} ; then if itest *${act_img_addr} == 0 ; then setenv activate_image 0;fi;if itest *${act_img_addr} == 1 ; then setenv activate_image 1;fi;mw ${magic_addr} 0x0;mw ${act_img_addr} 0x0;fi;if test $activate_image = -1 ; then setenv c_img $committed_image;else setenv c_img $activate_image;setenv activate_image -1;fi;if test $c_img = 0 && test $image0_is_valid = 0 ; then setenv c_img 1;fi;if test $c_img = 1 && test $image1_is_valid = 0 ; then setenv c_img 0;fi;if test $image0_is_valid = 0 && test $image1_is_valid = 0 ; then setenv c_img _err;fi;exit 0
serial_number=5444544335edited
serverip=192.168.1.2
sgmii_inv=1
sgmii_phyaddr=6
stderr=serial
stdin=serial
stdout=serial
sw_release_time=Apr 20 2015
sw_ver=V1.0.0.2
uboot_env_svn=144
update_image0=tftpboot ${ram_addr} ${tftppath}${image_name}-squashfs.image;sf probe 0;sf erase ${kernel0_offs} +${filesize};sf write ${ram_addr} ${kernel0_offs} ${filesize}
update_image1=tftpboot ${ram_addr} ${tftppath}${image_name}-squashfs.image;sf probe 0;sf erase ${kernel1_offs} +${filesize};sf write ${ram_addr} ${kernel1_offs} ${filesize}
update_openwrt=run update_image0 && setenv committed_image 0 && setenv image0_is_valid 1 && saveenv && run update_rootfs_data
update_rootfs_data=sf probe 0;sf erase ${data_offs} +${data_size}
update_uboot=run load_uboot && run save_uboot
us_vlan_id=145
us_vlan_mode=0
us_vlan_priority=1
ver=U-Boot 2011.12-lantiq-gpon-1.2.20.1 (Sep 18 2014 - 15:38:45),uboot_svn_id=144
vlan_mode=0
vlan_mode_option=0
Environment size: 5203/65531 bytes
FALCON =>
To be continue will see the command line interface of this Tenda G103, this is absolutely applicable on PLDTHOMEFIBR, we can now replace our HUAWEI ONU/ONT with this device.

May 14, 2020

TP-Link WR886N Chinese Third Party Firmware

Here we go after we done moding the FLASH and RAM its time for us to Brush it with the third party firmware. This device WR886N version 3.0 is supported by OpenWrt, SuperWrt, DD-Wrt and Gargoyle Linux opensource firmware. What we need is a USB cheap 25Q FLASH programmer and USB to TTL for the serial console. Next is decide to which boot loader you want to be accustom with.


The first boot loader utility is BREED aka  Boot and Recovery Environment for Embedded Devices is a close source boot loader by hackpascal, its in Simplified Chinese language just use Google translate to let you understand their script. You can download it on Google filename breed-tp9343.bin.

The second boot loader is also a BREED but modified version of the Simplified Chinese language its in English version. Download on the Giant Search engine filename u-boot_tp9343.bin.


The third boot loader is from TP-Link WR940N version 3.0 stock firmware stripped u-boot, filename is u-boot_tp-link_wr940nv3.bin.


The first brushing I did is with the TP-Link stock firmware WR940N version 3.x is also identical to WR941ND version 6.x such SoC. RAM and FLASH. Likewise WR940N version 4.x and 5.x too.


This is TP-Link stock firmware version 4.x if you want to know more about the internal web graphical user interface just visit tp-link.com for the respective wireless router emulator.


Brushing with third party firmware such as OpenWrt is straight forward since you can just upload via web interface if the wireless router is in the TP-Link stock firmware, TFTP is another method on brushing the firmware its usually use for device recovery from bricked devices.


I have more favor on OpenWrt third party firmware because of its plenty packages for the wireless router. Successfully also tested on LEDE both WR940N and WR941ND. On the Chinese forum someone mention that the WR886N ver3.0 can be flashed with TP-Link WR940N version 5.x, ow true is it?


This is TP-Link new web graphical user interface that added some features like Access Point only, Repeater or Range Extender, and WISP unlike the old version this addition function is not supported except for WDS and Wireless router only. The said added features were only exclusive for the TP-Link WA series device not on WR and WDR. The firmware option brushing may depends on the users, what I like on OpenWrt firmware is SoC TP9343 can be fully enhanced to 26dBm or 398mW of power.

If you know other third party Linux firmware that I did not mention let me know I want to brush it with your firmware that you have tried.

TP-Link WR886N Chinese Version 3 Mod RAM FLASH

First we have to open the clam shell type casing of the TP-Link WR886N chinese version 3.0 it has only two small screw found at the back of the device. Unscrew it, use plastic or metal knife to open the rounded clam upper cover.


Things needed basic electronics skill, hot air gun for desoldering the RAM and the FLASH. I used portable hot air gun in my case, for FLASH at least 400 to 450 C so I can lift it with the tweezers while 500 to 550 C for the RAM.


An old RAM of my Laptop PC3200 with eight chips memory module by 64MB to substitute the TP-Link WR886N 16MB memory.


Let just swap the RAM of the memory module to the router, putting back the memory to the router is sweating it will takes time aligning it and most of the time the memory pins don't sits properly need to clean the pad and the pins before heating it back onto the circuit board.


Once it done the FLASH and the RAM are on its place, testing and power ups so we can proceed to Brushing the third party firmware.

TP-Link WR886N Chinese V3 Specs

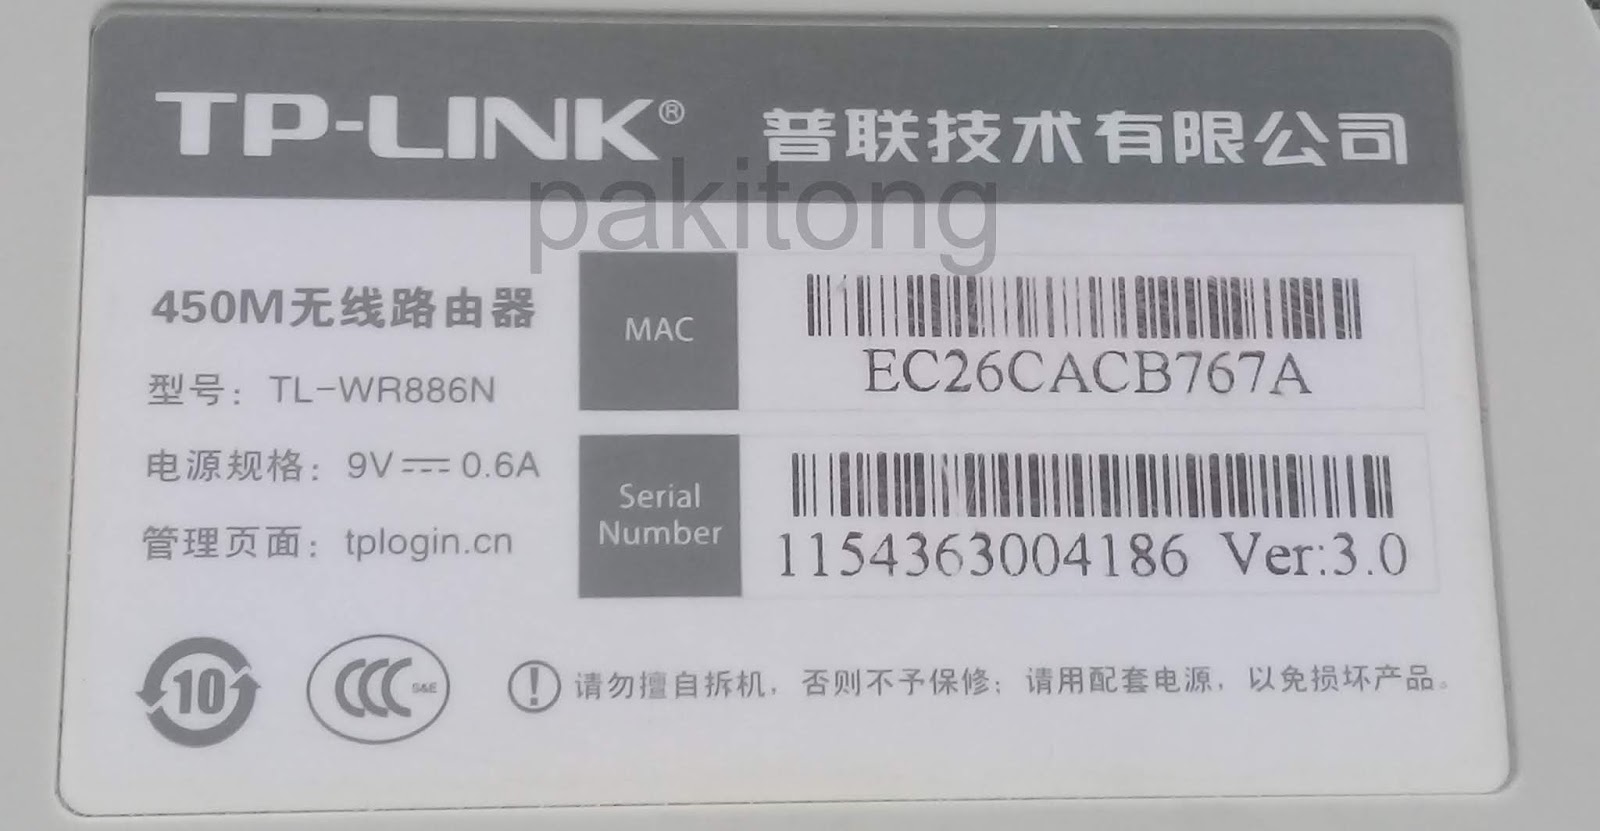
A week before went to online store and look for a second hand wireless router that I can make used of for OpenWrt plus VPN addons or similar cheap router that support it. So here I found a used  TP-Link WR886N Chinese version 3.0 it looks like the device is good and very cheap and the specs is near to average for consumer.


Less than ten days the parcel arrived, a postmen came to deliver to the house and paid for the COD.
I ordered two pieces for me the price is reasonable it only cost 354.00 Php each while the shipping is 100 Php for the two devices.


Looking at the physical appearance it has three 5dBi flat circuit omni directional antenna, fronting single system/power  LED.


At the rear face are the power input jack it has no ON/OFF switch, pin hole RESET button, single WAN port 100Mbps and four 100Mbps LAN ports.


The FLASH is 25Q16 series this mean that the chips is 16M-bit Serial Flash or in other words its only a 2Mbytes of flash storage.


The RAM is from Zentel its A3S28D40JTP-50, further specs of the memory its a 128M Double Data Rate Synchronous DRAM. It has only a capacity of 16MB of RAM.


The TP-Link WR886N Chinese version 3.0 is equip with Qualcomm Atheros TP9343-AL3A from Taiwan. The SoC has 750 Mhz processor of speed.


The internal circuitry of the TP-Link WR886N Chinese version 3.0 seems to be have many clones but different name model.  According to Wikidevi which now Deviwiki this wireless router device known similar are TP-LINK TL-WA901ND v4.x and v5.x, TL-WR882N v1.x, TL-WR886N v1.x, TL-WR940N v3.x/v4.x/v5.x, WR941ND v6.x and TL-WR941HP v1.x.


The mention above TP-Link wireless routers are identical to WR886N version 3.0  same SoC but some others vary on RAM and FLASH have more such 4MB and 32MB. For this device it will not qualify to Brush it with third party firmware wireless router such as  OpenWrt, SuperWrt, DD-Wrt or Gargoyle. The remedy for this device WR886N ver3.0 is to modify the RAM and FLASH to make it fully functional third party opensource wireless router firmware.