Jan 18, 2015

"Rocha" : Pear OS 8 Review

I have been following Pear Linux/OS for quite sometime. In fact, in between, I used Pear OS 6, the LTS one, as my main production distro for quite sometime last year. Pear OS intrigues me primarily because of it's striking resemblance to Mac OS X and inherent simplicity of the controls. Pear OS 8, based on Ubuntu 13.04 or Ubuntu Raring Ringtail, is the latest release from their stable. Unfortunately this release comes a bit late with the Ubuntu Raring already 6+ months old and Ubuntu Saucy (the latest version) already released. So, my basic interest was how the latest release of Pear OS fare against the previous LTS release: Pear OS 6 with support till April 2017.


Pear OS 8 release states the following incremental improvements:
  • New refreshing design with an intuitive and powerful desktop environment
  • No unnecessary programs or trial software to slow things down
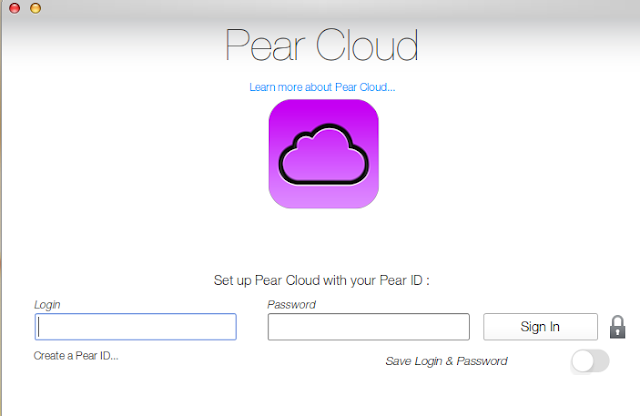
  • Pear Cloud to share files across platforms
  • Utility software like MyPear 6, Clean My Pear 2, etc. to provide easy customization options for users
I downloaded the 1 GB 32-bit ISO for this test, created a live USB using Unetbootin. I used a couple of laptops for this test:
  • Asus K54C with 2.2 Ghz Core i3 processor, 2 GB DDR3 RAM & Intel HD 3000 128 MB graphic memory
  • Asus K55VM with 2.8 Ghz Core i7 processor, 8 GB DDR3 RAM & Nvidia GEFORCE 2 GB graphic card
I did a live boot on both the laptops and then installed Pear OS 8. The primary reason for installing in a couple of laptops is that throughout 2012-13, I used Asus K54C for testing the Linux distros and record benchmark performance. However, now with a lot of improvement going on as far as drivers for dedicated graphic cards are concerned, I intend to use Asus K55VM for all purposes in 2014. Hence, in the transition phase I am using both the laptops.

Pear OS 8 ships with tweaked GNOME 3.6.3 and Linux kernel 3.8.0. Nautilus 3.4.2. I expected Pear to migrate to the more modern Nautilus fork Files; anyway, both are one of the best file managers in business.

Aesthetics

I must say that I am very impressed with Pear OS 8 interface. It is very simple, intuitive and functional. Unlike Pear Linux 6 & 7, the annoying animations are left out to go for a more sober and subtle effects. The default wallpaper is quite good and gels with the overall Mac-ish theme. The desktop interface looks very refined and aesthetically appealing to the eyes.


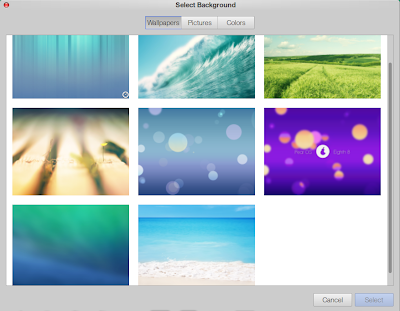
Pear OS also ships with some attractive Pear OS branded wallpapers. A couple of them are quite original and better than the default wallpaper.


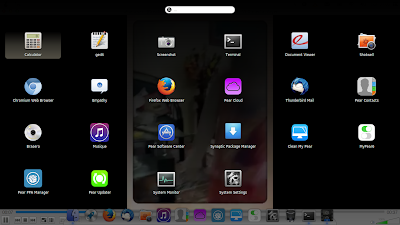
The dash is similar to GNOME and is activated on clicking the launcher. Regular Linux user will take a day or two to adjust to the Pear OS interface as the launcher is in the docky, rather than at the top panel. Unlike Unity dash, Pear dash doesn't have any filters and it may become a bit cumbersome when you install a whole lot of applications. Never-the-less, like GNOME dash, a search option is there to locate the preferred applications.


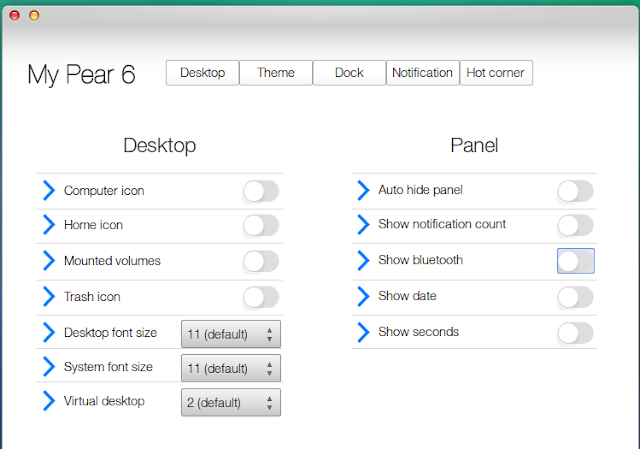
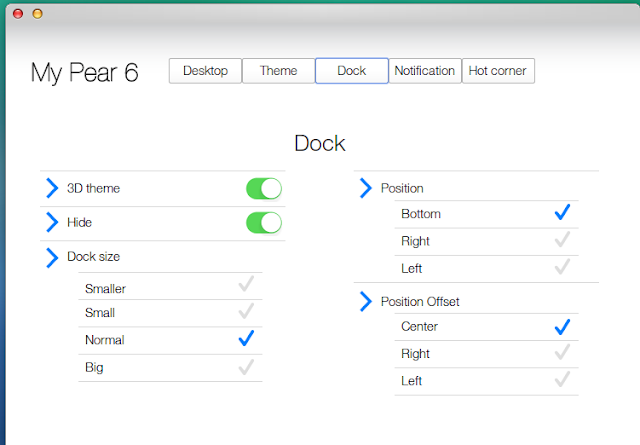
Pear OS comes with a whole lot of flexibility to change the look and feel, via My Pear 6. It has several options to tweak the desktop and dock appearances.


However, the theme option is still empty and hopefully by the time the Pear 9/10 is out, we'll get to see some aesthetically pleasing themes.

Further, somehow the hot corners didn't work for me in Pear OS 8. They worked for me in the previous two releases of Pear on the same laptop.

In overall, if you are looking for a Mac OS X look alike Linux, Pear OS is a tough competitor to Elementary OS. Simply put, the interface is very sophisticated and looks gorgeous enough to draw attention of on-lookers.

Applications

Pear OS basically provides very few applications pre-installed. It has been the case with all the releases that I have used. Anyway, it is kind of better for the users with stable internet connection to install their preferred packages instead of the OS developer choosing what they should be using. Below is a list of the limited applications that Pear OS provides:
  • Office: Document viewer, Pear Contacts
  • Internet: Firefox 25, Empathy IM, Thunderbird, Pear Cloud
  • Graphics: Shotwell Photo Manager
  • Multimedia: Brasero, Musique 1.2.1, Screenshot
  • Accessories: Calculator, gedit, terminal, Clean my Pear, MyPear6, Pear PPA Manager
There is no proper word or spreadsheet processing application and required to be installed from the Ubuntu repositories. I installed LibreOffice 4 and it worked well with Pear.

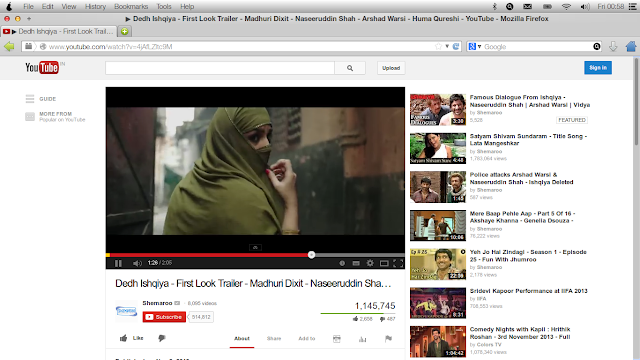
Internet section is the richest in Pear OS and comes with Firefox as the default browser. Multimedia codecs and Adobe flashplugin gets installed during the OS installation. I could watch my favorite YouTube movies without any issue post installation.


As regarding to the other applications, I discuss them in the following sections on the merits and demerits of Pear OS 8.

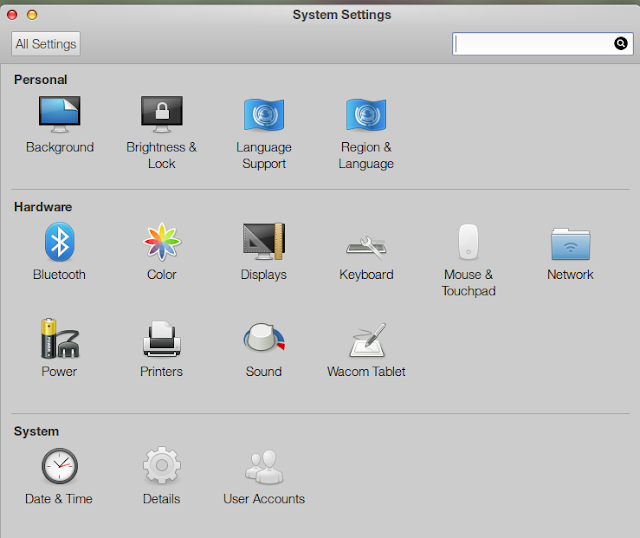
Settings are integrated and similar to GNOME or Unity settings. Pear OS also comes pre-installed with a few Pear OS specific settings options like My Pear 6, Clean My Pear, etc.


Installation

Installation is simple and similar to Ubuntu Raring. No surprises there and it is a step-by-step process which starts with selection of language, followed by keyboard type and language, location and time zone, hard drive where to install Pear and finally user ID creation.


Repositories

Pear OS 8 sources it's applications from Ubuntu Raring and other third party repositories. As mentioned earlier, Pear Software Center and Synaptic Package Manager are the default interfaces to download packages.


Performance

I must say Pear OS 8 is very smooth to use. Doing away with the fancy effects have actually resulted in an improvement in performance and smoothness of use. At steady state, the 32-bit OS consumes about 1-10% CPU and 190 MB RAM with task manager running on Asus K54C. Under similar circumstances on the same laptop, Pear OS performed way better than other GNOME 3 distros that I have used in 2012-13.

Operating System Size of ISO Base Desktop Linux kernel CPU Usage RAM usage Size of installation
Pear OS 8 1 GB Ubuntu Gnome 3.6.3 3.8.0 1-10% 190 MB 3.67 GB
Zorin OS 7 1.5 GB Ubuntu Gnome 3.6 3.8.0 1-10% 195 MB 8.60 GB
Antergos 2013.08.20 671 MB Arch GNOME 3.8.4 3.10.0 1-10% 207 MB 3.6 GB
Ubuntu 12.04.2 LTS 693 MB Ubuntu Unity 5 3.5.0 1-10% 230 MB
Pear OS 6 862 MB Ubuntu Pear Aurora 1.0.5 3.2.0 1-5% 235 MB
ROSA 2012 Fresh Gnome 1.1 GB Mandriva Gnome 3.6.2 3.6.10 1-10% 235 MB
Linux Deepin 12.12.1 1.2 GB Ubuntu GNOME 3.8 3.8.0 1-10% 240 MB 4.0 GB
Ubuntu 12.04.3 LTS 741 MB Ubuntu Unity 5.20.0 3.8.0 1-10% 250 MB 3.06 GB
Ubuntu GNOME 13.10 919 MB Ubuntu GNOME 3.8.4 3.11.0 1-10% 256 MB 3.37 GB
Elementary OS Beta 1 651 MB Ubuntu Pantheon 3.2.0 1-5% 270 MB 2.87 GB
LuninuX 12.10 1500 MB Ubuntu Gnome 3.6 3.5.0 1-5% 280 MB
Ubuntu 12.04.1 LTS 730 MB Ubuntu Unity 5 3.2.0 1-10% 280 MB
Ubuntu 13.04 Gnome 1 GB Ubuntu Gnome 3.8 3.8.0 1-10% 280 MB
Zorin 6.4 Educational 2 GB Ubuntu GNOME 3.4.2 3.2.0 1-10% 285 MB 5.6 GB
Fedora 17 Gnome 677 MB Fedora Gnome 3.4.1 3.3.4 1-10% 296 MB
Fedora 19 GNOME 964 MB Fedora GNOME 3.8 3.9.8 1-10% 297 MB 3.28 GB
Zorin 6 Core 1.4 GB Ubuntu Gnome 3.4.1 3.2.0 1-10% 300 MB
Fedora 18 Gnome 932 MB Fedora Gnome 3.6.2 3.7.2 1-10% 310 MB
OpenSUSE 12.2 Gnome 704 MB OpenSUSE Gnome 3.4.2 3.4.6 1-10% 310 MB
Pear OS 7 (64 bit) 1.1 GB Ubuntu Gnome 3.6 3.8.5 1-5% 315 MB
Ubuntu 13.04 835 MB Ubuntu Unity 7 3.8.0 1-10% 320 MB 4.98 GB
Pinguy OS 12.04 1.8 GB Ubuntu Gnome 3.4.1 3.2.0 1-5% 325 MB
Hanthana Linux 19 4.4 GB Fedora GNOME 3.8.4 3.11.2 1-10% 335 MB 11.74 GB
Ubuntu 13.10 939 MB Ubuntu Unity 7.1.2 3.11.0 1-10% 360 MB 3.70 GB
Sabayon 13.08 GNOME 1.8 GB Gentoo GNOME 3.8.3 3.10.0 1-10% 363 MB 6.13 GB
Ubuntu 12.10 790 MB Ubuntu Unity 6 3.5.0 1-10% 412 MB

My Experience with Pear OS 8

Following are the good and not-so-good experiences that I had while using Pear OS for a week or so on both the laptops:

Best of Pear OS 8

Here I am highlighting the features of Pear OS 8 that I really liked during my usage:

My Pear 6: As I highlighted in the section on Aesthetics, it is a handy little application to tweak Pear OS appearance. Good job by the developers!

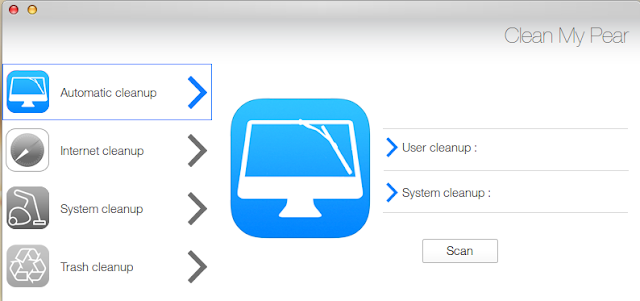
Clean My Pear: I like this application for the ability to clear cache and free up a lot of space. It acts like Janitor and provides flexibility of system wide clean up, only internet cache clean up and trash clean up, etc. It is a handy option for users unfamiliar with a great deal of technicalities.


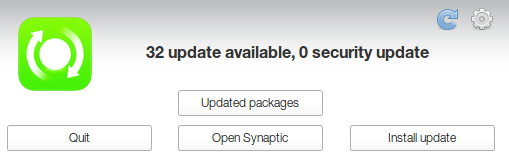
Automatic Updater: The update manager is added to the start up and provides options to view the packages to be updated, update via synaptic, install update and finally, if you are in the middle of something and not really interested to update, quit update. It is simple and intuitive.


Pear Cloud: It is a virtual storage space similar to Ubuntu One and gives 2 GB space for free. It requires creation of login profile and is good to access files from any computer. However, if you already have a dropbox account, you may not be interested in Pear Cloud.


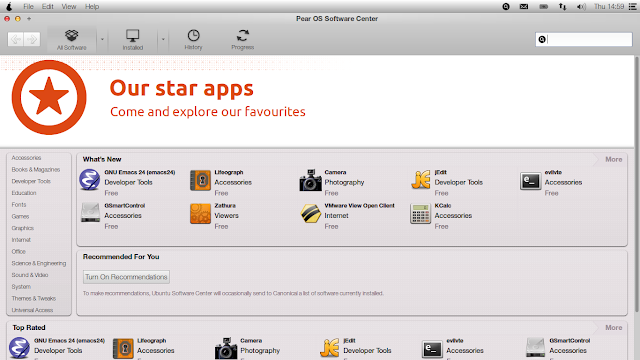
Pear OS Software Center: It is good to see Pear OS acknowledging it's roots and retaining the Ubuntu Software Center. The previous app center was too much Mac-ish for me and the present one is a more familiar interface.


Synaptic Package Manager: Another utility application and works faster than Ubuntu Software Center. It is the best package manager I have used. But, it may be a daunting initially for Linux novices to use Synaptic.


Pear OS PPA Manager: Adding and managing PPA's in Pear OS is very easy using the PPA manager. I really like the intuitive interface and simplicity that it provides. Pretty handy for new Linux users.


Installing Nvidia drivers in Pear OS 8

It is similar to Ubuntu Raring and involves the following steps:
Add Bumblebee ppa and install bumblebee with nvidia drivers from the terminal

sudo add-apt-repository ppa:bumblebee/stable
sudo apt-get update
sudo apt-get install bumblebee bumblebee-nvidia primus linux-headers-generic


Reboot and run optirun ls -l from the terminal to check if it looks like the screenshot below. If you get the output as shown here then bumblebee is working and the laptop heat will come down drastically.


You can now selectively choose the programs for which you need to run nvidia.

Bugs that I noted

Pear OS 8 comes with a few bugs that I noted while using it.

Issue with Root log in: On my first attempt I was unable to login as root and it won't accept any password. So, I went back to my user ID login and created a password for root login by running the following command at the terminal:

sudo passwd root

This would prompt to enter and re-enter the root password that I would like create. And it worked!

Curious case of VLC player: In root login, I could see a VLC player but was not visible in the dash. I re-installed it again from my user ID login. Still, VLC won't show up. So, I started VLC from the terminal and pinned it on the docky. Thereby, I could actually run VLC player and play my desired media files.


Issue in accessing USB drives: Somehow, I was not able to transfer files to any USB drivers. They were all in FAT-32 format (works with all operating systems including Windows and Linux). I tried changing permissions from root login, ran chmod command as root, etc. etc. But, nothing worked. Even the shared folders in LAN were not accessible. Possibly a bug and normally it doesn't happen with me with any Fedora/Ubuntu/Debian spin.

Pretty slow Musique: Musique 1.2.1 is the default music file player and it took ages to load my collection of about 2 GB music files. Other players that I have used are 100 times more faster than musique. However, on clicking a single file, it played quite well. Further, using the preset options in equalizer, I could modify the effects that I wanted. It is a versatile player no doubt but I need faster import of media files.


Irritating language download options in live boot: Every time I did a live boot of Pear OS 8, an irritating language pack download option would automatically start. I don't expect any download to start in live boot and manually I had to kill it. Possibly it can be done away with in live boot and kept for post installation to do things.


No hot-corners for me: As I mentioned earlier, the hot-corners for easy access of dash or open applications didn't work for me.


No option to select user wallpapers: With Pear OS 8, I was stuck with the system wallpapers only as there was no option to include any folder in the Select Background entry. It is a bug for sure and I hope the developers correct it as soon as possible as it seriously limit customization options for the users.


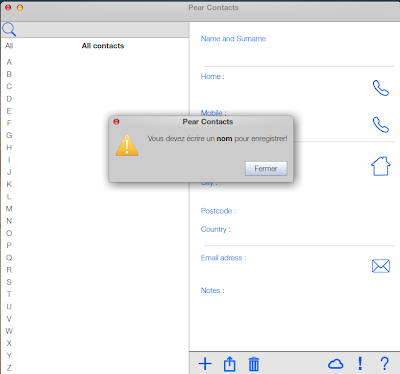
French language in some applications: Some apps like Pear contacts still bear the French language.


Overall

Pear OS 8 presents an unique combination of aesthetics and functionality. The present version is the best Pear OS I have used, if I discount the bugs that I discussed above. However, the users on Pear OS 6 may have little incentive to upgrade to Pear OS 8 as this edition has barely 3-4 months of support. So, they may be better off waiting for the Pear OS based on Ubuntu 14.04 LTS to release. Looking at the present improvements and refinement that I noted in this version, I can expect a great LTS release from Pear in the pipeline.

One thing here, I didn't experience similar bugs in Pear OS 6, except for the launcher breaking down occasionally. Was this release a bit rushed? Not sure. Anyway, the users who are interested to try out Pear OS 8, please go ahead and experience Pear. It may not be exactly Mac but the closest Linux can offer to Mac OS X. Pear OS 8 is available in both 32 and 64 bit versions and they can be downloaded from here.

Jan 17, 2015

Macs undetectable virus that "can't be removed"

A security researcher has discovered a way to infect Macs with malware virtually undetectable and that 'can't be removed.'

The attack, which has been called Thunderstrike, installs the malicious code into the Boot ROM of the system via the Thunderbolt port.


Trammell Hudson, who works for hedge fund Two Sigma Investments and is also the creator of the Magic Lantern open-source programming environment for Canon DSLRs, discovered the vulnerability after his employer asked him to look into the security of Apple notebooks.

"A few years ago we were considering deploying MacBooks and I was asked to use my reverse engineering experience to look into the reports of rootkits on the Mac to see if it was possible to patch the firmware to be secure against them," wrote Hudson in a summary of the vulnerability.

After initially discovering that the Boot ROM could be tampered with if the notebook was physically dismantled to give access to the chip soldered onto the motherboard, he then refined this technique so the attack could be carried out via the system's Thunderbolt port.

"It turns out that the Thunderbolt port gives us a way to get code running when the system boots," Wrote Hudson. "Thunderbolt brings the PCIe bus to the outside world and at boot time the EFI firmware asks attached devices if they have any Option ROMs to be run."

Hudson discovered that he could use a modified Apple gigabit Ethernet Thunderbolt adapter to carry out the attack.

"Since it is the first OS X firmware bootkit, there is nothing currently scanning for its presence. It controls the system from the very first instruction, which allows it to log keystrokes, including disk encryption keys, place backdoors into the OS X kernel and bypass firmware passwords," Hudson said.

And once it is on your system, it is incredibly hard to remove.

"It can't be removed by software since it controls the signing keys and update routines. Reinstallation of OS X won't remove it. Replacing the SSD won't remove it since there is nothing stored on the drive."


"The classic 'evil-maid' attacks also are feasible. Given a few minutes alone with your laptop, Thunderstrike allows the boot ROM firmware to be replaced, regardless of firmware passwords or disk encryption," explains Hudson. "So while you are getting breakfast at the hotel during a conference and leave the machine in your room and house-cleaning comes by to make up the bed, install the firmware backdoors, and replace the towels."

According to Hudson, Thunderstrike "is effective against every MacBook Pro/Air/Retina with Thunderbolt."

Fortunately, Hudson reports that Apple is working on an update that will prevent malicious code from being written to the Boot ROM via the Thunderbolt port. However, this update would not protect the system from having the Boot ROM tampered with directly.

One defense against this would be to paint over the case screws with glitter nail polish and take close-up photos of the seal you created. The glitter in the nail polish sets into a random pattern that would be impossible to replicate, and as long as you keep the photos safe, you can make sure they screws haven't been messed with.

via www.zdnet.com

TM Internet Expierence Measurement Tools Review

Telekom Malaysia (TM) Internet Experience Measurement Tools (IEMT) is an online testing tool for measuring network performance of a communication link from TM customer's perspective. It consists of downloading performance tool, browsing performance tool, streaming performance tool and speedometer tool.

To use this services head over to this hyperlink http://verify.tm.net.my/ or http://202.188.95.247/iemt/ and it will automatically detects your TM username account as shown screenshot below. If you are using a valid IP address of TM Streamyx, TMnet or Unifi you will be prompted immediately with greetings " Good morning username@streamyx, username@tmnet, username@unifi, welcome to IEMT."


The Internet Experience Measurement Tools (IEMT) is a smart tools, it has the capabilities on detecting the end user with this small piece of java script. On the other hand, once you are using a different ISP provider aside from TM network you will no longer able to use this IEMT intelligent program, instead it will tell you " Sorry, this portal is only for TM Broadband users (Streamyx and Unifi)."


See ! :-) Can everyone use these IEMT tests?
  • The online service is available for TM Streamyx and TM Unifi subscriber only and it's free!
Why perform the test?
  • The test can measure the performance of your downloading, browsing and streaming experience with your TM Streamyx or TM Unifi broadband internet service.
Here's an example on how to use the IEMT services, for downloading performance just click on the main menu labeled "Downloading" and you will be prompted for selection of files for download for testing purposes. After you click as in my case the 1MB it will again prompted me a java windows script in progress until it will be completed to 100% for the result to come out.


You can now evaluate what type of TM Broadband package you are subscribed, the result of the IEMT performance is really what I have applied for my subscription a VIP 5 Unifi and its correct.


To verify more for your doubts head over to another speedometer link http://speedtest.streamyx.com.my and see for the result for more comparison as in my case here.


This throughput test will transfer data between your computer and the selected server(s). Please do not use your connection while the test is in progress. The test may take a few moments. Your screen will refresh when the test is completed. Data will be sent to your computer through your internet connection to test the speed. Our speedometer also uploads the proxy data to our server as part of the speed measurement. This allows us to measure the upload and download speeds and provide absolute measurements of your Internet speed. If you have any trouble using our service, kindly contact our Customer Interaction Centre at 100 or e-mail to help@tm.com.my.

Disclaimer: *'The speedometer is valid for Streamyx and Business Broadband users only'

Jan 16, 2015

Bonding instead of load balancing: Never be offline again!

The philosophy behind Viprinet "Bonding instead of load balancing: Never be offline again!"

Viprinet – Always online, always broadband!

Today, business transactions require enterprises to have an Internet connection with 100% uptime. However, most network solutions dash already against the basics: As soon as an Internet line drops out and mobile radio cells are overbooked, the availability of the connectivity solution decreases significantly. Learn in this video why Viprinet is independent of individual Internet links and can thus help businesses to achieve 100% uptime – at even lower costs.


The data stream from the LAN is encrypted by the Multichannel VPN Router and distributed onto the Internet connections (here: 2x DSL, 1x 3G / UMTS). The encrypted and fragmented data passes the networks of the utilized ISPs and reaches the Multichannel VPN Hub in the data center, which in turn decrypts the data stream and reassembles it correctly. Afterwards, the data stream is forwarded to its actual destination on the Internet. The same goes for the opposite direction: Here, the Hub encrypts the data stream, while the VPN Router decrypts it.

Feel free to visit our downloads section and download our whitepaper on the topic "Always online – wherever and whenever needed", providing detailed information on the Viprinet principle and its possibilities.

We are the bonding inventors!

We've invented the principle enabling the bonding of different WAN technologies. For us, bonding means real aggregation of bandwidth of all WAN media to be bonded.

The Multichannel VPN Router is the core of the Viprinet technology. With this device, several broadband lines can be combined into a single, highly available joint line. Unlike load balancing which can only distribute load to several WAN links, real bonding of all connections available is realized here.

Viprinet can combine all different types of access media, be they ADSL, SDSL, UMTS / HSPA+ / 3G, or LTE / 4G. The LAN sees these connections as one single line providing the accumulated up- and downstream of the different links even for single downloads.

The remote station principle

Viprinet uses an exceptional VPN tunnel technique with a star topology for secure and fast site, facility and vehicle linkage. For this purpose, the integration of two different devices is needed: A Multichannel VPN Router establishes an encrypted VPN tunnel to a single central remote station, the Multichannel VPN Hub, via each Internet line available. These VPN tunnels are then bundled into one tunnel through which the data is then transferred.

The Multichannel VPN Hub is usually located in a highly reliable data center and acts as an exchange: Data targeted at another company site will be forwarded through the respective VPN tunnel; data targeted at the public Internet will be decrypted and forwarded to its destination. The VPN Hub provides secure and quick communication between different Multichannel VPN Routers but it also serves as pivotal exchange point between the encrypted VPN and the public Internet.

Highest reliability and maximum bandwidth

With bonding using the Viprinet principle, a fast virtual WAN connection featuring almost 100 per cent reliability can be established. This reliability even inceases, the more different WAN media are bonded together. The ability to aggregate the bandwidths of all WAN media guarantees maximum transfer rates.​

Wired and wireless bonding: Viprinet's magic

The magic of the Viprinet principle lies in bonding wired WAN media like DSL or cable together with wireless media like UMTS / 3G, HSPA+ or even LTE / 4G. Providers able to bond all these media always offer the optimum mix of cost-effective WAN media ensuring highest bandwidth and reliability. Especially the ability to combine all common 3G and 4G mobile phone technologies like LTE, HSPA+, UMTS and CDMA via bonding with satellite and/or DSL or cable is unique worldwide.

Truffle : Mushroom Networks MultiWAN Bonding Review

Aggregated point-to-multipoint Capacity with Virtual Leased Line - Truffle is a load balancing router with packet level WAN aggregation. Truffle can peer over the Internet with a Truffle device that has the VLL server module, to create a bonded pipe between the two locations (such as a head-quarter office and the branch offices). In this peered mode, all uplink and downlink traffic between the head-quarter/data center office and the branch office location(s), including VPNs, can utilize the aggregated bandwidth of the combined Internet access links.


Acceleration - All HTTP downlink sessions are aggregated for faster transfer via the Broadband Bonding WAN aggregation technology. Truffle is a load balancing router with packet granularity aggregation. Even in cases of single HTTP session (an example of such a session is a single file download), all Internet access lines are simultaneously and intelligently combined together to provide a faster data transfer for that single session.


High 9s network reliability - Automatic failover will protect against failure of one or more Internet access lines as long as at least one access line is still active. Additionally, Automated Domain Name Service (ADNS) optimization is used to maximize the utility of all active access lines, with automated email, syslog or SNMP alerts. This translates to both better performance and less downtime for your network.

Cellular data WAN connection - Truffle supports 2 USB ports for cellular data cards. The cellular data card dongle can be configured as a fail-over-only or always-on WAN connection. In fail-over mode, in case of all the wired Internet access lines fail, the cellular data card will take over in less than 30 seconds.

Application Armor with Session Keep Alive - When peered to a head-office Truffle Master unit, the Truffle Master unit monitors and intelligently reacts in realtime to mitigate any performance degradation caused by the WAN links at the branch offices. Managed parameters and network problems include packet loss, latency, jitter, cross-traffic, buffer management, MTU problems, black holes as well as others. In case of packet loss, spike in latency or any other degradation on any of the WAN links at the branch office, the VLL tunnel between Truffle and Truffle Master maintains the ongoing IP sessions without loss of performance by shielding the effects of dropped WAN link, lost packets, high latency on any of the links. 2G/3G/4G cellular cards can be added as standby WAN access links for additional reliability.

Advanced Quality of Service (QoS) - Various adaptive quality of service features enables dynamic bandwidth reservation for your selected applications and traffic types, that adaptively reserves bandwidth only when that traffic type is detected. You can also limit inbound/outbound traffic to defined bit rates, bind certain traffic types on to specified WAN links, manipulate traffic based on TOS identifier, block certain traffic types and much more.


Traffic Monitoring - A history of your traffic usage based on type, prototcol, interface or layer 7 deep packet inspection identification are presented with multi-color graphs with a time scale from seconds, minutes, hours, days and months.


DNS load balancing for inbound requests - Truffle can easily be configured to provide Dynamic DNS load-balancing for inbound requests for internally hosted servers such as web-servers, ftp-servers, mail-servers etc.

Intelligent session-based load balancing - In peered mode, Truffle will bond all types of traffic in downlink and uplink. Without peering, non-HTTP downlink sessions and all uplink sessions initiated from the Local Network, will be session based load balanced intelligently across the WAN lines. The application and cookie semantics will be preserved.

Pass-through installation – For installing Truffle into your existing network, no changes are required at your firewall or network. Simply slide in the Truffle between your existing network/firewall and your existing modem and add the additional WAN links as you need. All the installation and configuration can be done through the web-based management interface locally or remotely.

No coordination with ISP - With the Truffle, no new equipment or software is necessary from your Internet Service Provider(s) and all ISPs are supported. A user-friendly web-based management interface is provided for quick and easy configuration and system monitoring, either locally or remotely over the Internet.

Additional features include: DHCP server (can be turned off), state-full firewall (can be turned off), port forwarding, DMZ, UPnP support and others. More at mushroom networks.

LACP/Etherchannel Algorithms & Linux Bonding Modes

The LACP Mode in Enterasys or the Port-channel mode in Cisco, have their own algorithms for the priority selection for the slave interfaces involved in the bonding.
As I am a Linux Guy I am more familiar with the Bonding in Linux envoirnment.
We can create bonding in the /etc/sysconfig/network/ifcfg-bond0,here we can define the Master Interface with the IP address and then the slave interfaces involved in the bonding process along with the Mode of the Bonding.

The Switch connected for the bonding also has it's own aggregation algorithm present which must match the with the mode set in the server.

There are 7 modes present in the Linux kernel.

Refer to the Bonding Documentation in the Linux Kernel, it will be available at the path
cat /usr/src/linux-2.6.38/Documentation/networking/bonding.txt | less

More verbose information can be found at
http://www.linuxfoundation.org/collaborate/workgroups/networking/bonding

Enterasys :
In Enterasys Switches such as N-series, the LACP Lag output Algorithm can be set for the 3 modes
DIP-SIP - Destination IP address/Source IP Address, slave interfaces are assigned on the basis of Source or Destination IP Addresses.
DA-SA - Destination MAC Addess/Source Mac Address, slave interfaces are assigned on the basis of Source or Destination MAC Addresses.
Round-Robin - Equal distribtution from the first slave to all slaves in round-robin fashion

To check for the LACP algorithm use following on the Enterasys Switch
Matrix N3 Platinum(su)->sh lacp ?
Specifies the lag port(s) to display
outportAlgorithm Shows lacp current ouport algorithm
flowRegeneration Shows lacp flow regeneration state
singleportlag Show single port lag setting
state Show global lag enable state
Matrix N3 Platinum(su)->sh lacp outportAlgorithm
dip-sip
Matrix N3 Platinum(su)->

To set the LACP outputalgorithm to different mode
Matrix N3 Platinum(su)->set lacp outportAlgorithm ?
dip-sip Use sip-dip algorithm for outport determination
da-sa Use da-sa algorithm for outport determination
round-robin Use round-robin algorithm for outport determination
Matrix N3 Platinum(su)->set lacp outportAlgorithm round-robin
Matrix N3 Platinum(su)->

Hence in accordance with the Mode set on the switch we can set the mode in the Linux
After doing this the LAG groups present will use the round-robin algorithm for flow distrbution.
Remember this is the global configuration which will cause change in algorithm of all LAG ports present.
By default the dip-sip algorithm is configured in the Enterasys switches.

Cisco :
On the Cisco Catalyst Switches, the port-channel can be used in LACP mode for the operation.
The default Load-balancing method used is src-mac (Source MAC Address).
Cisco allows us to perform the dry-run of the algoritm implemented using the test command.
I have all interfaces configured in the LACP Mode (Not in PAgP).

To check what is the current algorithm
Cisco#sh etherchannel load-balance
EtherChannel Load-Balancing Configuration:
src-mac
EtherChannel Load-Balancing Addresses Used Per-Protocol:
Non-IP: Source MAC address
IPv4: Source MAC address
IPv6: Source MAC address
Cisco#

To test the Etherchannel Algorithm used
Cisco#test etherchannel load-balance interface port-channel 1 mac 00:18:17:F1:F9:C4 E4:9F:16:C5:11:56
Would select Gi1/0/1 of Po1
Cisco#

In IP based we can use the IP address to test the etherchannel.
To see the Ether-channel algorithm present
Cisco(config)#port-channel load-balance ?
dst-ip Dst IP Addr
dst-mac Dst Mac Addr
src-dst-ip Src XOR Dst IP Addr
src-dst-mac Src XOR Dst Mac Addr
src-ip Src IP Addr
src-mac Src Mac Addr
Cisco(config)#port-channel load-balance

Here we can see that there is the src-dst-ip & src-dst-mac which are used for inducing additional randomization using the XOR logical operation present.

Hence the load-balancing can be done using the Destination IP address or Source IP address, same goes for the MAC addresses.

To set the New Algorithm
Cisco(config)#port-channel load-balance dst-mac
Cisco(config)#

Now the Load-balancing will happen through the Destination-Mac Address.I will do some more research on this and update the post.

Intel 530 Series SSD Review

Intel launched the SSD 530 series as a progressive update on their SSD 520 line, moving away from the 25nm NAND flash and incorporating new SandForce silicon with 20nm flash for more efficient power consumption. The 530 series also consolidates Intel's various form factors which previously carried different model numbers.14 new products don the SSD 530 brand in a variety of different form factors; standard 2.5", mSATA and M.2. As was the case with their previous series, Intel has optimized the SandForce firmware to deliver a combination of performance and reliability.


Every Intel 530 SSD is quoted to have a maximum read speed of 540 MB/s and a write speed of 490 MB/s. With those performance numbers-- a tad lower than other SandForce-based SSDs--it’s clear that Intel’s new 530 line is catered towards a more mainstream consumer base rather than for the maximum possible transfer rates. Additionally, the maximum 4k random IOPS is 41,000 and 80,000 for reading and writing respectively. The Intel SSD 530 Series also offers key features such as Advanced Encryption Standard (AES) 256-bit Encryption to protect user data, End-to-End Data Protection, and Data Compression to help improve performance and endurance by automatically compressing information sent to the SSD.

The M.2 SSDs, mSATA and 2.5-models all use the Serial ATA 600 interface. The 2.5-inch version comes in 80GB, 120GB, 180GB, 240GB, 360GB and 480GB capacities. The mSATA and M.2 models are limited to in 80GB, 120GB, 180GB and 360GB. All of the Intel 530 SSDs ship with a five-year warranty. We are reviewing the 240GB 2.5” 7mm unit.

Intel SSD 530 SATA Specifications:
  • Capacities:
    • 80GB
    • 120GB
    • 180GB
    • 240GB
    • 360GB
    • 480GB
  • Performance
    • Sustained Sequential Read: up to 540MB/s
    • Sustained Sequential Write: up to 490MB/s
    • Random 4 KB Reads: up to 41,000 IOPS
    • Random 4 KB Writes: up to 80,000 IOPS
  • Components:
    • Intel 20 nm MLC NAND Flash Memory
    • SandForce SF-2200 Controller
  • AES 256-bit Encryption
  • Form Factors: 2.5-inch
  • Thickness: 7 mm
  • Weight: Up to 78 grams
  • Operating: 0C to 70C
  • Uncorrectable Bit Error Rate (UBER): <1 data-blogger-escaped-1016="" data-blogger-escaped-bits="" data-blogger-escaped-br="" data-blogger-escaped-per="" data-blogger-escaped-read="" data-blogger-escaped-sector=""> Mean Time Between Failure (MTBF): 1,200,000 hours
  • Warranty: 5 Years
    Design and Build

    One of the small things about the new 530 series is that it appears Intel is now taking the design of its consumer-branded SSDs up a notch. As such, the Intel 530 240GB has a very nice, modern look to it in terms of design with its silver colored all metal enclosure, with a dash of color with the faux circuit board sticker.

    Similar to previous Intel SSDs sharing the same case design, its 7mm z-height makes it compatible with thinner notebook designs and other systems needing the smaller form factor.


    Looking at the connectors, we see the standard power and Serial ATA connectors. This drive is SATA3 (6G) and is backwards compatible with SATA2 as well; however, the bandwidth limitation would be capped to approximately 270 MB/sec with SATA2, which is still much faster than HDDs.


    Under the hood, we will see that the Intel 530 makes use of Intel (Micron) 20nm MLC written NAND as well as a cross Intel/LSI-branded SandForce controller.


    The bottom side of the circuit board includes 8 additional NAND packages, making the total sixteen.

    Consumer Synthetic Benchmarks

    All consumer SSD benchmarks are conducted with the mid-range StorageReview Consumer Testing Platform. The comparables used for the review below include:
    • Crucial M500 (480GB, Marvell 9187, Micron 20nm MLC NAND, SATA)
    • OCZ Vector (256GB, Indilinx IDX500M00-BC Barefoot 3, 25nm MLC NAND, SATA)
    • Samsung SSD 840 EVO (250GB, 400MHz Samsung 3-core MCX controller, Samsung 1x nm Toggle NAND Flash, SATA)
    • Seagate 600 SSD (120GB, Link-a-Media LM87800, 19nm MLC NAND, SATA)
    • OCZ Vertex 150 SSD (240GB, Indilinx Barefoot 3 BF3-M10, 19nm MLC NAND, SATA)
    • Corsair Force LS (240GB, 19nm Toshiba MLC, SATA)
    To read more about the comparison of the benchmark testing with IOMeter please visit storagereview.

    Jan 15, 2015

    Free Web Directories for Building Backlinks

    Shortly after launching this blog I went on a marathon backlinks building session and successfully submitted http://www.pakitong.com to this 49 list of free web directories submission!

    Since then I’ve regularly updated this list to add more quality sites and remove anything that’s no longer free or has lapsed in quality. (The last update was on June 24, 2014).

    Sure, directory submissions are very VERY boring, but they’re totally worth doing!

    And submitting clambr.com to the free directories in this list was actually the first ever active link building exercise I did.

    I chose to do this first because it can take months to get your submissions approved.

    So after scraping the internet for free web directory lists I squeezed 76 potential candidates into an excel spreadsheet.

    Most of the lists I found from Google searches were either duplicates or very out of date. The most up-to-date web directory list was one I found later just as I was finishing up submitting to the below directories – Top 100 free directory list.

    Out of the 76 supposedly “FREE” directory submission sites I tried to submit to from my excel, 14/76 malfunctioned and 13/76 were not free at all! This left me with just 49 that had literally free options. Here they are:

    49 Fully Functioning Free Web Directories

    UPDATE: There are now 62 free directories in the list!

    Directory Name Directory URL DA
    Dmoz

    Scrub the Web

    Directory World

    So Much

    Jayde

    R Directory

    Dmoz.in.net

    T Section

    Free Website Directory

    Wwwi

    Vie Search

    1 Abc

    Business Seek

    Cipinet

    Directory My Link

    Directory Fire

    Pro Link Directory

    Pedsters Planet

    Amray

    Gain Web

    Link Book

    The Web Directory

    Scrabble Stop

    Submission 4u

    Suggest URL

    Elite Sites Directory

    Inteligentd

    Linkpedia

    1 Webs Directory

    9 Sites

    Synergy Directory

    Wikid Web

    247 Web Directory

    Pi Series

    PR3 Plus

    Nexus Directory

    The Net Directory

    Linkdir

    Best Free Websites

    Suggest Site

    Nipao

    Sighber Cafe

    Digg Directory

    10 Directory

    Vision Web Directory

    Xysyst

    SEO Free Links

    Dir4uk

    PR Web Link

    Royal Link Up

    Aditya Webs

    Directory Books

    Leading Link Directory

    Answer Spots

    SEO Up Link

    Directories.cf

    Good Useful Links

    Vision Web SEO

    UK Listingz

    Web Apps Directory

    Find Website

    Local Success
    dmoz.org

    scrubtheweb.com

    directoryworld.net

    somuch.com

    jayde.com

    rdirectory.net

    dmoz.in.net

    tsection.com

    freewebsitedirectory.com

    wwwi.co.uk

    viesearch.com

    1abc.org

    businessseek.biz

    cipinet.com

    directmylink.com

    directoryfire.com

    prolinkdirectory.com

    pedsters-planet.co.uk

    amray.com

    gainweb.org

    linkbook.pcgraphicsolutions.com

    the-web-directory.co.uk

    links.scrabblestop.com

    submission4u.com

    suggest-url.net

    elitesitesdirectory.com

    inteligentd.com

    linkpedia.net

    1websdirectory.com

    9sites.net

    synergy-directory.com

    wikidweb.com

    247webdirectory.com

    piseries.com

    pr3plus.com

    nexusdirectory.com

    the-net-directory.com

    linkdir.info

    bestfreewebsites.net

    suggestsite.net

    nipao.org

    sighbercafe.com

    diggdirectory.com

    10directory.com

    visionwebdirectory.com

    xysyst.net

    seofreelinks.com

    dir4uk.com

    prweblink.com

    royallinkup.com

    adityawebs.com

    directorybooks.com

    leadinglinkdirectory.com

    answerspots.com

    seouplink.com

    directories.cf

    good-useful-links.com

    visionwebseo.com

    uklistingz.co.uk

    webappsdirectory.com

    findwebsite.net

    localsuccess.org
    96

    79

    74

    70

    68

    65

    65

    62

    60

    58

    58

    57

    53

    51

    51

    50

    50

    50

    49

    49

    49

    49

    47

    47

    46

    45

    45

    45

    44

    44

    43

    43

    42

    41

    41

    39

    39

    35

    34

    34

    33

    33

    33

    32

    32

    31

    29

    28

    27

    27

    27

    26

    25

    25

    25

    25

    23

    23

    22

    21

    21

    20

    I hope this list is helpful to your own backlink building efforts :)

    Jan 12, 2015

    TP-Link TL-WR710N travel router review

    TP-Link’s TL-WR710N travel router is very similar to Netgear’s PR2000 Trek, but in a slightly smaller form factor. Like the Trek, it can plug straight into an electrical socket, it has a USB 2.0 Type A port for sharing storage, and it has two ethernet ports. Unlike the Trek, it supports only one 150Mbps spatial stream in 802.11n mode (on the 2.4GHz frequency band); and since it doesn’t have a micro USB port, it must be plugged into a wall socket (unless you travel with an extension cord, I suppose).


    The TL-WR710N can operate in one of five modes. In wireless router mode, you connect the Pocket Router to a DSL or cable modem and clients connect to the router wirelessly or via an ethernet cable plugged into its LAN port. In wireless access-point mode, the router connects to a hardwired network that has Internet access and creates a wireless network that clients can join to reach the Internet. In this case, the second LAN port can support one hardwired client (or more if you connect an ethernet switch).

    "If I had to choose between this and Netgear's Trek, I’d go with the Trek."

    In WISP mode, the Pocket Router establishes a wireless connection to a Wi-Fi hotspot and shares that Internet access on its own wireless network (as well as through its LAN port). And in repeater mode, you can use the Pocket Router to extend the range of a wireless network by establishing a wireless connection to another wireless router or wireless access point. It will then rebroadcast that signal.


    The TL-WR710N comes with preconfigured security, with its default SSID, wireless password, and admin login and password printed on the side of the device (albeit in itty-bitty print). Like TP-Link’s TL-MR3040, the Pocket Router supports up to WPA/WPA2 security with a RADIUS server. A single unlabeled LED (on the side facing out when the router is plugged into a wall socket report) glows blue when the device is working properly and blinks when the device is booting or when an ethernet cable or USB device is connecting to the router. Not terribly informative. This router doesn’t have a WPS button, either, but it does support the feature in software.


    You can share files stored on a USB hard drive by plugging it into the Pocket Router, and TP-Link provides a media server for streaming music, video, and photos (but the server is not DLNA certified). You can also establish user accounts for file sharing, to restrict access and control whether users can read and write files or only read them.

    When I measured TCP throughput, the Pocket Router finished last overall. When the wireless client was in the same room as the router, separated by nine feet, I saw TCP throughput of just 15.4Mbps. When I moved the client to the kitchen, 20 feet away with one insulated wall in between, the Pocket Router’s throughput dropped only slightly, to 14.6 Mbps. As with TP-Link's other travel router, the TL-WR710N couldn't reach the MacBook Pro when I placed it in my home office, 65 feet from the router and separated by several insulated walls.

    Would I buy one?

    The TP-Link TL-MR3040 and the Netgear Trek PR2000 are street-priced about the same. The TP-Link’s user interface exposes more functions than the Netgear’s does, but the Netgear delivers much higher performance.

    Trendnet TEW-714TRU Pocket Wireless Router Review

    You have to wonder why there are so many types of electrical plugs in the world. It’s a pain in the neck that Trendnet remedies by providing three swappable plugs: One for use in the UK, one for use in the rest of Europe, and one for North America. Since most other countries use one of those three types of adapters, Trendnet figures its router can plug into 90 percent of the world’s electrical outlets.


    The router itself is relatively small; think of a slightly oversized wall wart. It plugs directly into an electrical outlet, much like the Netgear Trek and the TP-Link TL-WR710N. It can operate in one of three modes: As a wireless router connected to a DSL or cable modem or a hardwired network; in WISP mode, connected to a Wi-Fi hotspot; or as a repeater to extend the range of an existing wireless network. You slide a button on the side of the device to choose which mode you’d like it to operate in.


    The Trendnet has one ethernet port and two USB ports. One is a USB 2.0 Type A for sharing files stored on a connected storage device, but there is no media server onboard for streaming music, video, or photos.

    The second USB port is used only for charging small devices, such as a smartphone, tablet, or media player (it will deliver between 1.1- and 2.1 amps of power). There is no provision for using a 3G, 4G, or LTE USB modem with this router. An on/off button on the other side of the router lets you turn off the router’s network function without disabling its USB charging function.


    Like most of the other travel routers in this roundup, the TEW-714TRU supports the 802.11b/g/n standards, delivering one 150Mbps spatial stream on the 2.4GHz frequency band. The router comes from the factory preconfigured with a secure password, and its default SSID, network password, and admin login and password are printed on a label that gets hidden the moment you plug the router into the wall (because it’s on the same side as its prongs). A WPS (Wi-Fi Protected Setup) button on the side of the router simplifies the process of adding clients to its wireless network, but you’ll still need to know the admin login info to access its user interface.

    In terms of performance, the TEW-714TRU is way in the back of the pack, but it's faster than the last-place TP-Link TL-WR710N. At close range, with the client nine feet from the router and in the same room, it mustered TCP throughput of just 18.4Mbps. The first-place-finishing Netgear Trek PR2000 hit 87.7Mbps here. The Trendnet finished next to last when the client was in the kitchen, 20 feet from router and separated by one wall, delivering TCP throughput of 16.2Mbps.

    It wasn’t able to sustain a connection at all when I moved the client to my home office, which is 65 feet from the router and separated by several walls.

    Power tips uber alles?

    The TEW-714TRU’s power tips will benefit frequent world travelers, and its ability to charge mobile devices and share files from an attached USB storage device are attractive features. But this router’s Wi-Fi performance leaves a bit to be desired.

    Netgear Trek PR2000 Travel Router Review

    The Netgear Trek is extremely versatile and it delivers great speed and range, but it operates only on the 2.4GHz frequency band. It doesn’t have as many features as some of its competitors, but it is well designed and is largely self-contained. You’ll never need to worry about packing an AC adapter, because it’s built in—just swing its blades down and plug it into a nearby socket.


    If you want better range than what you’ll get from operating the router near the floor, you can plug a USB AC adapter into its micro USB port (but you’ll need to provide your own, since Netgear doesn’t put one in the box). You could also connect an external battery to the Trek’s micro USB port (here again, you’ll need to provide your own).


    "When you’re at home, you can configure the Trek as a wireless range extender."

    The Trek operates only on the 2.4GHz frequency band, supporting the 802.11b/g/n standards, but it supports two spatial streams in 802.11n mode to deliver maximum throughput of 300Mbps (most of its 802.11b/g/n competitors support only one spatial stream and therefore top out at 150Mbps).

    That and the aid of an articulated antenna helped the Trek deliver very high throughput—76.3Mbps—when the client was in my home office, 65 feet from the router and separated by several walls. That's more than three times faster than two of the other routers I tested, and the other three couldn’t reach the client at all.

    With the client at close range—nine feet from the router and in the same room—the Trek delivered TCP throughput of 87.7Mbps, and the Trek's performance actually ticked up slightly when I moved the MacBook Pro to the kitchen, 20 feet from the router and separated by one insulated wall.


    Pivoting the antenna upward—as I did for my tests—exposes four LEDs that light up to report power status, Internet access, Wi-Fi activity, and the presence of a USB storage device. It’s always nice to have visual affirmation instead of having to guess what’s going on.

    Netgear’s travel router has two ethernet ports, so you can connect one to a DSL modem, cable modem, or the ethernet connection in your hotel room, and support one wired network client with the other (or plug in a switch and support as many hardwired clients as the switch has ports). The Trek does not support a guest network, which means anyone who's granted access to your network will be able see all the other devices on your network—you can’t restrict them to just Internet access.

    You can also connect the Trek to a Wi-Fi hotspot and share a broadband connection that way. A WPS button would be a welcome addition in these scenarios; as it stands, you need either to log into the router’s user interface to initiate WPS pairing, or read the factory-assigned SSID and Wi-Fi password that’s printed on the router itself (assuming you didn’t change it). This is a minor inconvenience, but an inconvenience nonetheless.

    When you’re at home, you can configure the Trek as a wireless range extender to fill in dead spots, or as a wireless bridge to support clients such as older Smart TVs, Blu-ray players, or AV receivers that require a hardwired network connection. Just don’t forget to take it with you when you hit the road again.

    The Trek has one USB 2.0 Type A port that can be used to share a portable hard drive over your network. I much prefer Netgear’s Readyshare software for sharing files on a USB hard drive attached to the router. Using an SMB server, you can easily copy multiple files or entire folders over your network. The Trek also has an FTP server for sharing large files over the network or over the Internet.

    You can also use that USB port to charge another USB device, such as a smartphone or media player—when the router is plugged into power. Unlike the D-Link and TP-Link devices, however, the Trek does not support USB cellular modems (although Netgear’s website indicates that the model sold in China and Russia does).

    The Netgear Trek supports UPnP, but it doesn’t have a DLNA-certified media server. If you consider media streaming a critical feature, you might be happier with D-Link’s DIR-510L. But I don’t imagine that particular feature will be all that important to someone shopping for a travel router.

    D-Link DIR-510L Wi-Fi AC750 Travel Router Review

    The DIR-510L is a marvelous device that's capable of running on AC power using the provided adapter, or it can run on its own internal 4000mAh battery. And it has three USB ports, so it can share files stored on a USB hard drive and run on AC power at the same time. The router must be put into charging mode to charge anything (the USB port delivers up to one amp of power to an attached device).


    The DIR-510L is the first 802.11ac travel router.

    Most travel routers trail the market, supporting older standards and offering limited features. Few would say that about D-Link’s DIR-510L (or the Wi-Fi AC750, depending on which name you find easier to remember). This is the first travel router to support the 802.11ac standard, and it’s loaded with features.

    In case you’re wondering what AC750 means, it’s the industry’s fuzzy-math marketing speak for informing buyers that a router supports two 150Mbps spatial streams using the 802.11n standard, and one 433Mbps spatial stream using the 802.11ac standard (never mind that 150 + 150 + 433 add up to only 733).

    The DIR-510L is a dual-band router capable of running on the 2.4GHz frequency band in 802.11b/g/n mode, or on the 5GHz frequency band in 802.11a or 802.11ac mode. It has only one Ethernet port, so it can’t support a wired network, but it can operate as a wireless router connected to either a wired broadband connection, or as a wireless hotspot connected to a wireless broadband connection. Alternatively, you can share a 3G, 4G, or LTE wireless broadband connection with a wireless USB adapter and whichever cellular service you subscribe to.

    It has a Wi-Fi Protected Setup (WPS) button, which makes connecting clients super-easy (there’s no need to write down the SSID or WPA password). You should be aware, however, that the DIR-510L doesn’t come with any preset security. Don’t get in a hurry and forget to set that up, or anyone will be able to jump on your network. The DIR-510L supports guest networks on both the 2.4GHz and 5GHz frequency bands, enabling you to share Internet access with others without granting them access to the computers on your network.

    While feature-rich, the DIR-510L was not the fastest travel router I tested—at least not when I tested it with a Mac server and a Mac client. Netgear's 2.4GHz 802.11n router was faster than the D-Link both when the D-Link was operating as a 2.4GHz 802.11n router and when it was operating in 802.11ac mode on the 5GHz frequency band.


    When operating as an 802.11ac router, the D-Link DIR-510L delivered throughput of 59.8Mbps when the client was in the same room as the router, nine feet away. Throughput dropped marginally to 48.5Mbps when I moved the router into my kitchen, 20 feet from the router with one insulated wall in between. The D-Link couldn't connect to the MacBook Pro at all when I moved it to my home office, 65 feet away and separated by several insulated walls. Distance typically isn't a big problem with travel routers, unless you're trying to support several colleagues in adjacent hotel rooms.

    As you can see from the benchmark chart, the client had no problem connecting to the DIR-510L's 2.4GHz 802.11n network when the client was in my home office. I measured TCP throughput of 29.5Mbps in that scenario. At closer range, the D-Link delivered throughput of 42.3- and 43.1Mbps when the client was in the bedroom and kitchen respectively. But that's a far cry from the Netgear Trek's performance of 87.7-, 89.2-, and 76.3Mbps in the bedroom, kitchen, and home office respectively.

    The DIR-510L has an onboard DLNA media server for streaming music, photos, and video from an attached USB hard drive. D-Link’s SharePort app supports most of the typical file formats: bmp, jpg, and png for photos; mp3, wav, and m4a for audio; mp4, mov, and m4v for video; as well as PDF and Microsoft Office document formats. Sadly, however, it does not support flac audio files. If you’re using a Mac, you can use D-Link’s SharePort Web Access to view directories of files on an attached drive. D-Link also offers SharePort apps for iOS and Android devices.

    The D-Link DIR-510L has nearly all the features you could want in a compact router, but it's not the top performer—at least not when paired with a MacBook. That title belongs to Negear's Trek PR2000. When I tested these routers with a Windows laptop, the results were just the opposite.

    Jan 10, 2015

    Free Download Sevida 1.7 Blogger Template

    Sevida is the premium responsive blog and magazine template for Blogger fans. This template shows you how cool and flexible Blogspot magazine template can be.


    We have brought for you Free download of Sevida theme v1.7 with following features:

    Free Download Sevida 1.7 Blogger Template link 1

    Sevida Blogger Template Features
    • Current version: 1.7
    • 100% Responsive.
    • Manual Featured Post Work with Image Widget(Slideshow) New
    • Lightweight Auto read-more support third party image and youtube (option make it slideshow) New
    • Ajax load more post
    • Ajax Page Navigation New *
    • Support Mega Menu New
    • Recent Post by Labels (10+ Post Type (Slider, Combine, Vertical, Horizontal, Gallery 1, Gallery 2, Simple, Slideshow) support Random)—Support ShortCode New *
    • Allow visitors increase / decrease text size and auto remember for future.
    • Support RTL Language New
    • Lightweight Version New

    Download Iconic One Pro Premium Wordpress Theme


    A theme for next generation of bloggers, it features a very simplistic design and is powered by our own lightweightThemonic Framework. Super fast loading time, ultra responsiveness and SEO features will make sure that your site is loved by the search engines. Iconic One make use of the live customizer options for an easy setup.

    Download Iconic One Pro v1.4.6 Premium Wordpress Theme link1

    Download Iconic One Pro v1.4.6 Premium Wordpress Theme link2


    How To Fix "FileZilla is running in kiosk mode"

    Recently I have just updated my FileZilla which I like so much that I chose it as the default FTP program on my OS X. However, after upgrading to FileZilla 3, I started seeing the following error message: FileZilla is running in kiosk mode. ‘Normal’ and ‘Account’ logontypes are not available in this mode.
    It took me a while to understand what “kiosk mode” exactly is and why I kept getting this alert. Here is what I learned and I hope sharing it will help those who are experiencing similar problems.

    What Is “kiosk mode” and Why?

    To understand FileZilla’s “kiosk mode”, you first need to know how FileZilla keeps FTP passwords. FileZilla saves all FTP passwords as plain text in a XML file named sitemanager.xml. On a Mac, you can find this file at: “~/.filezilla/sitemanager.xml”. Below is what the sitemanager.xml looks like.

    ?
    <Server>
        <Host>filezilla.org</Host>
        <Port>21</Port>
        <User>filezilla</User>
        <Pass>anyonecanseethis</Pass>
        <Logontype>1</Logontype>
    </Server>

    You can see the password “anyonecanseethis” is in clear text format. If someone gets a hold of this XML file, that person will have all your FTP passwords (not so good…). Disappointedly, FileZilla doesn’t have a built-in feature to securely store your FTP passwords in encrypted format.

    To avoid this security risk, FileZilla has added a new feature called “kiosk mode” since version 3.1.2-rc1 (2008-08-24). When running in “kiosk mode”, FileZilla will not save any passwords, instead you will be prompted to enter the password each time you’re connecting to the FTP server. This change has made FileZilla more secure but also brought inconvenience to users.

    Solutions

    You have 3 options if you don’t want to see the “FileZilla is running in kiosk mode.” error.

    Option 1: Disable the “kiosk mode”

    If you don’t care about FileZilla saving your passwords in clear-text format, you can disable the default “kiosk mode” (not recommended). After you turn off the “kiosk mode”, you will no longer getting the “FileZilla is running in kiosk mode” error. To disable “kiosk mode”, go to Preferences=>Interface, under “Behavior”, uncheck “Do not save passwords”.


    Option 2: Stick to “kiosk mode”

    “Kiosk mode” was added to FileZilla to enhance its security. Though inconvenient, it is safter than having passwords saved in a XML file which is human readable. Instead of turning off this feature, you should start using it and getting used to it. But if you’re managing a lot of FTP sites (eg: over 50), this is not a viable solution. You may need to use another application (maybe lastpass?) to store all your FTP credentials and then copy the passwords into FileZilla each time you use it; That’s a lot of work.

    Option 3: Find an alternative to FileZilla

    The last option is simply using a different FTP program. I found Cyberduck is extremely easy to use and is packed with many useful features. It stores your FTP passwords using the system’s Keychain App so your FTP passwords are encrypted. This is a lot safer than keeping the unencrypted passwords in a plain XML file meanwhile you dont’ have to type in the password yourself every time.

    Summary

    Option 3 worked best for me because I am managing large numbers of ftp sites. Though I like FileZilla very much, until FileZilla provides a secure password manager, I will stick with other FTP clients for now.

    Jan 9, 2015

    Uniregistry Now Accepts Paypal As A Payment Option

    Cayman Islands based registrar Uniregistry announced that it now accepts Paypal as a payment option. Uniregistry is a registrar owned by domain name investor Frank Schilling.

    Not being able to pay by Paypal was a deal breaker for me and now that it is resolved, I am ready to try out Uniregistry. So now you can pay by Paypal besides using a wire transfer or a credit card.

    There are 3 easy steps to connect PayPal to your Uniregistry purchases:
    • Before processing your payment, click on the 'Change' button located next to your Payment Profile.
    • Choose PayPal as your payment profile.
    • Create your payment profile & you're on your way!

    How To Buy Domain Name With Unverified PayPal

    Most teen bloggers start blogging with sub-domain like '.blogspot' or '.wordpress' but as they move on and get lot of viewers they likw to get a domain name. Well most teens don't have credit card like me but what they have is Paypal account which can help a lot. There are many sites to buy domain ex: Godaddy and they also accept PayPal but they only accept verified PayPal account. 

    What is a verified PayPal account ???

    Account that are linked with any credit card or any bank account is known as a verified account.

    What is a Unverified account ???

    Well the answer is simple if you account is not linked with any bank account or credit card its an unverified account. 

    How To Buy Domain Name With Unverified PayPal ?

    All the popular sites that sell domain names only accept verified Paypal account which is a very big problem. But there is one site that sell domain name and accept Unverified PayPal account. Namecheap.com the only domain registrar that accept unverified Paypal account.  They will accept all PayPal account Verified and Unverified. Now this Site helped lot and lot of teens. This site is also voted best by life hacker.

    There is another site that you can buy domain name with unverified Paypal Account its www.Name.com Now many people bought from this site so you can be sure that it will work. Try this one over Namecheap as more people bought from here.

    How to create and extract zip, tar, tar.gz and tar.bz2 files in Linux

    Data compression has been extremely useful to us over the years. Whether its a zip file containing images to be sent in a mail or a compressed data backup stored on a server, we use data compression to save valuable hard drive space or to make the downloading of files easier. There are compression formats out there which allow us to sometimes compress our data by 60% or more. I’ll run you through using some of these formats to compress and decompress files and directories on a Linux machine. We’ll cover the basic usage of zip, tar, tar.gz and the tar.bz2 formats. These are some of the most popular formats for compression used on Linux machines.

    Before we delve into the usage of the formats I’d like to share some of my experience using the various formats of archiving. I’m talking about only a few data compression formats here, and there are many more out there. I’ve realized that I need two or three formats of compression that I’m comfortable using, and stick to them. The zip format is definitely one of them. This is because zip has become the de-facto standard choice for data compression, and it works on Windows as well. I use the zip format for files that I might need to share with Windows users. I like to use the tar.gz format for files that I would only use on my Mac and Linux machines.

    ZIP

    Zip is probably the most commonly used archiving format out there today. Its biggest advantage is the fact that it is available on all operating system platforms such as Linux, Windows, and Mac OS, and generally supported out of the box. The downside of the zip format is that it does not offer the best level of compression. Tar.gz and tar.bz2 are far superior in that respect. Let’s move on to usage now.

    To compress a directory with zip do the following:

    # zip -r archive_name.zip directory_to_compress

    Here’s how you extract a zip archive:

    # unzip archive_name.zip

    TAR

    Tar is a very commonly used archiving format on Linux systems. The advantage with tar is that it consumes very little time and CPU to compress files, but the compression isn’t very much either. Tar is probably the Linux/UNIX version of zip – quick and dirty. Here’s how you compress a directory:

    # tar -cvf archive_name.tar directory_to_compress

    And to extract the archive:

    # tar -xvf archive_name.tar.gz

    This will extract the files in the archive_name.tar archive in the current directory. Like with the tar format you can optionally extract the files to a different directory:

    # tar -xvf archive_name.tar -C /tmp/extract_here/

    TAR.GZ

    This format is my weapon of choice for most compression. It gives very good compression while not utilizing too much of the CPU while it is compressing the data. To compress a directory use the following syntax:

    # tar -zcvf archive_name.tar.gz directory_to_compress

    To decompress an archive use the following syntax:

    # tar -zxvf archive_name.tar.gz

    This will extract the files in the archive_name.tar.gz archive in the current directory. Like with the tar format you can optionally extract the files to a different directory:

    # tar -zxvf archive_name.tar.gz -C /tmp/extract_here/

    TAR.BZ2

    This format has the best level of compression among all of the formats I’ve mentioned here. But this comes at a cost – in time and in CPU. Here’s how you compress a directory using tar.bz2:

    # tar -jcvf archive_name.tar.bz2 directory_to_compress

    This will extract the files in the archive_name.tar.bz2 archive in the current directory. To extract the files to a different directory use:

    # tar -jxvf archive_name.tar.bz2 -C /tmp/extract_here/

    Data compression is very handy particularly for backups. So if you have a shell script that takes a backup of your files on a regular basis you should think about using one of the compression formats you learned about here to shrink your backup size.

    Over time you will realize that there is a trade-off between the level of compression and the the time and CPU taken to compress. You will learn to judge where you need a quick but less effective compression, and when you need the compression to be of a high level and you can afford to wait a little while longer.

    Jan 8, 2015

    How To Point Your Domain To 000Webhost With IP Address Other Than NS

    When you create a free host account on 000Webhost, you are requested to add their Name servers into your domain DNS settings and which are usually ns01.000webhost.com and ns02.000webhost.com after which you can be able to use all of the services provided to you including but not limited to File Transfer Protocol access, Website builder, File manager, emails and all others. While Name servers are believed to be the best option when it comes to pointing your domain name to your host including 000webhost, there are times when one would prefer to leave his or her domain registrar name-servers and instead use the hosts Internet Protocol (IP) addresses for one reason or the other according to ones needs.

    When I first joined 000webhost, all I knew was the fact the the world’s popular free hosting provider supported only nameservers, and which was wrong since of recently, I did make an IP address option on one of my testing website and every thing looked wow since my website was able to propagate within only a few minutes as opposed to the estimated waiting time or between 24 – 72 hours and that is why in this post, I am sharing with you how to exactly point your newly purchased or old domain name to 000webhost without tampering with your registrar’s name severs but rather using the the IP address which you copy from your 000webhost control panel.

    And just like you can see in the image above, the message is prompting you to point your domain name to your nameservers and in order to point your domain using an IP address, follow the simple procedures below.

    1. Log in to your 000Webhost account and open settings on your newly added domain name.


    2. On your right hand side under account information and below Server Name and copy the IP address as you see in picture below.


    3. Now log in to your Domain Registrar and modify your A records addresses as seen in below picture.


    You should the IP address with your own unique IP you copied from your host. When you are done, you should give it a few minutes and check the propagation status of your domain. You can use the DNS propagation tool by visiting www.whatsmydns.net.