Showing posts sorted by relevance for query router. Sort by date Show all posts

Mar 20, 2013

L7-N-R2000 TM Unifi Router So Weak Wireless

The L7-N-R2000 aka DIR-614 is a wireless N router substitute to D-Link DIR-615 by TM for Unifi subscribers whether it is a customize firmware or alike supplied by L7 Networks a company base in Taiwan who's products are available to corporations, e-businesses, web hosting companies and service providers. Its partners include hardware manufacturers, OEMs, distributors such as D-Link.


The L7-N-R2000 is a wireless N router aka DIR-614 the problem with this device is the wireless connectivity is so weak, according to LowYat forumer FlamingYu this router will always fail its wireless connectivity during night time.
Which router should I get for Unifi? Trying to replace the TM router.
Currently using the router provided by TM, L7 Networks L7-N-R2000.

1) And it is normal that wireless is weak at night?
Either the router lousy or . . .?

2) Does running Hypptv slow down connectivity?

Thanks.

The best remedy to the wireless N router L7-N-R2000 aka DIR-614 provided by TM for Unifi subscriber user is to re-flashed this with DD-Wrt, OpenWrt or Tomato by Shibby firmware if you do not want to spend on buying another wireless N router.

Aug 27, 2015

Any Router Should Work with Unifi ONU/BTU Modem

Method to use any router with unifi (IPTV-compatible) for ZTE ZXDSL 931Dll (VDSL Modem)


Actually this concept is the same with It’s for vdsl modem brand Huawei HG655a. But, my tutorial is for vdsl modem ZTE ZXDSL 931Dll.

Unifi Standard Installation

500 = vlan data (internet)
600 = vlan IPTV

Problem

1. I want to use DD-WRT in my Dlink DIR-615
2. Using DD-WRT, we can not use IPTV anymore.


Solution


1. Plug IPTV cable to ZTE ZXDSL 931Dll (VDSL Modem)
2. Put static IP 192.168.1.2 and subnet 255.255.255.0 in your PC
3. Plug the cable to LAN2 port of ZTE ZXDSL 931Dll
4. Open browser and go to

username: admin
password: hs5711Bbvl

5. Go to Network -> WAN -> Port Binding


Go to Bridge_PTM_500_0 at the dropdown list. Tick LAN4. Click submit.

6. Go to Network -> WAN -> VLAN Trunk


Choose LAN1 at the dropdown list.
Choose 2 or 0 for Supported VLAN number. Dont choose 600 for VLAN ID.

Choose 600 at the PVID dropdown list
Click Submit.

7. Go to Network -> WAN -> VLAN Trunk. You can choose method 7a or method 7b. I recommend you follow step 7a because it is easier and less work to do.

Method 7 a) Added this Method for those router that are not capable on VLAN-tagging.

Even though you have a VLAN tagging capable router, you do not have to tag your WAN port with VLAN if you use this method. This works for all routers including not-VLAN-tagging capable router like Streamyx router. Thank to the this blog. You just setup normal PPPoE in your router.


Choose LAN4 at the dropdown list.
Tick Enable VLAN Trunk
First Supported VLAN number, insert value 0.
For PVID, choose 500.
Click Submit.

Method 7 b)

This method is not working with the routers that does not have VLAN tagging capability. This only works for VLAN tagging capable router. You have to tag VLAN500 and setup PPPoE in your router. That’s why i cross it.


Choose LAN4 at the dropdown list.
Tick Enable VLAN Trunk
First Supported VLAN number, insert value 1.
For VLAN ID1, choose 500.
Click Submit.

8. Plug STB cable to LAN1 port of ZTE, After that Dlink DIR615 cable to LAN4 ZTE. After that reboot all the equipment.

After that, you can use any router with your unifi. If you want to use DD-WRT firmware you can follow this tutorial, _guide.php (Ignore VLAN tagging step if you use method 7a).

All images posted in this article and ideas are not mine it belongs to azim references found at the following sites.

Mar 14, 2013

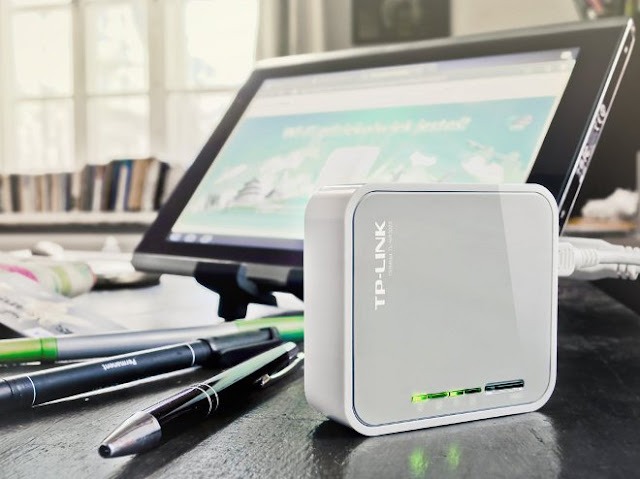
TP-Link TL-MR3020 3G/3.75G Wireless N Review

This is just my personal review and hands on to TP-Link TL-MR3020 3G/3.75G Wireless N Review. Recently, I had a situation which I need to solve and that is my mum’s place need internet connection but at the same time, a simple solution is required instead of the big bulky router with cables running all over setup.


My mum is a recently converted internet user. She had no previous computer knowledge thus she went for a basic computer cum internet course as well as the most advance Email communication course at the local community center. As she is still very much a new computer user, all her laptop setup and internet connections is done by yours truly.

But as I am moving out in the next couple of weeks, I am migrating my internet connection and all the infrastructure including my Aztech Homeplugs therefore, I was on the look out for an easy simple solution that still works on Ethernet cable and requires nothing more than 3 steps. With some initial configuration of the device by me, the 3 step usage solution is no longer a dream but a reality.


TP Link 3G/3.75G router is really simple to use. Moreover, it has all the features of a full fledged router such as Wireless N, Mac filtering, firewall rules, Ethernet port (only 1) and anything else you could have think of in a normal wireless N broadband ADSL router. Just that this router runs its internet connection via a mobile broadband dongle.


It comes with microUSB (for power via a separate power adapter or USB of the laptop), Ethernet port (for connecting the Ethernet cable to the Laptop/PC if you do not like to use wireless) as well as a USB port (for the connection of USB Broadband Mobile dongle).

Initial configuration

The configuration requires you to plug in the USB mobile broadband dongle and the model will be automatically detected by the router. Thereafter, you need to continue with the set up by choosing the country you are in as well as choosing the service provider such as Vodafone, Singtel, M1, etc. (Remember to choose Connect Automatically option)


After the set up is done, you will notice that the LED light on the dongle should be lighted up in solid colour. And the router’s Internet symbol should be lighted in solid yellowish green color too.

This indicates that the internet connection is establish.

Click on Status page and you will see that the 3G/3.75G signal strength as well as other data such as packet up and packet down.

You can try out the internet connection via your trusty usual browser such as IE, Firefox, Chrome or Safari.

Experience

The experience on setting up, configuring, using and sharing the internet connection is really a breeze. I do not see much of an issue except that it took a couple of mins to detect the model of the USB Mobile broadband dongle.

Even if the USB Mobile broadband dongle that you have is not detected automatically by the router, you could try and download the list via TP-Link website and update your router.

I have done some test on the heat dissipation on this mobile device and found it to be acceptable. Not hot but with a slight warmth (good for a cold winter night) though the mobile broadband dongle is abit more warm than the router but thats quite usual.

During this test, i was using a USB Mobile broadband dongle by Huawei ( Model – XXXXX ).

Overall, the experience on setting this device up was pleasant and simple enough for a layman.

Price and availability

This device cost SGD$49 and it is available at computer stores such as Challenger. You can check with your local distributor for more information.

Suitability of device

There are numerous uses for this device such as an ad-hoc internet connection sharing or even personal home use for those who do not want to have bulky cabling in their rented apartments. I would like to point out that it should not be use for latency critical applications such as online Multi-player games or First Person shooting games.

Feb 16, 2013

ZTE MF91 4G LTE Pocket WiFi Router Review

As the top telecom equipment supplier in China, ZTE is leading the 4G LTE technology. And we are glad to see ZTE release one new 4G LTE Router, in real, it’s a mobile pocket WiFi Router. The model Number is ZTE MF91. It’s attractive at the first glance. We can’t wait to know more about this new gadget.


ZTE MF91 4G LTE Pocket WiFi Router can be the fastest Wi-Fi devices for Internet access. The speeds that can be achieved are impressive up to 100 Mbps download and 50 Mbps upload speed on LTE FDD network. The ZTE MF91 is thus the fastest mobile router MiFi available now on the market.

The MF91 4G LTE Mobile Hotspot supports up to 10 simultaneous users. This means that with the MF100 along with 9 other friends can enjoy fast internet. The ZTE MF91 supports all WiFi devices like the Apple iPad, iPod, iPhone, Samsung Galaxy and more.

The ZTE MF91 supports the following modern networks such as 4G LTE FDD 2600/1800 MHz, HSPA +, HSDPA, HSUPA 850/2100MHz on the 3G UMTS (WCDMA) network, but also works on the old 2G network (850/900/1800 / 1900 MHz).

The ZTE MF91 comes in a black color and has an impressive industrial design. The OLED display shows the signal type, signal strength, battery status, Wi-Fi mode and more. The ZTE MF91 has an external antenna port to amplify the signal. The antenna is sold separately.

The ZTE MF91 uses 802.11b/g/n Wi-Fi connection standard that currently belongs to the fastest. In the standby mode, the 2300 mAh battery to about 100 hours. In active mode is up to 6 hours.

The MF91 has a memory card slot for MicroSD / MicroSDHC memory cards (up to 32GB). A new interesting feature of this Router MiFi is the “Security Mode” that protects users from unauthorized connections.

ZTE MF91 Specifications:
  • Unlocked with ZTE logo.
  • 1.4 “OLED Display
  • Up to 10 Wi-Fi devices simultaneously.
  • Integrated UMTS and WLAN “High Gain” antenna.
  • Download Speed 100 Mbps.
  • Upload speed 50 Mbps.
  • 4G Network LTE-FDD-1800/2600 MHz
  • Network 3G-850/2100MHz and 2G-850/900/1800/1900 MHz.
  • Obtain worldwide LTE / UMTS / WCDMA and EDGE / GPRS / GSM networks.
  • Wifi 802.11 b / g / n.
  • MicroSD card slot max 32GB.
  • Battery 2300 mAh Li-Ion.
  • Dimensions: 100x58x15, 9 mm
  • 2x External antenna connector(TS 9 connector)
  • Warranty 12 months.
Here is the specification in PDF: ZTE MF91 4G LTE Mobile Hotspot

In the package box:
  • ZTE MF91 MiFi Router
  • USB Cable
  • Battery
  • Adapter
  • Manual
Some user may concern about comparion with HUAWEI E589 4G LTE Pocket WiFi, actually, per our testing, they are both new 4G LTE devices of revolution. HUAWEI E589 may be more powerful because it support more LTE bands, which means it support more LTE networks all over the world. Concerning the price, ZTE MF91 4G Router is a budget LTE router if the network in your country is compatible with it.

Actually, there are difference model of ZTE MF91 available at the same when ZTE MF91 come out. They incorporate different 4G LTE frequencies for different 4G LTE network, such as ZTE MF91T 4G Mobile WiFi is for TD-LTE network. And ZTE MF91S is also for LTE TDD network at 1900/2300/2600MHz.

Jul 1, 2011

Sun Cellular Huawei B200 Wireless Broadband

Previously I have a DSL connection which costs a big pile of cash on a monthly plan, it was like 1600Php my monthly bill and the package is a phone line and a 1Mbps speed DSL connection. So in other words I'm paying for both the DSL Cable + landline even if I am not using the phone just to avail a 1Mbps connection, and then there was Sun Cellular network.


Sun Cellular has offered me a cheap deal for an ISP (Internet Service Provider) their proposed wireless broadband next to the mini stick like thingy is the Huawei model B200 wireless broadband modem also at same serves as a router. It is similar to residential Gateway in contrast to wired while Huawei B200 it wirelessly if you connect to the ISP.

Whats new about this plan?
  • the Huawei B200 can act as a wireless router and at the same time your ISP modem
Whats it look like?
  • here is its interface for you if you haven't seen the model yet:

The Top Front View as you can see the Power button on the top, and the lights represents the connection details.


From the blue light that represents the wireless connection, the next green light is the signal strength of the router when its green it you can see its color as a pure green and if the signal is low it somehow changes to orange or yellow, the next is the blinking green light that represents the connectivity of the router from the internet with each info it sends or receive or you can just call it the received part on some few routers.

The back side top view has four different ports, from the black wired port is the antenna connection, next to it is the power cord (obviously it powers the router), and the yellow port is the RJ 45 connection slot and the last if for the telephone(landline) connection slot.


Router Cost?
  • router costs P1,500 you can pay over any Sun Cellular that offers this plan (this includes the antenna).
Plan Cost?
  • this plan is only P650 "MONTHLY" very cheap for a 1mbps right?
Whats the Speed?
  • you can hog all the 1mbps speed to you with this connection
  • you also have to take note of the signal strength on this one because it rely does rely on the signal strength of the ISP to ensure its connection speed.
Security?
  • like any other router you can set its security passwords for LAN connection or WIFI connection just punch in your default gateway I.P address and you can access the router.

Nov 12, 2013

SmartBro : How-To Setup Wireless Router with MyBro Green Packet OX230

I intend to write this article to help my guest blog reader/s and commenter/s to help them setup their SmartBro 4G WiMAX wireless broadband internet connection to extend wirelessly. The new product of SmartBro that is being reBranded to MyBro that uses Green Packet Technology from Malaysia CPEs such as DV235T for indoor and OX230 for outdoor unit with license frequency 2.3GHz. Whereas SmartBro Motorola Canopy antenna is a fixed wireless broadband internet connection obtain license frequency 5.7GHz LOS that soon to end of its life by Smart Telcos.

The OX230 is an outdoor unit built-in with antenna similar to Motorola Canopy except it is a 4G WiMAX wireless modem also serves as a router but lack of wireless LAN aka WiFi. It is not equip with VoIP port so there is no way of plugging in your POTS unlike the Huawei 4G WiMAX devices. It has only one (1) RJ45 port where you can plug your PC/Lappy likewise where the power inline to the cable with the use of PoE, this device that can be extended up to  90-100meters as long as there is conduit.


Here we go, the above screenshot of my battery operated portable wireless router  from TP-Link MR3040 it has a Standard AP (access point) this is the simplest aka Plug&Play, the easiest way to extend the MyBro OX230 with headache. If you don not have this kind of device that is capable as Standard AP then do not bother. Will take what is available in our garage, CD-R King WR-NET-018-CC this is the cheapest wireless router that we Pinoy loves to buy.


The second screenshot is CD-R King WR-NET-018-CC similar to the TP-Link they are both a wireless router, MR3040 has four operation mode while the WR-NET-018-CC don't have the other capabilities as the first one have more features.


What we do to make the  CD-R King WR-NET-018-CC act just like the Standard AP (MR3040), first we will be going to disable the DHCP Server mode likewise its no longer serves as a router but as a Standard Wireless Access Point only. Now we are going to plug the MyBro OX230 to any LAN port from 1-4 instead onto the WAN port. Automatically the CPE OX230 now will serves as the DHCP server any device will connect to CD-R King it will gives an IP address from 192.168.15.2 to 254.

On the other hand, if you wan to make the CD-R King WR-NET-018-CC (or any wireless router) act as wireless router AP that will works also with MyBro Green Packet OX230 still its possible. First you have to enable the DHCP Server mode, then plug the OX230 to WAN port. The Cons is that since OX230 has an IP address of 192.168.15.1/24 or has 253 host it will consume time routing the packets. Second on the other part of CD-R King wireless router that has also another IP address of 192.168.10.1/24 likewise has 253 host it will another consume additonal routing to the packets will prolong.

If you have any comment about your MyBro Abot Kaya internet having the same issue on extending your connection wirelessly feel free to leave message.

Mar 14, 2013

Robot project Wifi - Tortured TP-Link MR3020

I planned a robot controlled by wireless from a smartphone or a PC. The basis of this robot is a very economical router TP-Link MR3020.


But then, I have to connect to this router:
  • Where an arduino will be connected motors ( servos modified ) and sensors.
  • A basic webcam (Logitech CZ110).
At first I was thinking of adding a USB connector on the microprocessor has probably the router, as I had done some time ago on a Netgear router . But then, the microprocessor datasheet is not public and its "form factor" makes it very difficult to hack.

You say, a usb, enough for the webcam. Except that the router has only 4MB of flash memory which makes it impossible to add software like python and mjpeg-streamer. So add additional memory. To this add 2 possibilities: 1 MMC used with GPIO lines or 1 SD / USB-key. The GPIO lines are few (except to remove switches and LEDs) I opted for the USB drive and a μSD. I will also use two GPIO lines in I2C to communicate with the arduino.

I bought a USB hub STOREX 3€ to disassemble and retrieve its PCB. Unfortunately, the self-powered hub is not yet consumption of the camera + SD is very limited we will be remedied by plugging the power on the USB hub.


Come on, hop on the box apart is stuck. Only card interest. Power is useless in this project, we will put it aside for later.

The USB Hub
The power plug must be removed and the USB connectors to save space and weight.

USB Hub / Power
Reader μSD €3 is disassembled to easily access USB tracks. It is removed "properly" and then be re-assembled, the carcass of the USB is essential for the maintenance of the map μSD.

μSD reader
The reader can then be soldered directly to the USB hub still in the idea of ​​saving space.

The USB Hub
Then you can re-assemble the drive and stick it on the hub.

The hub and drive μSD
I damaged a few tracks by unsoldering the USB connectors. It must be said that €3, PCB is not worth much ... but it's still the epoxy and not of bakelite.

Now back on the router. To increase its scope quite small, we're going to add an external antenna. Simply remove the shunt in J4 and come weld the cable core antenna on the track next to the registration J4 (1) and the mass of the pad side (2).

External antenna J4
It is small and zooming have clearly seen my big blocks!

Connect the external antenna
Here is the result with the router in its original box.

External antenna and serial console
To avoid damage to the router, I have not unsoldered the USB port. I just soldered directly on the PCB son to connect to the hub. An iron shot and you can make the router to its original function. In addition, at this place, the place occupied by the connector does not bother me.

The camera is fitted with a new connection based barette divisible by 2.54.

The MR3020 his webcam and usb hub
That's it for hardware changes. Following concern research and GPIOs free soft part.

GPIO on the mode selection switch, flikr
Here for example a track. Rather than remove the LEDs that are useful, you can remove the switch mode selection that does not serve us. It will give us our 2 GPIO (1: GND, 2: GPIO 18 & 20) for i2c. But before doing that, I'll see if there is any other useful or useless GPIO bit like his cousin of TP-Link WR703N. - equinoxefr

Mar 10, 2013

D-Link DIR-615 DD-WRT Firmware Flashing


Here I want to share an example of a D-Link DIR-615 how to flash the popular alternative DD-WRT router firmware. Basically, you should bring some experience in dealing with firmware updates. One of the golden rules: If you are not absolutely sure of what you're doing, leave it! I extended countless router with DD-WRT. Rarely there are problems. To destruction, it is not gone too! Check out the tutorial at your leisure. If you need help at some point, just let me know.


First, we determine if the existing model is at all compatible. In this case it is a D-Link DIR-615 router. We get the best data on the nameplate: Important here is the hardware version.


By knowing the hardware version of the D-Link DIR-615  we may now proceed to DD-Wrt database router and enter the last three characters of our model.


Here we must take special care to choose the correct hardware version! An incorrect version can possibly transform the barely functioning router into a paperweight 1A, inshort we may bricked the device by loading the improper firmware to D-Link DIR-615 !


There is a special version (initial flashing) for flashing the DD-Wrt firmware. If there is such a version for your model, choose the smallest existing version (size) of the DD-Wrt firmware. Save the file, and then we go. Open the web interface of your router. In the model shown here, D-Link, select the item maintenance / firmware update.


Next, "Select file" to the point, we open the saved firmware file.


Then, Select the previously saved firmware file and press Open.


By clicking "Upload" the flash starts. During the flash process, you should leave the router alone. Connect. Example to any network cables or pull out what


You see, as long as the flash process is running, a status page.


During Falshvorgangs not the current should be separated! This could mean the demise of the router.

After the end of the flash process, there is a error message in the browser. The dd-wrt firmware used in the standard configuration a different IP range.


Now we can use the router by entering the default DD-Wrt IP address http://192.168.1.1. We are asked to change the user name and password. In this example, the username "admin" and "+? / M3in-75" the password (without the ""). Then click on "Change Password".

Dec 4, 2014

How-To Configure WISP on TP-Link MR3040

TP-Link is gaining its name as it has more and more likes this device because of low end price equipment likewise it has a good performance when it comes to wireless router this is because of the popular Atheros SoC chips that they are embedding to appliances. One of my favorite TP-Link product is TL-MT3040 its a portable 3G/4G wireless router equip with battery that is good when traveling to get hook your smartphone to the internet.

One of this feature that I like most is the WISP it stand for wireless internet service provider, in short the TL-MR3040 can act as WISP Client Router: In this mode, the device enables multiusers to share Internet from WISP. The LAN port devices share the same IP from WISP through Wireless port. While connecting to WISP, the Wireless port works as a WAN port at WISP Client Router mode. The ethernet port acts as a LAN port.


To begin with I am using an Aztech DSL605EW modem router built-in with WAP (wireless access point) aka WiFi this will act as my  WISP server, the configuration on this device is in Bridge Mode and WLAN also is able because my medium to hook to my TL-MR3040 is via wireless not wired.


Now, lets login to the TP-Link TL-MR3040 to get the quick setup, this is just a straight forward configuration like setting up your ordinary wireless router.


The quick setup will tell you how to configure the basic network parameters. Just follow the screenshot its simple, to continue, please click the Next button. To exit, please click the Exit button.


Then, will select from the option the WISP Client Router: In this mode, the device enables multiusers to share Internet from WISP. The LAN port devices share the same IP from WISP through Wireless port. While connecting to WISP, the Wireless port works as a WAN port at WISP Client Router mode. The ethernet port acts as a LAN port.
Note:
  • Some configurations, such as access point's SSID, BSSID, encryption's info, will lose after changing operation mode.
  • Some web pages will display abnormally before rebooting the device.

Next is the WAN Connection
  • PPPoE - If you have applied ADSL to realize Dial-up service, you should choose this type. Under this condition, you should fill in both the User Name and Password that the ISP supplied.

This goes your account given to by your ISP, your username and password input then click Next.


On this part instead the TL-Link TL-MR3040 hook to cable/LAN now our medium is wireless we will use the WiFi as our medium to connect to the ISP. Click the Survey button then select your WISP server the Aztech DSL605EW.


The MR3040 wireless router has just finish the setup and will now ask you to reboot.


After rebooting, login to TL-MR3040 verify that the status of your wireless connection is on Client and the state is on Run, this means that you are already connected to the WISP server.


If your ISP account is valid or you didn't type any error both the username and the password you may be able to connect to your ISP network. Finally, its now successful as you can see from the screenshot above. There only a few routers that supports the WISP protocol namely TL-Link, Tenda, MikroTik and the third party firmware such Openwrt and DD-Wrt. If you know other routers that support the WISP please don't hesitate let me know leave message on my comment. Enjoy!