Jan 15, 2014

How-To Read Embedded NAND Flash Chips

NAND flash chips are used in all sorts of electronics for storing information/firmware etc. If you are interested in trying to get the information out to study, then I may have something useful for you. This is how I read the flash chip without removing it from the device.


DISCLAIMER- Not an easy task, and not foolproof either. This procedure can be rough on both the device you are trying to read, and the reader used. NAND chip specs are also changing all the time, and so are card readers, so there is no real way of knowing if this pertains to “ALL” NAND Flash and “ALL” readers. This has been used successfully on Samsung small block flash using a Dazzle SmartMedia/xD reader.

First, you’ll need to get a Smartmedia/xD card reader. The reason for this is Smartmedia and xD flash cards are basically just NAND flash chips in a friendly, removable card. Other types of flash media also use NAND, but have a controller in them that handles the interfacing between the flash chip and the host, be it a camera, cell phone, card reader, etc. This controller gets in the way or reading data off embedded chips, because they are looking for partitions/files in a particular formats (FAT16 for example) that embedded flash rarely uses. Typically, we’d be trying to get the raw data off the embedded NAND to study.

Knowing that Smartmedia/xD cards are basically straight NAND chips, we can connect the card reader directly to the NAND chip by cross-referencing the chip pin out to Smartmedia/xD card reader. You can get the card pinouts here.
Note- These pin outs are for the cards themselves, not the readers.

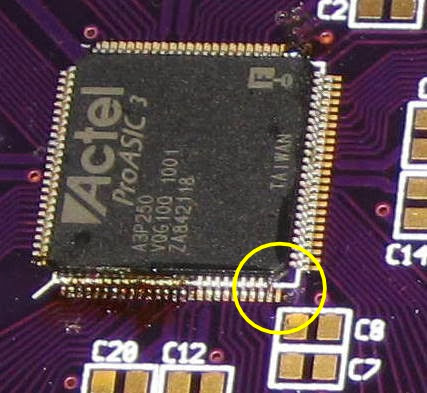
An example for wiring to a Smartmedia reader is pictured below. Pin one of the reader is at the top of the picture, and the pin out is as follows.

Pin 1 — Vcc (+)
Pin 2 — Vss (ground)
Pin 3 — I/O 5
Pin 4 — not used
Pin 5 — I/O 6
Pin 6 — I/O 4
Pin 7 — I/O 7
Pin 8 — I/O 3
Pin 9 — I/O 8
Pin 10 – I/O 2
Pin 11 – not used
Pin 12 – I/O 1
Pin 13 – not used
Pin 14 – WP
Pin 15 – RY/BY
Pin 16 – WE
Pin 17 – RE
Pin 18 – ALE
Pin 19 – CE
Pin 20 – CLE
Pin 21 – not used
Pin 22 – not used

The battery select is dependent on your NAND chips voltage (either 3.3 or 5 Volts) and the write-protect switch is used if needed.


Connecting the reader to the chip can be the hardest part. The chips I have done have all been TSOPs, which are surface-mount chips with .5mm pitch. Quite small! I have done it several different ways. First way was to use some 30 gauge Kynar (used for wire-wrapping), soldering a wire from each pin on the NAND chip to its corresponding pin on the reader. An old IDE hard drive cable can provide wire of a similar size. It was doable with an extremely fine-tipped soldering iron and plenty of patience, but was by no means easy. Depending on the device, you may be able to trace out some alternative points to solder to, instead of directly to the NAND chip. It gets pretty tight trying to solder to 4 of those tiny pins in a row without bridging anything with solder!

Another approach used some flexible ribbon cable. The wire in the cable had the same pitch as the chip, making it easier to keep all the wires aligned while soldering to NAND chip. A few places sell this cable, such as Mouser and Digikey, but you may also be able to scrounge some from an old DVD player or drive, or even possibly old CD drives. They are used to connect the laser assembly to the main board.


If you have some .5mm TSOP/TSSOP prototyping boards around, this can be the easiest. Cut down to size, and beveled where they will meet the chip, you can make a set of wedges that will solder up fairly easy. Just line them up, and drag some solder from the board down to the chip to solder in place. A little flux will help, but you won’t have to use any additional solder, just what is already on the prototype board. Once you are done, a little wiggle will free the board from the chip without damage. No need to desolder anything, either. The following pics should clarify this.

Once you have the NAND chip hooked up to your reader, you have to get the data off it. Leaving power to the device you are trying to read OFF (preferably Batteries out, unplugged, etc.), plug in your reader to you computer. Depending on your OS, you can get the data off a couple of ways.


Linux users can mount the card reader and use dd to dump an image of the Flash chip. The resulting image can the be studied with the hex editor of your choice.

For Windows, I used a product called OnBelay by Compuapps. A very similar (identical?) product is Recovery Manager by Vaiosoft. Both these will work the same way. The main screen has a list of drives it can access, choose the one that corresponds to your reader. The program probably won’t recognize the file structure of the flash, so it says “no media present” or something to that effect. Along the top of the screen are tabs, one of them is labeled “Tools”. When you click on that, you’ll have the option to back up your media. Press it and it will allow you to back up the chip to a specified folder. I also check the box to backup both used and unused space. The backup image is in .FMB format, which can be browsed with any hex editor and studied.

Hope this can be of use to someone!

via uC Hobby

Jan 7, 2014

MP3 Player Recovery and Hacking

Loading New Firmware:

The first step to loading new firmware into the MP3 player, or doing a firmware dump from the player, is to set the device into loader mode. In some cases, where the firmware is intact on the device, new firmware can be loaded without setting the device into loader mode.

There are a variety of ways to set the device into loader mode. The most definite, guaranteed to work method is to short a number of the I/O pins of the flash chip with the battery removed, while connecting the player to a free USB port. If the device has two flash chips, the I/O pins on the first chip (closest to the CPU) are the ones to short. While this method should work for pretty much any similar device, it can cause problems, especially if you short the wrong pins.


The safer method for forcing the device into loader mode is to hold down the R/V (recorder mode/volume control) button with the battery removed, while connecting the player to a free USB port.


When the player is plugged into a free USB port while in loader mode, a new device will be detected as "ALi USB 2.0 BOOT LOADER". The LCD and backlight will both not illuminate when this is successful.

Should neither method work in setting the player into loader mode, it is possible that the player itself is damaged, and it may not be possible to recover it.

Useful Software:

Finding software capable of loading firmware to this brand of player was quite challenging, given the similarities between ALi chipset players and S1MP3 players, and that many manufacturers were based in China. This is where the entries on the Polish forums on elektroda.pl were most useful. From rough translations, there were a few software packages that could read and write firmware images to the flash memory.


One such tool is a program called MPTool, which appears to be designed to be used as a factory firmware loader. With minimal documentation available, it is difficult to determine what all the features are used for without risking further damage to the player, however it would appear that the software can be used to change USB vendor and product IDs, reformat the flash memory used for storing MP3s, and changing the inbuilt serial number. This software does not seem to be able to create actual firmware images from scratch, and is not able to dump existing firmware from the device to disk.


A potentially more useful program is the M566x ISP tool. This program is capable of uploading firmware binaries to devices, and is also capable of dumping the current contents of the flash memory to disk. The function of particular interest is the "Save PM" function. This function appears to dump the complete operating system image to disk as a file called PM.bin. At the moment, there is no obvious way of converting this file back to a broken down set of binaries or Cabinet archive as required for loading into a device.

Before you can use the M566x ISP tool to dump firmware images, it is necessary to identify what type of flash memory is used in the player. In most cases this should be printed quite clearly on the flash chip itself, but if it has been rubbed off, or you do not want to open the case of the player, the "Auto ID" button will in most cases identify the type of flash memory used in the player. Clicking "OK" will start the firmware loading process, allowing you to select multiple binary files to be loaded as firmware. If there is a problem with any of these binaries, in most cases it will either crash the program, or cause the write process to fail. This does not seem to destroy the player, but as always be very careful when loading new firmware.


MPTool can be found in many different distributions of firmware updates for ALi chipset MP3 players, and under a wide variety of names. One of the more common names for the MPTool executable is "Factory4.exe". A quick hunt on Google will find many sites with this file, and a zipped barebones copy is available, although this does not include any firmware files. M566xISP (known as the M5661 ISP tool or M566x ISP tool) is considerably harder to find, but can be found within some firmware distributions, most notably within the firmware package of the Z-cyber Zling T-Nax. The tool itself is also available for download below, but again does not include firmware files for any player. If possible, it is best to download these files elsewhere, as the bandwidth of this server is very limited.

Want to help me maintain this server? Donate some BitCoins to: 1FZFrGTAdnQzUD9y5AkvqS6WY18m9vcMyH

MPTool.zip (485k)

M566xISP.zip (1354k)

The Firmware Itself:

In my case, it took many weeks of on-and-off searching to finally find a firmware image that was compatible with my device. Given the number of M566x based MP3 and MP4 devices out there on the market, it is very easy to find firmware images that may seem right, only to load them and find that the display and controls do not work. Eventually, I found a firmware set that did work for my player, a firmware package built for a Typhoon 1GB MP3 player (obviously another rebrand of the same device sold by Egoman and Yuraku). Within the firmware package for this MP3 player is a file called IEOA_FW16.13.11_060617.CAB. This file contains 94 small binary files, the structure of which are discussed in more depth later on.

While this firmware package did work, it did not have the original "Ministry of Sound" introduction screen which I had grown quite fond of. In order to recover it, I needed a copy of the firmware dumped from a working "Ministry of Sound" branded player of similar design, while the flash memory size was largely irrelevant, the device needed to have the same type of LCD and controls.

Fortunately, I was able to acquire a similar player from a friend who had purchased the 2GB version. Using the M566x ISP tool, I saved a copy of the PM from it to disk and loaded it up in a hex editor. Before I continue however, below is a brief discussion of what I have found out about the firmware files used by the loader software.

It would appear that single file firmware images used by MPTool are Microsoft Cabinet archives of a large number of binary files. Each binary filename starts with a number and usually has a limited text description following it, such as 000INIT.BIN, or 005PLAY.BIN. The number would appear to signify what order in which the overall firmware is to be assembled and where in the memory each section of code is to be stored. The name of the binary file itself after the initial three digits seems to be irrelevant other than describing the purpose of each to developers, and is not stored in the overall firmware image when loaded into the player. The M566x ISP tool does not use Cabinet packed archives of these binary files when loading them into a device, rather it allows you to select the individual binary files for loading. Size of each of these binary files seems to play a role, as it is not possible to load a single large binary file, however the size of each of the binary files is able to be varied.

The saved PM.bin file appears to be a concatenated set of each of the binary files, each padded with some extra bytes which are often null.

From the various firmware files I had found and discovered not to work on my player, I noticed that in many cases the basic files such as (in some cases) 000INIT.BIN were very similar, despite the differences in the players, which meant that the original "Ministry of Sound" firmware loaded on the player must have had a similar structure to the Typhoon firmware that worked when loaded onto the player. It was possible to find the "Ministry Of Sound" introduction animation by finding the end and beginning of the surrounding binaries, which in this case were collections of strings. The data between the end of one string binary and the beginning of the next were copied to a new file, where the padding data was removed, then was loaded in with the working firmware image. - source

Jan 1, 2014

@Pakitong Paypal Donations, Thank You

A many many thanks to those who came to my Blog and donated for a cup of coffeebean at starbucks, I can not name you all guys or mentioned you one by one you, long live for you.


This just a few of screenshot taken recently, including last month this year 2014.


Again, I salute you all there is no reason for me to stop posting article on this little blog of your not mine. Guest readers you are all my inspiration on keep going. many many thanks!

Dec 31, 2013

Green Packet OX230 : How-To Unlock myBRO Plan 1299

My nephew myBRO Plan1299 will debut its first year this coming January 2014 since it has been installed by the SmartBro technician on the roof of my sister in-laws house here in our city. It came to my attention everytime I used the net on their residence that the Green Packet OX230 aka myBRO Plan1299 wireless broadband modem router is just left open to the public network and anybody can just manipulate the device by using the default username and password as "smart" without the quote. People from the outside can just sniff onto their CPE, it can also reboot remotely, restart and not only that but the worst thing is that intruder can just upload bad firmware that will bricked the 4G WiMAX wireless modem router resulting the myBRO Green Packet OX230 outdoor unit become unusable.


From the screenshot above this is the internal graphical user interface (gui) of the myBRO 4G WiMAX wireless broadband modem router. The Green Packet OX230 outdoor unit is using a customized Smart/PLDT firmware, the Main Menu are very limited for the subscribers this has been totally restricted from being altered such as the settings, configurations and most of all to protect the device from the users who has a lingerie mindset. Thanks for their concerned it is the Smart/PLDT ISPs advantages to their customer but the downside to their client is very negative.


Taking a look closely to the ports that has been exposed on to the public and here's the result. Port 22 is well known to SSH, 80 and 443 is for HTTP and HTTPS with same credential you can log onto this OX230 Green Packet outdoor unit aka myBRO. Wait! Another user account is guest that has same privilege that can also manipulate this device? Wow! The bad thing really is on port9000 is for Redboot> without any username and password Netizen who has dirtyhand can wipe out the entire flash memory of this CPE. Behold! Hopefully I can help you unlock your myBRO OX230 Green Packet.


The result of after unlocking my nephew 2Mbps myBRO Plan 1299 aka Green Packet OX230, you will noticed that comparing from the first screenshot above, the Main Menus are now all visible. There are no more restriction given, you can set you own settings, modify your configurations. You can now even personalized your own password and even your username is more than possible.


Problem with your myBRO OX230 outdoor unit 4G WiMAX wireless broadband modem router ports are being open to the public? Verily now you can close it, select which ports you wanted to be open.


Hopefully this thread will help you protect your myBRO Green Packet OX230 outdoor unit (ODU) being exploited anonymously. Feel free to comment  on my box, if you need my service this can be done remotely. Email me, my contact number is just on the right to the menu. Enjoy!

Dec 16, 2013

myBRO To Globe : How-To Configure Green Packet DV-235T

On my previous post I have written on How-To upgrade the myBRO DV-235T of Green Packet to the Stock Firmware. Today, I wanted to share to my beloved guest, commenters and visitors on How-To configure the Green Packet DV235T aka myBRO to be able to hook it to Globe network. This experiment is not an exploit or an ethical but only for Educational purposes only.


The myBRO DV235T Green Packet 4G WiMAX wireless modem router that is built-in with WLAN b/g that you can find on forums, online store, is a Smart/PLDT WiMAX CPE with customized firmware supplied by Green Packet Berhad, Malaysia the manufacturer.

Here's how to DIY, first you must have to update the myBRO DV-235T to the Green Packet stock firmware aka (web_update-2_3G-v2.10.14-g1.0.4-gp.tar), if you don't have the firmware, download it before you proceed to this guide. Once you have updated your myBRO to the stock firmware then you are now ready to do this stuff.


On your myBRO DV235T graphical user interface (gui) you will see the WiMAX Menu on  top of it, on the left Sub-Menu click the Scanner button to be able for you to edit/configure/input the Globe Telco 4G WiMAX ISP frequency just follow the screenshot above.


Next step is setting up the correct Username, Password and the Identity, this is just identical to Huawei 4G WiMAX wireless modem router CPE same thing you will do on this Authentication, except the issue here is the length of the Username character is limited to "maxlength=32". Meaning the generatedmacaddress@globelines.com.ph is not possible to be place or to be input on the given space provided. The trick to be able to expand the "maxlength=32", just point your mouse on your myBRO DV-235T gui then right-click you will be prompted with Inspect element (Q) by then you can now edit to what ever maxlength=?  you will wish as you have notice the above grabbed image. Hopefully you will now able to input your 34 character (generatedmacaddress@globelines.com.ph).


There you are, your generatedmacaddress@globelines.com.ph is now on its placed! On the below Option just tick the Auto Prepend Auto Mode and the Ignore Cert Verification. By the way you must not forget to click also the Apply button on every changes you have made to save your works.

Opps! we are not done yet, open your putty or telnet, you must use the this following command below to be successfully your myBRO DV-235T can enter the Globe Telco ISP network.

enable enter
router enter
wan mac (your mac address) enter
commit enter
exit enter
reboot enter


It only proves that myBRO DV-235T of Green Packet 4G WiMAX wireless broadband modem router CPE can be use on Globe Telco ISP. This tweaks can be found on Google, Forums and other popular blogs. Its not my intention to alter or deform this device, since the stock firmware can just be download anywhere and it is being seeded on different mirror sites don't flame on me about this stuff.

Feel free to use this article for your educational used, I do not guarantee or warranty if your device/CPE will get bricked. Enjoy!

Dec 15, 2013

FPGA-development card includes RAM, programmer

Claiming all the features necessary for developing reprogrammable-microcontroller applications, Domain Technologies recently announced a development card for Actel ProASIC3 FPGAs. Measuring only 2.4×1 in., the standard A3P-MRAM (magnetoresistive-random-access-memory)-1000 development card comes with an Actel A3P1000, 512 kbytes of 35-nsec nonvolatile MRAM, and an onboard device programmer. The high-speed MRAM device stores both programs and data, eliminating the need for flash-programming algorithms and boosting performance.


You perform all FPGA-device programming and software debugging of implemented microcontroller designs through the A3P-MRAM's built-in USB interface. The onboard device programmer is compatible with the STAPL (Standard Test and Programming Language) files generated by Actel’s Libero integrated development environment. You use the same onboard device programmer and mini-B USB interface for accessing the A3P-MRAM's onboard JTAG emulator and debugger.


The A3P-MRAM-1000 sells for $750 and is available from stock. For smaller development applications Domain Technologies offers a lower cost version with an installed Actel A3P250. The A3P-MRAM-250 costs $640. The company ships each unit with stand-alone FPGA-device programming software and a mini-B USB cable.

More infoe @ A3P-MRAM

InFeCtuS: Versatile Modchip for Xbox360, PS3, PS2 and Wii

The InFeCtuS modchip has been in development for some time already back in December 2006. It's a versatile modchip that can be used for lots of things. On Xbox360 you can read/write/patch the DVD flash firmware or it can act like a Globe360 or NME 1.2 (soon) DVD FW modchip.

From infectus.biz:
InFeCtuS is the first versatile modchip ever released in the market, created to work with many different consoles. InFeCtuS will give you access to so many features that it's impossible to describe them all today, some are still in development and more will come in the future, just stay tuned on www.infectus.biz
We developed this modchip with an OPEN concept, we use a CORE reprogrammable, a 512kb flash on board and an USB interface for the PC communication.


The hardware has a very HIGH QUALITY component design:
  • The core of INFECTUS is the new ACTEL ProASIC3 FAMILY, the new family after the famous APA075 used in the past in many PS2 projects.
  • We used a 512Kb parallel flash SSTSF040, with a high transfer rate and performance.
  • Finally, we have got a REAL USB2.0 processor. This high quality component can manage the communication between ACTEL and PC (mini usb connector).
  • All of the chip PLD/FLASH/USB parts are 100% reprogrammable via USB communication.
  • For security reasons, all of the applications stored in the flash are AES 128-bit encrypted, to protect our work against chinese market!
  • The project is produced in Europe with the last technology of BSDL testing.
Being InFeCtuS so versatile, we want to show you at least a little part of its features, ordered by console.

XBOX360 SUPPORT:
  • Allows to gain total access over the XBOX360 flash driver, so that you can read and write the internal flash of any X360 DVD READER in the market. Everything can be managed with a very simple and user friendly PC software.
  • FLASH ID realtime patching, your xbox360 cannot understand if there is any flash running other than the original one.
  • GLOBE MODCHIP 360 100% emulation including ON / OFF LED
  • NME 1.2 firmware emulation (at work 80% finished). Allow you to install the chip with few wires like NME.
PS3 SUPPORT:
  • The first work to be done is to allow our users to flash directly the PS3 BIOS by USB. So no more problem with firmwares, you can install everything you want, when you want. All the complications due to firmware versions that cannot be downgraded will not bother you anymore.
  • This solution will be released in the next 4 weeks!
  • Another new feature that we want to add is a REAL TIME patching of the firmware part that you want to be emulated from the chip. Being the 512Kb flash not enough to store a real dual firmware, we'll have to wait for the first hacked firmware to understand if a "realtime" patching will be possible. In case we won't be able to find more ideas, a new version of Infectus with a memory expantion bay will be released.
PS2 SUPPORT:
  • Complete O2 MODCHIP emulation 100% with all functionalities (www.o2mod.com) 
Included for FREE
REMEMBER THAT O2 MOD IS THE ONLY ONE IN THE MARKET WITH "DNAS PATCH" AVAIABLE!!! DNAS PATCH IS NECESSARY TO HAVEN'T PROBLEMS IN ONLINE GAMING

WII SUPPORT:
Of course this is a free "bonus" in this mod because, we know, most of You wouldn't install such a big and expensive chip on a WII, but being it free... it's a good chance!
  • WIIKEY / WIIFREE EMULATION: (under developement - 80% ready). This feature will allow you to play just everything you want on your WII.
SOFTWARE MANAGEMENT:

The possibility to manage the features using an easy software is one of the BIG advantages of this modchip solution!
  • WIZARD help for the users: you will simply follow software's instruction step by step, everyone would be able to install and manage the INFECTUS MOD.
  • When you will be ready to install INFECTUS on a DVD DRIVE 078 XBOX360 FIRMWARE, the software will assist you with a 100% automated extraction of the key and the patch of new firmware.
  • WIZARD configuration based on XML for an automatical update of last firmwares.
  • X360 FIRMWARE checksum, the software will tell you if you are actually using the correct firmware (this feature is only available in WIZARD procedure)
  • HELP section to allow an easy searching of X360 firmwares
Official Site: www.infectus.biz
Discuss this news item on our forums: forums.xbox-scene.com

Dec 14, 2013

MIPS-based eCosCentric Developer's Kit Now Available!

MIPS Technologies, Inc., a leading provider of industry-standard processor architectures and cores for digital home, networking and mobile applications, and eCosCentric Limited, the eCos and RedBoot experts, today announced that eCosCentric has ported its eCosPro® open source real-time operating system (RTOS) to the microMIPS™ instruction set architecture (ISA).

eCosCentric has also made available its eCosPro Developer’s Kit for the MIPS32® M14K™ and M14Kc™ cores, which are based on the microMIPS ISA. This builds on support for other MIPS cores already offered by eCosCentric.

With the robust, feature-rich and fully-supported eCosPro RTOS for the M14K and M14Kc cores, users can choose from a rich set of supported peripherals, network stacks and file systems. They can become productive quickly with the full Eclipse-based development environment that packages the RTOS. Since the eCosPro Developer’s Kits for MIPS cores were built and tested using standard MIPS reference designs, engineers can start building applications within a few minutes.

“The ecosystem of third party support for our microMIPS ISA and M14K cores continues to grow, and we are excited to offer our licensees who are designing products around these technologies access to the highly popular eCosPro RTOS. We are seeing interest in the combination of eCosPro and microMIPS among our customers for a range of cost-, speed- and resource-constrained applications,” said Art Swift, vice president of marketing and business development, MIPS Technologies.

According to Alex Schuilenburg, managing director/CEO at eCosCentric, “We are pleased to add to our existing support for MIPS cores by porting eCosPro to the microMIPS ISA. Existing eCos users will be able to migrate quickly to eCosPro on the new microMIPS architecture, leveraging their existing application and system design knowledge. They also have the assurance of guaranteed commercial support direct from the original designers of the RTOS.”

Availability

The eCosPro Developer’s Kit for the M14K and M14Kc cores and microMIPS on the SEAD™-3 reference board is available directly from eCosCentric, with packages of support to suit teams of varying sizes. eCosCentric can also tailor-build a run-time to meet customer requirements. Visit www.ecoscentric.com/ecospro.shtml, contact info@ecoscentric.com or visit stand #2319 at the Embedded Systems Conference – Silicon Valley 2011 for more information.

Where To Download Alcor Tools To Fix Fake USB Flash Drives

Recently SOSFakeFlash put out a call to people who managed to reprogramme a fake flash drive purchased from eBay. See Did You Manage to Reprogramme a Fake Flash Drive Bought on eBay? Contributions are starting to arrive. To determine your chip set see Repairing Counterfeit Flash Drives

carlton has contributed detailed information for Flash drives identified as having an Alcor Controller chip and the software files to assist you.

carlton October 30, 2008 at 23:56.

Where to download Alcor tools to fix fake USB flash drives

Directions:

1. Download & install

Alcor UFD Manufacture Programm (AU9386 V1.10)
To identify proper VID & PID (bottom left corner)

2. Download AlcorMP (080829) AU6981/AU6983/AU6986

OR

one of the other AlcorMP versions, according to your chipset.

3. Install Proper VID & PID with LoadDriver.exe

4. Low Level Format with AlcorMP.exe

Try each AlcorMP version until one recognizes your drive

Here is the drive that Carlton repaired:
My Results

Chipset:
Alcor au6983hl
SPECTEK FBNL52AHGK3WG-AT
memory is identical to
MT29F16G08MAA
VID 058F
PID 9381

16GB faulty drive becomes 4GB good drive
Carlton, rescued his drive from being a 16GB Frankenflash. It is now a good drive at it’s true capacity of 4GB.

Entire Alcor shared directory:

http://www.4shared.com/dir/10145698/9e4ada91/sharing.html

Link to each file:

http://www.4shared.com/file/69061840/5f8ec858/Alcor-AU9381-V1100.html
http://www.4shared.com/file/69061996/2817917/ALCOR-AU9386-V110.html
http://www.4shared.com/file/69061602/df72417a/ALCOR_AU9382_UFDTool.html
http://www.4shared.com/file/69061614/2f0ad50e/ALCOR_AU9385.html
http://www.4shared.com/file/69062234/880b0be/AlcorMP_080228__AU6984.html
http://www.4shared.com/file/69062341/3669b8c1/AlcorMP_080424__AlcorMP_AU698X.html
http://www.4shared.com/file/69062160/70dc3ebb/AlcorMP-080829.html
http://www.4shared.com/file/69062583/705fea53/AlcorMP-UFD-621.html
http://www.4shared.com/file/69062457/c35e3a30/AlcorMP_6_18.html
http://www.4shared.com/file/69060926/59c9c7b9/AlcorTools.html
http://www.4shared.com/file/69062670/6c88197f/AU6980-6981_v61504.html

Alternate download location, all above files in one RAR

http://www.zshare.net/download/50678688947a35ad/

Filelist:

Alcor-AU9381-V1.1.0.0.rar
ALCOR-AU9386-V1.10.rar
AlcorMP(08.02.28)_AU6984.rar
AlcorMP(080424)_AlcorMP_AU698X.rar
AlcorMP-080829.zip
AlcorMP-UFD-6.21.rar
AlcorMP_6_18.rar
AlcorTools.rar
ALCOR_AU9382_UFDTool.rar
ALCOR_AU9385.rar
AU6980-6981_v6.15.04.zip

We all thank Carlton for his efforts to assist other victims of fake flash who have determined they have an alcor based controller in their flash drive.

Note: in using any tools that do low level formats or reprogramming, there is always a risk of losing the drive. It is very important to be sure your drive has an alcor controller – using the wrong software can result in the drive becoming unusable. So proceed with care on your rescue mission. You should consider rescue if you are unable to reclaim your money from a fake flash seller.

If you have suffered a triple cheat:

1. victimized by an eBay fake flash seller
2. victimized by eBay refusing to listen to your cries of fake flash suffering and data loss – refusing to do anything against the seller or and assist you in reclaiming your hard earned money
3. victmized by Robotic PayPal determined to out do both Fake Flash Seller and eBay in making your life a misery and keeping your money

This is a consolation option you have to rescue an alcor controller based usb flash drive fake.
You may wish to keep track of the time you spent trying to save the drive and inflict the same amount of time and misery on all three victimzers – by contacting others who bought the same drive as you did. You will do good deeds: warning others as you wished you had been warned, increasing the army of fake flash victims marching to eBay and PayPal and finally allowing other flash drives to become their true capacity.
If you have been fully refunded by PayPal and you have been asked to destroy the drive as a condition of refund, you are obliged to do so if you accepted the refund. In that case send the counterfeit drive to fake flash heaven or send it to the local police with details to increase awareness on the fake flash situation. It is amazing that so few know about it – most find out only when they discover they have become a victim of fake flash and the resulting data loss.

Via SoSFakeFlash

Dec 7, 2013

Connectify Hotspot Pro + Dispatch 4.3.3.26694 Full With Serial

Connectify Dispatch is groundbreaking PC software that lets you connect to all available Internet connections simultaneously, for their combined speed, and increased reliability.


Experience the Internet, Faster

You already pay for high-speed Internet at home, data access on your smart phone, and mobile broadband on-the-go. Now, with Connectify Dispatch, you can combine those expensive connections to get the fastest Internet experience possible.

Connectify Dispatch gives you all of the bandwidth bonding capabilities of a hardware load balancing router at a fraction of the cost. No need to waste time and money configuring and carrying around another hardware device. Dispatch is a software Internet load balancer that offers premium features like 3G and 4G link bonding, at-a-glance Internet speed testing (via the Dispatch Analytics Dashboard), and much more. With Connectify Dispatch, you get all of these great features for thousands of dollars less than expensive hardware routers.

We all need faster Internet — to get our work done quicker, our game on sooner, and to download or share important documents as soon as possible. Get Connectify Dispatch today and get the Internet, faster.

Connectify Hotspot: Turn your PC into a real Wi-Fi Hotspot

Connectify Hotspot is easy-to-use Internet connection sharing software for your PC. With Connectify Hotspot, you can wirelessly share any Internet connection: a cable modem, a cellular card, or even another Wi-Fi network. Other Wi-Fi-enabled devices can see and join your hotspot just like any other Wi-Fi access point and are kept safe and secure by password-protected WPA2 Encryption. Use Connectify Hotspot on the road for 3G or 4G Internet connection sharing, or as a repeater to boost Wi-Fi at home. The possibilities are endless.

Connectify Dispatch is easy-to-use Windows software that lets you combine multiple Wi-Fi, 3G or 4G, and Ethernet connections into one super-fast connection. Try Dispatch along with our software router, Connectify Hotspot PRO, absolutely risk-free!

Multiple Connections, Maximum Speed

For the first time, you can connect to the coffee shop Wi-Fi and your 4G mobile device simultaneously, using both Internet connections for their combined speed, and increased reliability.
With Connectify Dispatch, you can even use two different Wi-Fi networks at the same time. Just connect a secondary USB Wi-Fi card (in addition to your laptopΓÇÖs on-board Wi-Fi card) and Dispatch does the rest. At the click-of-a-button, youΓÇÖll be cruising the web at warp speed, using the combined throughput of both wireless networks. Even if you lose connectivity on one of those networks, Dispatch keeps you online, moving all of your traffic onto the working connection until both networks become available again.

But thats only one scenario, with Dispatch you can connect to as many Internet connections as you have adapters for. Tethered smart phones, ethernet and wired connections, 3G and 4G mobile broadband adapters, Wi-Fi and MiFi - you name it, Dispatch can use it. The more connections you have, the faster you'll go!

Automatic Failover

Using multiple connections, Connectify Dispatch always gives you the most reliable Internet access possible. Furthermore, Dispatch allows you to select priority levels for your available Internet connections.

By setting a connection to "Backup" Dispatch will only access it in the event that you lose connectivity on all of your "Primary" Internet connections. This way, you can easily designate a metered 3G or 4G modem, tethered device, or other expensive mobile broadband connection to be used only when absolutely necessary or in case of emergency.

Accelerate Large BitTorrent Downloads

BitTorrent makes use of many network sockets by design, so it is a perfect application for Connectify Dispatch. With each Internet connection you add, Dispatch can increase the speed of your torrent downloads significantly.

Share your Super-Fast Dispatch Connection with Connectify Hotspot
Connectify Dispatch is even more powerful when you use it alongside our flagship software router, Connectify Hotspot PRO. Just start a Connectify Hotspot while aggregating Internet connections with Dispatch, and in an instant you'll be sharing your Dispatch super connection over Wi-Fi with all of your friends, co-workers, and other devices.
Supported Operating Systems : Windows XP/Vista/7/8
Language : English

Install Notes:

1] Install The App
2] Block The App in Fire-Wall
3] Enter Email and Serial
4] Register Yourself & Enjoy!!

Download Connectify Hotspot Pro + Dispatch 4.3.3.26694 Here:
Connectify Hotspot Pro + Dispatch 4.3.3.26694 Setup : Link
Connectify Hotspot Pro + Dispatch 4.3.3.26694 Serial : Link

Dec 3, 2013

myBRO : Green Packet DV235T WiFi Weak Signal Solved

On my previous post I have experimented my Green Packet DV235T 4G WiMAX wireless broadband modem router CPE with the  leaked stock firmware (web_update-3_5G-v2.10.14-g.1.0.5-gp.tar) on my device the SmartBro new product aka myBRO. So far so good after upgrade it did not brick the device with the said stock firmware but it is mismatch with the hardware model it is suppose for WIXFMM-129 and not for WIXFMM-114 the DV235T board. There are few bugs that we netizens have faced by upgrading with this new updates, although I can connect to the network but the most concern among others is the WLAN. The WiFi signal drops significantly even if you are closer or nearer to the device you will really get disappointed on hooking your Smartphone, Tablet or even with your Lappy. To solve this bugs the only way to go is to upload the correct stock firmware (web_update-2_3G-v2.10.14-g1.0.4-gp.tar) of the device, so here's how to do it. Some of the screenshot I have provided as guide to those who are newbies to the myBRO DV235T CPE.


Update: I added this screenshot above because of so many misleading forumers  seeding/leaking the Green Packet Stock Firmware appearing to be legit or the right one, but you will end up with discouragement when you find out it is just same firmware that same guy leaching it. If you really want to make sure that you uploaded the correct firmware to your myBRO DV235T is correct here's the inside to the two (2) Green Packet stock firmware comparison.

First, login to the Green Packet DV235T with the default username and password as "admin".


Next, navigate to the Main Menus above on the graphical user interface (gui) of the DV235T as you can see on the screenshot below. On the left corner Sub-menu click Upgrade button, then  the Browse button and locate your downloaded Green Packet DV235T stock firmware (web_update-2_3G-v2.10.14-g1.0.4-gp.tar) then Upload.


If you are sure now with the file that you have download is the correct or the appropriate stock firmware for the myBRO DV235T 4G WiMAX wireless modem router, then its time for you to upload it.


Finally, just click the Apply button to confirm that the stock firmware to be uploaded to the CPE. Wait, the progress indication bar will appear from zero (0) until it successfully to be completed at 100%.


After the 100% progress indication bar completed the firmware upgrade now is done, click the button Close then the myBRO DV235T Green Packet CPE will reboot automatically in 70 seconds.


Wait until the graphical user interface (gui) login page will refresh and you will be prompted again to enter the device with same username and password. Now everything will be in placed your DV235T is now already being updated with the right stock firmware, the WiFi issue now is already solved.

You can leave your message on my comment box, I also offer repairs and upgrade for myBRO DV235T just email or PM me I can help you. Enjoy!

Nov 30, 2013

MyBro Green Packet DV235T Stock Firmware Update Help

Recently I have posted about SmartBro new product that they wanted to promote the myBro aka "Abot kaya wireless home broadband" the 4G WiMAX wireless internet that uses the Green Packet CPE model DV235T. What I do not know is that this 4G wireless modem router device has been already tweaked silently almost a year done by many forumers and it has just leak this few weeks by SB netizen that stock firmware updates have been compromised and leak the links to Google.

With my curiosity to have also the updates whom I wish to be able to tweak my donated DV235T I'll keep on searching until I stumble upon to the source. There are at least two (2) Green Packet stock firmware for myBro DV235T that has been seeded online one is for free (web_update-3_5G-v2.10.14-g.1.0.5-gp.tar.gz) and the other is you must have to pay (web_update_v2.10.14-g.1.0.4-gp.tar.gz) whom I paid it for U$35 via remote update and the only copy I have is on the Chips itself of Hynix H27U1G8F2BTR since I badly needed it the only option of mine is "take it or leave it".


After my DV235T has been updated remotely here how it looks like, you can check on my other post the details of the Green Packet stock firmware v2.10.14-g.1.0.4-gp. The most interesting here is the Hardware model:WIXFMM-144 and also the Frequency range:2300000KHz~2400000KHz, 2490000KHz~2700000KHz. Make sure before you upgrade to any updates of your device firmware you have a screenshot for your reference and for your comparison. If you go back to the myBro Smart customized firmware v2.10.14-g1.0.7-smart here's how it looks like.


It only shows that Green Packet stock firmware v2.10.14-g.1.0.4-gp is the right firmware updates for the myBro DV-235T 4G WiMAX wireless broadband modem router because it is for Hardware model:WIXFMM-144. In addition, the  Frequency range:2490000KHz~2700000KHz is also being added. 


On the other hand, going here to the free Green Packet stock firmware (web_update-3_5G-v2.10.14-g.1.0.5-gp.tar.gz) you will notice that the updates or firmware is for CPE Hardware model:WIXFMM-129,  likewise taking a look closely to the Frequency range:3300000KHz~3600000KHz obviously the firmware will not suite to the myBro DV235T. It may or may not work perfectly because of mismatch hardware model and firmware updates. As I have tested with the given above firmware the myBro Green Packet DV235T will not bricked  as you can see I have the screenshot of it. There are three (3) issue I have found out using this firmware, one the WiMAX LED signal has strong indicator or very high though if you open you GUI on RSSI is most likely the same dBm with ver.04. Second is the the trade off, your built-in WiFi signal is getting weaker. Third, it can connect but unstable, you will be facing frequent disconnection so there is no used of upgrading to this stock firmware (web_update-3_5G-v2.10.14-g.1.0.5-gp.tar.gz) you will be having a headache definitely.

Since I DO NOT have the stock firmware in me or I can't get any firmware online because of no one is willing to seed it. The only remedy is on the Chips Hynix H27U1G8F2BTR using NAND flasher/programmer (I/you) can copy the raw firmware but can not use it via GUI upgrade only thru TSOP48 write it directly to the NAND Flash memory to be able for you/your myBro aka DV235T work it perfectly with out worries on changing the WAN MAC address, disconnection, WiFi weak signal etc....

Hope this article will help those netizen have upgrade their myBro Green Packet DV235T 4G WiMAX wireless modem router with the wrong firmware.

Nov 29, 2013

Building the ProASIC 3 nano FPGA board

After a busy week spent traveling for work and a morning digging out from a surprise snowstorm, I had a great weekend with my family. It was Sunday night before I heated up the soldering iron and got down to business building the ProASIC 3 nano FPGA board.

I started with the toughest component, the FPGA. Its central location and low height means that I will have an easier time accessing it before other components are mounted. That is not likely to be a big problem for this board, with plenty of space around the chip, but I would still prefer not to have to work around the filter capacitors if I can avoid it. On the other hand, its 100 pins and 0.5 mm pin pitch makes it far and away the most difficult soldering job on the PCB.

Getting the FPGA placed was tougher than I expected. Pins a half a millimeter apart are about a quarter of a millimeter wide and need to be aligned even more finely. Getting them lined up on all four sides of the chip took plenty of patience. With the chip misaligned, the silver pins and gold circuit board pads brightly threw back the light from my magnifier, but as I carefully and gently slid the chip around, darkness would suddenly emerge as the pins and pads aligned and the dark purple PCB shone through. Then I would line up another side of the chip, only to see the first side gleaming its misalignment at me once again.

Eventually patience won out, and all four sides were lined up. I gingerly tacked two corners in place, checked the alignment again, and began to solder, starting with one of the corners I tacked. As the solder holding that corner liquefied, the chip turned and my careful alignment was lost. I removed the heat, the solder solidified, and I could see the mess I had made:


Solder wick will not fix it, because there is solder under the pins where solder wick will not go. The best option for removing the chip is hot air. Sadly, my built-in supply is inadequate for soldering duty, so I will have to borrow a heat gun or hot-air soldering rig.

I like to follow the rule of never designing in a component I can not afford two of, so I started again with board number two and FPGA number two. After the requisite patient fiddling to get it all lined up, the soldering went smoothly, and I had a cleanly attached chip:


Some quick probing with an ohmmeter did not reveal any shorts between neighboring pins, but I need to make a thorough check and clean up the flux residue before I pronounce it done.

Laen’s PCB Order sent three boards, but for now I am keeping the third one in reserve. Mouser did not have the A3PN250 FPGA when I ordered parts, so I settled for the A3PN250Z, a lower-cost version that lacks Schmitt trigger inputs. Also, though I did not design the board with them in mind, there are other Actel Microsemi FPGAs with a similar pinout that may fit it. Leaving the third board unbuilt will keep my options open for later.

I have a few things on my agenda now. I think I know where I can borrow a heat gun, so with luck I can clean up the first board and recover its errant FPGA. Of course, I am also looking forward to mounting the rest of the parts on the second board and firing it up.

Look for a new feature on the blog next week. Until then, happy soldering!

Nov 28, 2013

PS3 NOR FLASH GONE BAD ?

I have a CECH 2051b with progskeet installed. I followed a tutorial called noobs guide to downgrade from 3.7x. (found here) http://www.ps3hax.net/2011/08/noob-tuto ... kmeaw-cfw/

My console was running kmeaws 3.55 when it was updated by a child. I had enough soldering skills to get the install done but ran into problems with flashing.

I started by Dumping 4 different nor dumps from my JSD-001 with spansion and then followed the instructions to patch with transplant+ v1 then import to flow rebuilder and flashed finished patch file. It flashed to 100 percent, but with many errors on verification. (Used winskeet4000 on WIN7 ULTIMATE N) Would have used xp but could not get progskeet to recognize in virtual box.

After this flash I waited 30 minutes and the PS never rebooted. I finally pulled plug and reboot back to a black screen only. Green power light when turned on but black screen and no access to FSM. I tried to flash original dump back on it and got same results so I decided it must be the flash side of the progskeet. My wires were long so I decided to de-solder everything, shorten the wires and start over. Now I have re-soldered and tried rebooting and only get three beeps when I press power. If I press the eject button the fan comes on and stays on but still will not power the progskeet.

Has anyone run into this problem or found a way out of it? why would the system stop powering on now completely? Any help would be appreciated.

Couple of install pics.....


Need to be done before patching and trying anything else as follows:

1- make at least 5 dumps of the original NOR image
2- compare the dumps to check if you have a proper reading
3- extract the dump using flowrebuilder to see if it's valid as a first check.
4- check the dump well following the steps and details on PS3DevWiki. ---> Validating the Dump
5- once you are sure you have a 100% valid dump, you must flash it back to PS3 NOR to ensure you also have a stable/reliable writing method/setup ---> Test Report Table

If all this worked fine, you can proceed to patch the NOR dump using the Simplified Downgrade V2 method ( also found on PS3DevWiki with the patches to use ) --> NOR patching
No more need for the "transplante" software in Simplified Downgrade V2, the tutorial you followed seems to be still using the very first method Downgrade V1.

Now your PS3 is not booting because it doesn't have a valid image flashed in the NOR, you mentioned that writing had verification errors so probably your writing method was not stable,
also I would like to mention here that many times the very old version of Progskeet Flasher works much better then the latest winskeet released.

Here's the link to the old Flasher I use for Flashing the NOR image back into PS3 ----> ProgSkeet 110819 Flasher

You can also see the successful results from the table linked here ---> Test Report Table

Also for more help you can join our IRC channel on Efnet called: #ps3downgrade where lot of guys are willing to help you in detail to solve your problem and get the PS3 working fine again, most of the discussions and help about downgrading is going in that channel... (#Ps3downgrade)

Nov 27, 2013

myBro DV235T Green Packet Stock Firmware Snap Review

Recently I have just upgrade my 4G WiMAX wireless modem router myBro DV235T to Green Packet stock firmware. I just wanted to share this review using the default factory firmware instead the PLDT/Smart ISP customized firmware that has very limited user level privileges. Using the firmware v2.10.14-g1.0.4-gp you will be able to do what ever you wanted to do such as changing the WAN MAC address, port forwarding, DMZ etc.

What I love most having the stock firmware of Green Packet is that you are the admin, the root, the administrator of the device, you can customized your settings and your configuration without limits.

Here's just few of the screenshot taken by me that I wanted to share to all my guest, my commenter and likewise to those who eagerly wanted to tweak their new toy aka myBro DV235T.


This screenshot was grab from my Asus lappy, it only shows that myBro DV235T has been successfully change its WAN MAC address on this Green Packet stock firmware. All menus and sub-menu are now available, you can do what ever you want with your setting likewise configuration.


If you hate using the username and password as "admin" then you can now choose whatever username and password you wish, NTP server also is visible to edit if you need to synchronize you this CPE to other machine for special purposes it is now possible.


Your account is no longer locked by your ISP you can manually select the authentication of your username and password, setting the frequency  for best performance and optimizing your allotted bandwidth are even more possible that is if you want to test the 4G network in you area if you are really covered by many ISPs.


Tweakers will love this section since most of the sub-menus were being omitted on the customized myBro firmware, torrenting will play big role for those who are fun of downloading movies. You are all granted to port forward any ports inbound and outbound for any of your applications.


Protect and manage your 4G WiMAX wireless modem router CPE being updated the firmware over the air (OTA) by the system, deny or accept by enabling or disabling it. Not to mention other stuff such as SNMP, OMA-DM, Log, Ping if you want to test your connectivity to your ISP server. Upgrade and Recovery is also available to your to restore and upgrade with other firmware to the DV235T.


This features are not available on Huawei 4G WiMAX wireless broadband modem router, the Green Packet DV235T is capable of being a client and a server such as PPTP likewise L2TP, IPSEC or IP security is also added in this feature. Hopefully I could add the command line interface (cli) screenshot for the telnet and the ssh on my next post.

Nov 26, 2013

How-To MyBro DV-235T Green Packet Firmware Upgrade

First of all I would like to thanks Joker a friend from Visayas the person who donated me this myBro 4G WiMAX wireless modem router which is equip with WLAN unlike the Huawei CPEs that don't have. The "myBro wireless home broadband Dito tayo @ home" is the new product of   SmartBro that has been reBranded to myBro and uses Green Packet of Malaysia CPEs such as DV235T for indoor unit, OX230 for outdoor unit and the U series shuttle UH235 MiFi  portable modem.

If you have subscribed the promo of My Bro Abot Kaya 499 from PLDT and Smart recently then you probably will be so lucky and you will have also this device the myBro DV235T on your desk now. But unfortunately if you wanted to tweak this 4G wireless modem make some changes on the configuration such as port forwarding or fun of torrenting that needs administrator rights then you will be in trouble because the firmware is customized by Smart ISP. Inshort all subscriber of the Smart Telcos has limited access to their 4G WiMAX wireless broadband modem. You have to used the myBro DV235T as it is because no one ever leak the root username password or the admin username password, the only alternative is to upgrade this CPE with the Green Packet firmware v2.10.14-g1.0.4-gp to gain the administrative privileges.

So here's how-to Do-It-Yourself, first open any web browser and point to http://192.168.15.1 which is the default web graphical user interface (gui) IP address. Login with the default username and password as "smart" without quote.


After you have login navigate to the Menu Management then click the sub-menu Upgrade browse or locate were the Green Packet firmware you have saved and upload it on to the myBro DV235T CPE.


Upon clicking the Upload button the myBro Green Packet DV235T will show up a progress bar it will indicate that the firmware is being written wait until it finish. The CPE will reboot automatically in 60 seconds you will be prompted again with login page.


You will notice now the login page is no longer the myBro logo instead it is the greenpacket already which is the factory default firmware, another this is the default IP address for the web gui its http://10.1.1.254 and no longer http://192.158.15.1 so if set your PC as static IP address you must change it to DHCP otherwise you will be able to access the DV235T.


To be able to login the Green Packet DV235T after upgrading the firmware, the username and password is still "smart" as of the moment since we didn't save it yet permanently to the NAND flash memory Hynix H27U1G8F2BTR. Next navigate to Management menu, go to Recovery sub-menu and then  click Factory Default to make the firmware changes permanently.


The modem will then reboot automatically in 60 seconds again, you can now login with the default username and password as "admin" likewise when using the command line interface (cli) via telnet or ssh. The changes of tweaking the the myBro DV235T is now 101% possible, not only that even changing the MAC address of this CPE is even more applicable. Additionally you will now have the full access and full control of your 4G WiMAX wireless modem router with limitless privileges.

If you have you this kind of 4G WiMAX CPE in you and have doubt or hesitant to do so, feel free to comment just leave your message I will answer your queries. Enjoy!