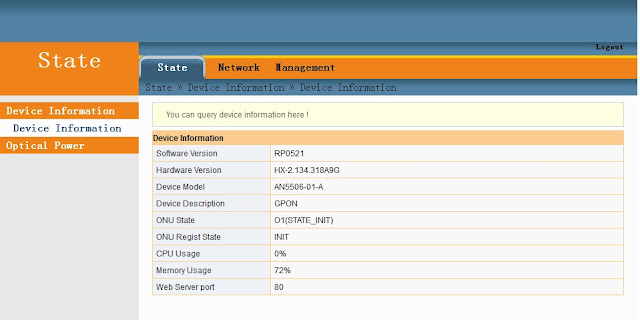
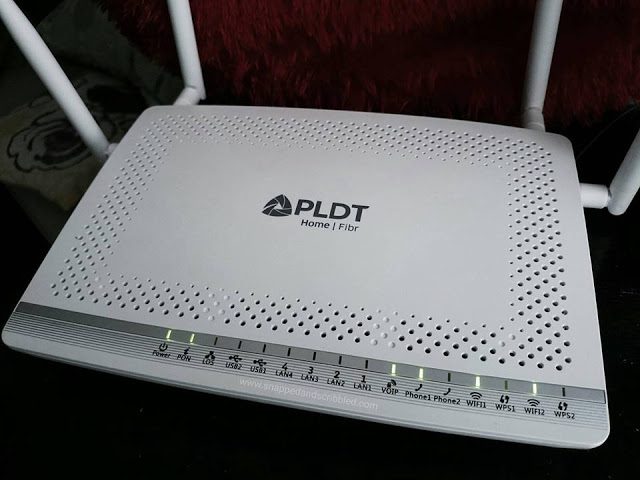
First and foremost before doing the backup of the ONU/ONT Fiberhome AN5506-04-FA make sure you are the owner of the device, secondly you responsible for the damage you have done, doing this is a risky and you might be able to brick the equipment if mishandled incorrectly. As a precaution, preferably you have a spare ONU/ONT on your hand in the case of disaster you might not disrupt your internet connection.
How do we backup the ONU/ONT Fiberhome AN5506-04-FA mtd aka firmware?
There are two available terminal that we can gain access on AN5506-04-FA one is via Telnet terminal and the other is via Serial communication port. These two accessible console is also applicable to the other Fiberhome ONU/ONT AN5506-XX-XXX series if you want to explore your own device to prevent your Internet Fiber ONU device being remotely updated upon updated its firmware for you not to have the vast features configuration and all the other setting being hidden by your greedy ISP. To begin with, lets check if the port of Telnet is open we can use NMAP to verify it or other similar port scanner that may give us same result. If the Telnet port is close then we do not have other choice but to open the top cover of the ONU/ONT AN5506-04-FA because Serial Console header is residing on the surface of the board.

What we need for serial communication for us to be able to communicate with AN5506-04-FA Serial Console is a serial com port, or any USB-to-Serial converter device. Then a HyperTerminal, you can also use Putty,you might want to be comfy Hercules will do or any other application alike will serve for data communication between two digital devices. Once you are plugged in then the console terminal is ready. Communication baud rate is 115200 8n1, if everything is properly hooked up, once we fire up the power ON you should see the U-Boot message just started like this.
U-Boot 2010.03-svn671412 (May 27 2017 - 09:37:39)

DRAM:  128 MB
Boot From NAND Flash
CHIP ID = 51152100
NAND:  Special Nand id table Version 1.23
Nand ID: 0xC2 0xF1 0x80 0x95 0x02 0x00 0x00 0x00
Nand(Hardware): Block:128KB Page:2KB Chip:128MB*1 OOB:64B ECC:4Bytes
128 MiB
env0 ok ~~~~~~~~~~~
In:    serial
Out:   serial
Err:   serial
hi_lsw_init
hi_lsw_init_t
MEM_MODE = MEM!
tmp_cmd a =kk=112 mem=240M console=ttyAMA1,115200 root=/dev/mtdblock5 rootfstype=jffs2 mtdparts=hinand:128k(startcode),1M(u-bootA),1M(u-bootB),1M(envA),1M(envB),18M(kernel_rootfsA),18M(app_binA),20M(app_exA),18M(kernel_rootfsB),18M(app_binB),20M(app_exB),12160k(cfg)
kernel_rootfs_mtd_offset = 0x420000
Hit enter to stop autoboot:  2
This is just the first boot, let the system to goes on to the second boot until you see the message like this and then it will tell you to Press Ctrl+C to stop auto setup in 3 seconds, from 2sec to 0sec you must be quick.
CFE adapter module install successfully ...!

CFE hw_adpter_l3 module install successfully ...!

CFE module install successfully ...!
dapter multicast module install successfully, version: Jul 12 2017 10:28:18

 CFE_FH_MARK module install successfully ...!
initialize.sh...

Press Ctrl + C to stop auto setup 0
You are now in the root directory
~ #
Once you type the following Linux command like this
cat /proc/mtd then you will see now the list of all MTDs.
~ # cat /proc/mtd
dev:    size   erasesize  name
mtd0: 00020000 00020000 "startcode"
mtd1: 00100000 00020000 "u-bootA"
mtd2: 00100000 00020000 "u-bootB"
mtd3: 00100000 00020000 "envA"
mtd4: 00100000 00020000 "envB"
mtd5: 01200000 00020000 "kernel_rootfsA"
mtd6: 01200000 00020000 "app_binA"
mtd7: 01400000 00020000 "app_exA"
mtd8: 01200000 00020000 "kernel_rootfsB"
mtd9: 01200000 00020000 "app_binB"
mtd10: 01400000 00020000 "app_exB"
mtd11: 00be0000 00020000 "cfg"
Your USB pen drive or Flash drive must be formatted in FAT32 by default in any Microsoft Windows OS. After formatting it eject then plugged it onto the USB port of the AN5506-04-FA device. It will then pop you a message like this.
usb 1-2: new high speed USB device using hiusb-ehci and address 3
scsi1 : usb-storage 1-2:1.0
scsi 1:0:0:0: Direct-Access     TOSHIBA  TransMemory      1.00 PQ: 0 ANSI: 4
sd 1:0:0:0: [sda] 7574304 512-byte logical blocks: (3.87 GB/3.61 GiB)
sd 1:0:0:0: Attached scsi generic sg0 type 0
sd 1:0:0:0: [sda] Write Protect is off
sd 1:0:0:0: [sda] Assuming drive cache: write through
sd 1:0:0:0: [sda] Assuming drive cache: write through
 sda: sda1
sd 1:0:0:0: [sda] Assuming drive cache: write through
sd 1:0:0:0: [sda] Attached SCSI removable disk
fat
open /dev/console successed.
usb led 0  off
usb led 1  on
Verify with the
df Linux command. It will show you the list of all devices in the system.
~ # df
Filesystem           1K-blocks      Used Available Use% Mounted on
/dev/root                18432      9864      8568  54% /
tmpfs                   119696         4    119692   0% /dev
none                    524288         0    524288   0% /tmp
none                    524288         4    524284   0% /var
/dev/mtdblock11          12160       856     11304   7% /fhcfg
/dev/mtdblock6           18432      5796     12636  31% /fh/bin
/dev/mtdblock7           20480     16564      3916  81% /fh/extend
/dev/sda1              3777936    215868   3562068   6% /dev/shm/usb/media/sda1
The USB flash drive is detected as sda1 device (/dev/sda1) and the mount point is located at (/dev/shm/usb/media/sda1), now we have to unmount the USB pen drive device first by not unplugging from the USB port of the AN5506-04-FA. Then mount again the USB flash drive with this following Linux command.
umount /dev/sda1

mount /dev/sda1 /dev/shm/usb/media/sda1
We are ready now for backing up all the MTDs of Fiberhome ONU/ONT AN5506-04-FA, we'll make first folder on the USB drive with this command.
mkdir /dev/shm/usb/media/sda1/backup
Now use these following Linux commands for back up the list of all the AN5506-04-FA MTDs.
~ # dd if=/dev/mtd0 of=/dev/shm/usb/media/sda1/backup/startcode.bin

256+0 records in
256+0 records out
131072 bytes (128.0KB) copied, 0.018642 seconds, 6.7MB/s


~ # dd if=/dev/mtd1 of=/dev/shm/usb/media/sda1/backup/u-bootA.bin

2048+0 records in
2048+0 records out
1048576 bytes (1.0MB) copied, 0.147251 seconds, 6.8MB/s

~ # dd if=/dev/mtd2 of=/dev/shm/usb/media/sda1/backup/u-bootB.bin

2048+0 records in
2048+0 records out
1048576 bytes (1.0MB) copied, 0.146912 seconds, 6.8MB/s

~ # dd if=/dev/mtd3 of=/dev/shm/usb/media/sda1/backup/envA.bin

2048+0 records in
2048+0 records out
1048576 bytes (1.0MB) copied, 0.147150 seconds, 6.8MB/s

~ # dd if=/dev/mtd4 of=/dev/shm/usb/media/sda1/backup/envB.bin

2048+0 records in
2048+0 records out
1048576 bytes (1.0MB) copied, 0.146535 seconds, 6.8MB/s

~ # dd if=/dev/mtd5 of=/dev/shm/usb/media/sda1/backup/kernel_rootfsA.bin

36864+0 records in
36864+0 records out
18874368 bytes (18.0MB) copied, 2.636288 seconds, 6.8MB/s

~ # dd if=/dev/mtd6 of=/dev/shm/usb/media/sda1/backup/app_binA.bin

36864+0 records in
36864+0 records out
18874368 bytes (18.0MB) copied, 3.495190 seconds, 5.1MB/s

~ # dd if=/dev/mtd7 of=/dev/shm/usb/media/sda1/backup/app_exA.bin

40960+0 records in
40960+0 records out
20971520 bytes (20.0MB) copied, 2.980738 seconds, 6.7MB/s

~ # dd if=/dev/mtd8 of=/dev/shm/usb/media/sda1/backup/kernel_rootfsB.bin

36864+0 records in
36864+0 records out
18874368 bytes (18.0MB) copied, 5.694926 seconds, 3.2MB/s

~ # dd if=/dev/mtd9 of=/dev/shm/usb/media/sda1/backup/app_binB.bin

36864+0 records in
36864+0 records out
18874368 bytes (18.0MB) copied, 2.767045 seconds, 6.5MB/s

~ # dd if=/dev/mtd10 of=/dev/shm/usb/media/sda1/backup/app_exB.bin

40960+0 records in
40960+0 records out
20971520 bytes (20.0MB) copied, 2.995862 seconds, 6.7MB/s

~ # dd if=/dev/mtd11 of=/dev/shm/usb/media/sda1/backup/cfg.bin

24320+0 records in
24320+0 records out
12451840 bytes (11.9MB) copied, 1.870105 seconds, 6.3MB/s
Now we are done, we able to backup all the MTDs of Fiberhome ONU An5506-04-FA. Soonest I post an article on How-To upload the MTD int the device incase you bricked you equipment you can repair it by you own.


